Quantcast
Channel: Crafting ideas from Sizzix UK
Viewing all 2033 articles
Browse latest View live

Stamped Styled Label Cards

$
0
0


Hi everyone! My name is Rachel Greig, I'm the owner and designer at Darkroom Door, a rubber stamp company based in Australia. I'm so excited to be joining the Sizzix blog to share ideas on how Sizzix dies and embossing folders can be combined with Darkroom Door rubber stamps and paper products!

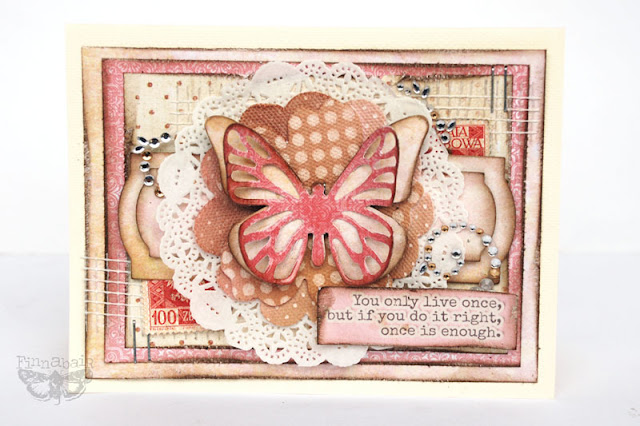
One of my favourite dies is Styled Labels 656642. There's two different labels on this die, both perfect size for card making! Many of Darkroom Door's quote stamps fit perfectly into this die, so naturally I tend to use this one a lot. Today I have two cards to share showing how I stamp quotes onto the die...


Instructions:
1. Stamp 'Splatter Background DDBS009' onto folded blue card using Archival Sepia ink pad. Sponge around the edges of the card using the Sepia ink pad with an ink blending tool.
2. Cut the Styled Label from grungeboard. Stamp the quote from 'Artist DDRS027' stamp set onto the label using Archival Jet Black ink pad. Sponge around the edges of the grungeboard using Walnut Stain Distress Ink.
3. Pierce a hole at the top and bottom of the label using an awl and insert two decorative brads.
4. Adhere grungeboard to front of card using foam adhesive to complete!

Here's a second card using the same die:


Instructions:
1. Stamp 'Mesh Background DDBS016' onto folded cream card using Archival Sepia ink pad. Lightly sponge around the edges of the card using the same ink with an ink blending tool.
2. Tear a strip of kraft glassine paper and sew onto the bottom of the card using a zig zag stitch on your sewing machine. Crumple up the edges of the paper to give it more texture.
3. Trim an image from the 'Wilderness Montage DDMN006' and ink around the edges with Archival Sepia ink. Adhere to left side of card as shown.
4. Cut the Styled Label from grungeboard. Stamp quote from 'Vintage Automobiles DDRS033' stamp set onto the label using Archival Sepia ink pad. Sponge the edges of the grungeboard lightly with Sepia ink using an ink blending tool.
5. Pierce a hole at the left and right sides of the label using an awl and insert two decorative brads.
6. Adhere grungeboard to the card using foam adhesive to complete!

Hope you've enjoyed these cards and ideas!

I'll look forward to sharing more ideas with you soon.

Thanks for stopping by!

Rachel

Frames, flowers and leaves

$
0
0


Hello!

Here is a new layout made by me. I hope you like it.
Sizzix makes some wonderful frame dies and I have used two on top of each other for this page.


You can see both frames here. I have stamped the background.


The leaves are from the Card Edges die. I have cut it to pieces to fit the flowers.


And the butterfly is from the new starter kit.


Products used:

657413 Sizzix Sizzlits Decorative Strip Die – Vintage Lace Edging

Have a wonderful week! See you next Sunday!

Camilla

***********************************


Hej!

Här kommer en ny layout från mig. Jag hoppas att du gillar den.
Sizzix gör verkligen fina ramdies och jag har använt två uppe på varandra på denna layout. 
Du kan se båda två på den första närbilden.
Jag har stämplat på bakgrundspappret.
Bladen är från Card Edges die. Jag har klippt den i bitar för att få bladen att passa till blommorna.
Och fjärilen är från det nya Starter kit.

Products used:

657413 Sizzix Sizzlits Decorative Strip Die – Vintage Lace Edging


Ha en fantastisk vecka! Vi ses nästa söndag!

Camilla

a spanner in the works

$
0
0


This weekend I was down in London teaching, which meant I had a few hours on the train to do some hand stitching.

You've seen the grandmother's flower garden blocks I've been slowly working on using the 1" and the 1.25" hexagon dies, haven't you?

5 down. About 95 to go.

I've been stitching the sashing hexagons on as I've been going - the black ones - to make things easier when I finish all the blocks and sew them together into a quilt top.


I was so pleased that I got this one finished.


Until I realised I'd sewn black hexagons all the way around and not left the other sides free to sew them all together. (This is the moment when my face was hit by my palm and I might have muttered some not so fragrant words).


a spanner in the works

They still all fit together, but now I'll have to plan where this one goes a little better when I sew the top together. It'll have to sit on the edge, or be the starting block. Or I could unpick those extra hexagons, of course...but unpicking is never fun, is it?

tessellation

Sewing things in the wrong order, or the wrong bits together is always my downfall and most common mistake. What is your most common mistake? Make me feel less of a fool and share your hiccups with me!

Starter Kit Series: 4 Hearts Card

$
0
0


Hi everybody! Today is day 2 of my Starter Kit Series and I am showing you how to make a card using the positive and the negative space of the dies. 
To make this cute card I've challenged myself to use only the things that I had on my table (You know sometimes I like to challenge myself!) so the supply list to make this cute card is very budget friendly :)


Supply list:
I have Started by creating a card base with pink cardstock, adhering a piece of pattern paper and inking the edges. Then I have placed the framelits on the card to figure the best way to place them and then I have die cut all the elements and adhered on the card. As you can see I have used also the scrap of paper resulting from die cutting the hearts. That is the negative space and you can use them in many ways and really get the most from your dies and your Big Shot! As a final touch I have made some dash lines with a black gel, I love the look of this simple technique on my projects!


Happy Monday!
................................
¡Hola a todo el mundo! Hoy es el segundo día de mi Starter Kit Series y os voy a enseñar cómo hacer una tarjeta utilizando el espacio positivo y negativo de los troqueles.
Para hacer esta tarjeta tan mona me reté a utilizar solo lo que tenía encima de la mesa en ese momento (¡Ya sabéis que a veces me gusta retarme a mí misma!) así que la lista de materiales es muy pequeña.

Materiales:

He empezado creando una base de tarjeta con cartulina rosa, pegando un trozo de papel decorado y entintando los bordes. Después he situado los framelits en la tarjeta para ver la manera en que más me gustaban, he troquelado todos los elementos y los he pegado en la tarjeta. Como podéis ver he utilizado el resto de papel donde he troquelado los corazones. Eso es el espacio negativo y lo podéis usar de muchas maneras diferentes para aprovechar bien vuestros troqueles y la Big Shot. Como toque final un poco de falso cosido no podía faltar :)

¡Feliz lunes!

Giftbag with tags

$
0
0

Hi everyone...today I have a giftbag to show you with some tags.


Supply list : 
655268 Sizzix Big Shot Machine
658696 Sizzix Framelits Die Set 8PK w/Stamps - Banners #2
656642 Sizzix Movers & Shapers Die - Styled Labels
658572 Sizzix Movers & Shapers Die - Postage Stamp Frame
658568 Sizzix Movers & Shapers Magnetic Die Set 3PK - Sized Rectangles
658557 Sizzix Bigz Die - Pediments

Papers: Pion Design - Vintage Garden, Paperbag
Stamps - Sizzix, Stampers Anonymous Tim Holtz Collection
Inks: Distress ink Pad - Walnut Stain, Picked Raspberry, Archival Ink - Jet Black, StazOn - Jet Black
Other: Feather, Seam Binding ribbon, Sweetheart Blossom, button, 3D foam

How to do:

Cut out the top of the paperbag. Die cut Postage Stamp Frame and glue it to the paperbag. Stamp and die cut the banner. Glue it on the front of the paperbag with a feather, Seam Binding ribbon and flower. Die cut Pediments and distress it with Distress ink Pad - Walnut Stain and Picked Raspberry.
Die cut labels and stamp text on the Labels. Glue the Pediments on the topp of Labels.


Wish you a great day!
Anne Kristine

Hei alle sammen i dag har jeg en gavepose med tags å vise deg. 

Produkter:
655268 Sizzix Big Shot Machine
658696 Sizzix Framelits Die Set 8PK w/Stamps - Banners #2
656642 Sizzix Movers & Shapers Die - Styled Labels
658572 Sizzix Movers & Shapers Die - Postage Stamp Frame
658568 Sizzix Movers & Shapers Magnetic Die Set 3PK - Sized Rectangles
658557 Sizzix Bigz Die - Pediments
  
Mønsterark: Pion Design - Vintage Garden, papirpose
Stempler - Sizzix, Stampers Anonymous Tim Holtz Collection
Inks: Distress ink Pad - Walnut Stain, Picked Raspberry, Archival Ink - Jet Black, StazOn - Jet Black
Annet: Fjær, Seam Binding bånd, Sweetheart Blossom, knapp, 3D puter

Beskrivelse:
Klipp av toppen på papirposen så den passer til rammen. Stans ut Postage Stamp Frame og lim det til papirposen. Stempel og stans ut banner. Limes i front sammen med fjær, Seam Binding bånd og blomst. Stans ut Pediments og distress demedDistress ink Pad - Walnut Stain og Picked Raspberry.
Stans ut Labels og stemple tekst på disse. Lim fast Pediments på toppen av Labels.

 Ønsker deg en fin dag!
Anne Kristine


Memories book

$
0
0


Hi Everyone.
I hope you all had a great week. Today I will show you  the front page to my memories book.
I have used some of the dies from Sizzix Big Shot Starter Kit

 Items used:
Big Shot Starter Kit 658300
Postage Stamp Frame 658572
Sizzix Rectangels 658568
Mini Clock Key 658561
Hanging Sign 656631
Supply list:
Paper: BoBunny,Tim Holtz Collectien, cardstock
Paint: distress Paint- Mustard Seed- Salty Ocean,-Brushed Pewtwr-
Distress Stain-Tumbled Glass-,Forest  Moss-
GooseBumps.Shinner texture spray-
Stamp: Stampers Anonymous Tim Holtz Collection
Brads
How to do:
Distress the page with distress stain and distress paint and a lot of water.
Stamp using Tim Holtz Collection
Cut a little piece of BoBunny paper , use inside the frame
Die cut using Postage Stamp Frame 658572, Sizzix Rectangels 658568
Die cut using Big Shot Starter Kit 658300
Paint the frame using Distress Paint Silver and spray using Shinner texture spray


Thanks for stopping by, see you next Tuesday
Pia
Hej
Jeg håber du har haft en god uge. I dag vil jeg vise forsiden til min memories bog hvor jeg har brugt forskellige dies fra   Big Shot Starter Kit 658300
 Dies jeg har brugt::
Big Shot Starter Kit 658300
Postage Stamp Frame 658572
Sizzix Rectangels 658568
Mini Clock Key 658561
Hanging Sign 656631
Andre materialer:
Papir: BoBunny,Tim Holtz Collectien, cardstock
Maling: Distress Paint- Mustard Seed- Salty Ocean,-Brushed Pewtwr-
Distress Stain-Tumbled glass-,Forest  Moss-
GooseBumps.Shinner texture spray-
Stempler: Stampers Anonymous Tim Holtz Collection
Brads
Fremgangs måde:
Distress siden med distress stain og distress paint og rigtig meget vand.
Stempel med Tim Holtz Collection
Skær et lille stykke  BoBunny papir som bruges indeni rammen
Stand die ud ved at bruge Postage Stamp Frame 658572,Sizzix Rectangels 658568
Stands die ud ved at bruge Big Shot Starter Kit 658300
Mal rammen ved at bruge  Distress Paint Silver og spray med Shinner texture spray
Tak fordi du kiggede forbi, vi ses næste tirsdag
Pia


Pockets of Fun

$
0
0

Hello!
This week I have been getting to know the new Big Shot Starter Kit...what a really useful set of dies to put with the machine! With a mixture of technologies which include Sizzlits, Framelits and an embossing Folder and also a Bigz die to allow you to not only work with paper but also to cut shapes from pretty much anything that you can cut with scissors from fabric and leather to heavy weight card and chipboard. I really think this collection will cover most bases when it comes to the needs of the majority of crafters.

I have been experimenting with an envelope die to create a mini-book for storing photos or written memories and I have decorated it using the Starter Kit dies and embossing folder. The envelope die that I have used is the Sizzix Movers & Shapers L Die - Pocket Envelope.


The size of this envelope is perfect for this project and the small circles on the die which are designed to create string ties have been used here to add strength to punched holes. As this is a steel rule die I was able to cut out lots of little rings at once in different coloured papers.


As you can see the Big Shot Starter Kit consists of a Bigz die with circles of two sizes, hearts of two sizes and a gorgeous butterfly which is a perfect size for paper and fabric projects. there are two sizzlits in the set one has an intricate butterfly design (which fits perfectly over the solid butterfly shape on the Bigz die), and the other is a selection of flowers and flower centres with a tiny heart. 


 The Framelits are a gorgeous set of labels, flowers, circles and a heart and the embossing folder is a really simple pattern of latticed dots which could be used for any occasion.  


I have used all of the shapes to decorate this mini-book, as you can see they all work extremely well together and I can confidently say these will be the set that I will return to time and time again because of their versatility. 


I think that one or more of the elements could be used for any occasion and I plan to set myself the  challenge of creating cards for different occasions simply using this set. watch this space! 

Mini Album

$
0
0


Hi all!

Today I would like to show you a mini album, which I created using a lot of different Sizzix dies. I enjoyed to create this album. And I enjoyed to use these cute little things that I cut using Sizzix dies.


Items used:
Big Shot Machine (655268)
Sizzix Thinlits Die Set 9PK - Doilies, Lovely (658605)
Sizzix Framelits Die Set 9PK - Tags #2 (658611)
Sizzix Framelits Die Set 8PK w/Stamps - Banners #2 (658696)
Sizzix Thinlits Die Set 6PK - For the Record (659108)
Sizzix Framelits Die Set 4PK - Frames, Instant (658608)
Sizzix Originals Die - Circles #4 (657020)
Lily Bee Design Paper and Stickers - Handmade collection


Have a nice day!

Daria.


Всем привет!

Сегодня я мини-альбомом,  который создала используя много различных наборов ножей. И я получила огромное удовольствие от создания альбомчика, от вырезания всех этих милых штучек, а затем от использования их в альбоме. Давно уже хотела сделать что-то подобное.

Материалы:

Big Shot Machine (655268)
Sizzix Thinlits Die Set 9PK - Doilies, Lovely (658605)
Sizzix Framelits Die Set 9PK - Tags #2 (658611)
Sizzix Framelits Die Set 8PK w/Stamps - Banners #2 (658696)
Sizzix Thinlits Die Set 6PK - For the Record (659108)
Sizzix Framelits Die Set 4PK - Frames, Instant (658608)
Sizzix Originals Die - Circles #4 (657020)
Бумага, наклейки и вырубки от Lily Bee Design  - коллекция Handmade

Всем хорошего настроения!

Дарья.


New Starters!

$
0
0


Yes, that's right.... Starters! One is our fantabulous new Big Shot Starter Kit and and the second the the return of my old sparring partner, the incomparable Debi Potter!

Debi is one of the most talented designers around, I have never known anyone have such an acute sense of colour balance and composition and she instinctively knows how to get the best from die cutting and embossing. It's great to have her back here at Sizzix Central and will certainly keep me on my toes and it's great to have someone to bounce ideas and banter off.

We went to the same school and art college so I've known her for a good few years although, at this point, I'm sure she would like me to point out that I am actually much older than her!

The new Big Shot Starter kit is finally here! not only is it beautiful to behold but it comes with a truly world class collection of goodies comprising a Bigz, two Sizzlits, seven Framelits and an embossing folder. It also comes with an extra long multi purpose platform (Hallelujah!) and a pack of papers, in fact everything you need to get started.


If you just want the machine and/or platform you can get them both separately. In the coming weeks I will showcase some things I have made using the various bits and pieces from the kit but for now I would like to show you a couple of workshop projects which I created, one of which was for our fabulous Finnish Distributor Sinelli who celebrated their 15th anniversary last weekend.

 I was lucky enough to fly out to Helsinki to join them. On the Saturday I taught a workshop to 80 of their loyal customers who were all absolutely lovely, the event was really well organised so a big thank you to Arja and her team for all their help and Support. (You would LOVE the main store, it's a real Aladdin's cave for craft stash).

the Main boxes were made from chipboard using a couple of Bigz pro dies and our Big Shot Pro machine and the rest is all starter kit.


Live your life layout

$
0
0


Live your life layout

Here is a very fresh and colourful layout which is a kind of hymn to Mother Nature and spring time! I had fun working on a horizontal layout, a simple technique which always turns out great!

Supply list:

Papers, alphabets, stickers: Jenni Bowlin Studio
Wooden stars: Sodalicious
Versafine inks: black, spanish moss
Adirondack inks: clover
Stamps: Florilèges Design, Craft Origine, Art Stamp, Glitz Design, Technique Tuesday
Masking tape: Lovely Tape
Strass: Prima

657900 Sizzix Big Shot
657007 Sizzix Base tray
657212 Sizzix Movers & Shapers Magnetic Die Set 2PK-Mini hearts set
658002 Sizzix Sizzlits Decorative Strip Die- Lace & Circles
659111 Sizzix Thinlits Die Set 7PK-Hello Summer


I started by working on the background with three nature-patterned stamps, using different colours of ink.

Still in the nature theme, I cut out a heart shape out of cork. If you want to cut this kind of material, you’d better use the Bigz dies. Here I also used my tray base to cut this shape. The heart is glued with liquid adhesive and has a small green strass as an accent.

A small branch from the Hello Summer die is cut out of green patterned paper. Two little birds stamped in black complete the scene.

As a finishing touch, I added a lace paper border realized with the Laces &Circles die. I really like this particular die. It adds finesse to the creation.


So today’s creation is quite easy to realize but I really like it. What do you think?

Have a nice day!

Karine

Page Live your life

Une page toute fraiche et colorée comme un hymne à la nature et au printemps ! Je me suis amusée ici à travailler une mise en page horizontale, simple mais efficace !

Matériel :

Papiers, alphabets, autocollants : Jenni Bowlin Studio
Etoiles en bois : Sodalicious
Encres Versafine : noire, spanish moss
Encres Adirondack : clover
Tampons : Florilèges Design, Craft Orogine, Art Stamp, Glitz Design, Technique Tuesday
Scotch de masquage : Lovely Tape
Strass : Prima

Dies utilisés :
657900 Sizzix Big Shot
657007 Sizzix Base tray
657212 Sizzix Movers & Shapers Magnetic Die Set 2PK-Mini hearts set
658002 Sizzix Sizzlits Decorative Strip Die- Lace & Circles
659111 Sizzix Thinlits Die Set 7PK-Hello Summer

J'ai dans un premier retravaillé mon fond de page avec trois tampons nature avec des couleurs d'encres différentes.

Tout en restant dans l'esprit naturel, j'ai découpé une forme coeur dans du liège. Pour découper ce type de matière, prévoyez des Dies Bigz. J'ai ici eu besoin de ma Base Tray pour effectuer ma découpe. Le coeur est collé à la colle liquide et décoré d'un petit strass vert.

Une petite branche est découpée à l'aide du Die Hello Summer dans un imprimé vert, deux petits oiseaux imprimés en noir viennent compléter la scène.

J'ai terminé ma page en rajoutant une bordure de papier dentelle réalisé avec le die Laces &Circles. Une découpe que j'aime beaucoup et qui ajoute un peu de finesse à la création.

Une créa du jour toute simple mais qui me plait énormément, et vous ?

Je vous souhaite une très bonne journée !

Karine

gold, silver and white - scrapbooking page with Janna Werner.

$
0
0

Hello everyone, it´s Janna here. After last week´s colorful scrapbooking page, I am back with a gold, silver and white color combination. It is definitely one of my favorite combinations as it adds an elegant touch to each project.


Material list:
655268 Sizzix Big Shot machine
655098 Sizzix Accessory - Extended Spacer Platform
657691 Sizzix Bigz Die - Heart, Stem & Leaves
657846 Sizzix Texture Fades Embossing Folders - Bubble & Honeycomb
656363 Sizzix Framelites Dies - Labels, Wavy
658552 Sizzix Sizzlits Decorative Stripes - Stacked Artful Words
cardstock: Bazzill, Stampin´Up
vellum: Stampin´Up, Dear Lizzy
journaling card: Skipping5
glitter foil: American Crafts
spray: Heidi Swapp
clip: Crate Paper
wood veneer: Studio Calico
other: masking tape, sewing machine, white thread, glue, photo, black pen, paint brush


This clean and simple page can easily be recreated. Add a piece of masking tape on top of the page. Then use a paint brush and golden spray to add splatters. Let the splatter dry before you continue.


Cut a piece of gold dotted vellum and place it in the middle of your page. Then put a journaling card and a piece of white, embossed cardstock on top of the vellum. I used a honeycomb pattern to emboss the white cardstock. Instead of running it through my Big Shot, I pressed it very hard with my hands. Like this the pattern will be more decent.


Cut an oval out of vellum and glue the title on top of it. Add a bit of stitching, if you like (see photo above). The vellum will be adhered on top of the journaling card. The photo will be decorated with a clip. To make sure, it will stay in place, glue the photo on top of the white, embossed cardstock and add glue on the backside of the clip as well. Embellish the page with silver leaves and wood veneer and you are done!

I hope you enjoyed today´s inspiration. Take care and see you next thursday!
Janna


*****

Hallo ihr Lieben, Janna hier. Nach der bunten Scrapbooking-Seite der letzten Woche, habe ich heute ein Layout in der Farbkombination Gold, Silber und Weiß für euch. Dies ist definitiv eine meiner liebsten Kombinationen, da sie jedem Projekt Eleganz verleiht. 

Materialliste:
655268 Sizzix Big Shot machine
655098 Sizzix Accessory - Extended Spacer Platform
657691 Sizzix Bigz Die - Heart, Stem & Leaves
657846 Sizzix Texture Fades Embossing Folders - Bubble & Honeycomb
656363 Sizzix Framelites Dies - Labels, Wavy
658552 Sizzix Sizzlits Decorative Stripes - Stacked Artful Words
Cardstock: Bazzill, Stampin´Up
Vellum: Stampin´Up, Dear Lizzy
Journaling-Karte: Skipping5
Glitzerfolie: American Crafts
Spray: Heidi Swapp
Clip: Crate Paper
Wood Veneer: Studio Calico
Anderes: masking tape, Nähmaschine, weißes Garn, Foto, Stift, Pinsel

Diese clean and simple Seite kann leicht nachgearbeitet werden. Zuerst wird ein Streifen Masking Tape am oberen Rand befestigt. Dann werden mit einem Pinsel und goldenem Spray Kleckse auf dem Layout verteilt.

Anschließend wird gold-gepunktetes Vellum zurechtgeschnitten und mittig auf dem Papier befestigt. Darauf wird eine Journaling-Karte geklebt und ein Stück weißer Cardstock, der vorher embossed wurde. Ich habe das Honeycomb-Muster zum Embossen verwendet, habe allerdings nicht die Bog Shot genutzt, sondern mit den Händen gedrückt. Auf diese Weise ist das Muster dezenter.

Aus Vellum wird ein Oval ausgestanzt, auf diesem wird dann der Titel befestigt. Als Akzent wird über den Titel genäht. Das Vellum wird anschließend auf der Journaling-Karte aufgeklebt. Das Foto wird mit einem Clip verziert. Damit sich das Foto nicht verschiebt, sollte es partiell mit Kleber versehen werden, ebenso die Unterseite des Clips. Zu guter Letzt wird die Scrapbooking-Seite noch mit silbernen Blättern und einem wood veneer embellished - das war´s!

Ich hoffe, euch hat die heutige Inspiration gefallen. Lasst es euch gut gehen, bis nächste Woche!
Janna


Quilted and almost ready to go.

$
0
0

As I said last blog I was at Malvern for the Quilts UK show last week. I was very pleasantly surprised by the beautiful sunny weather we had for most of the show. The showground is set amongst stunning surroundings and it was delightful to take a few minutes enjoying the scenery during lunch breaks.
I met a lot of lovely people at the show, including some old friends and previous customers, and had great fun showing off what can be done with the Big Shot and dies - I always enjoy watching peoples expressions when they see how easy the machine is to use and how clean cut the shapes are.
Obviously there were also a lot of beautiful quilts on display and lots of goodies to be tempted to purchase. I managed very well, not to buy lots of things, until the last day and then I bought a sewing machine for my grandchildren to learn to sew on - I haven't unpacked it yet, but it has touch button sewing and a variable speed control, which means that they won't need to learn to control the foot pedal as well as where the needle is stitching - I'll let you know how the sewing sessions go.
So I thought I might have been able to finish the quilt by this week - but as the title indicates I didn't manage to get that far! (I always think I can accomplish at least 50% more than I really have time for!!)
However I have managed to quilt it - albeit in the ditch , as my free machine quilting needs some practice because I haven't done any for a while.
Here it is - quilted with the sashing cross hatch quilted at the intersections - I think the cross hatching on the sashing is just about visible.
Next week will be the binding - which I prefer to do double as it gives a lovely edge to stitch at the back. Also I will show you a couple of things I did at the quilt show, and some ideas that I'm developing.
The sun is out - I'm off to enjoy it while it's here - have a lovely week.
Angela

Big Shot Starter kit: Handmade Embellishments

$
0
0

Hello Everyone!
this is Anna. I have some fun embellishments to share with you today! I took out my smaller pieces of patterned papers and of course, my Sizzix dies: that of the new Big Shot Starter kit! It's fabulous!!!
Big Shot Starter kit - 658300
So, over the past week I've been creating some stickers trying to use up some of my leftovers. I have a ton of scrap papers, what better way to use them up than to create some embellishments to accent your cards and scrapbook pages! As a Bigz die I even incorporated some felt, which you'll be seeing me doing a lot of in the future!

cafe creativo - Anna Drai - big shot sizzix - handmade embellishments (1)
cafe creativo - Anna Drai - big shot sizzix - handmade embellishments (2)

cafe creativo - Anna Drai - big shot sizzix - handmade embellishments (3)

cafe creativo - Anna Drai - big shot sizzix - handmade embellishments (4)

Items used:
658300 Sizzix Big Shot Starter Kit
scrap of: cardstocks, patterned papers, glitter papers, old book pages, felt
foam board tape
distress ink
(sewing machine, yarn, strass...)

So to start lets gather up some supplies.
Die-cut some shapes out of patterned papers, glitter papers, felt and distress ink the edges.
The next step is the fun part layering all the pieces together: I used some pieces of foam board tape to add a 3D effect really fun! Then keep on adding the layers on as much as you would like!
When you're done embellishing, flip them over, and attach a piece of foam board tape... and voila! Here's the complete set. The sweetest stickers are ready to use!

A few ideas for what to do with cute stickers: use them for your scrapbook pages, as an embellishment on a tag or card, as seals for notebook or add them to gift wrap!

Then of course I had to do a card to show them put to use:

cafe creativo - Anna Drai - big shot sizzix - handmade embellishments (5)
cafe creativo - Anna Drai - big shot sizzix - handmade embellishments (6)

I am hoping that these ideas will teach you to create some embellishments using your Big Shot Starter kit!
Thanks for visiting!!!
Happy creating!

**************************************
Flag_of_Italy Per le amiche italiane! :)

Ciao! Ecco un nuovo appuntamento con Anna. Oggi vorrei condividere con voi alcuni abbellimenti rigorosamente fatti a mano! Per fare ciò ho utilizzato i miei piccoli avanzi di carta e naturalmente le fustelle Sizzix: quelle del nuovo Big Shot Starter kit! Ragazze, è favoloso, vi assicuro!!!

Non so voi, ma io ho una scatola pena di ritagli e... quale modo migliore di usarli per creare degli abbellimenti carini da usare per le card o pagine?! Ho anche usato qualche pezzo di feltro, che è possibile tagliare grazie alla fustella Bigz, in dotazione con il kit.

Materiali:
ritagli di: cartoncini tinta unita, carte fantasia, carte glitter, pagine di vecchio libro, feltro
scotch biadesivo spessorato
inchiostro distress
(macchina da cucire, filo, strass...)

Come fare:
- Quindi, per iniziare raccogliete alcuni avanzi di carta e feltro.
- Fustellate alcune forme dalle carte fantasia, carte glitter, feltro ecc. Sporcare un po' i bordi con inchiostro.
- Il passo successivo è la parte più divertente ovvero fare la stratificazione dei pezzi: ho usato alcuni pezzi di scotch biadesivo spessorato o cartone per aggiungere un effetto 3D davvero simpatico. Continuare ad aggiungere strati su strati finchè si desidera.
- Quando avete finito, capovolgere ogni abbellimento e applicare un pezzo di biadesivo... e voilà! Ecco il set completo di stickers pronti all'uso!

Qualche idea su cosa fare con questi stickers? Li potete usare per le vostre pagine scrap, come abbellimenti su tag o biglietti, come decorazioni per quaderni/notes o aggiungerli ai pacchetti regalo! Naturalmente, ho voluto fare una card per mostrare come ho messe a frutto il mio lavoro ;)

Spero che queste idee vi possano dare delle ispirazioni per creare nuovi abbellimenti utilizzando il vostro Big Shot Starter kit!

Grazie per la visita! Fa sempre piacere :)

Big Shot Starter Kit in action - greeting card

$
0
0

Hi, it is my turn to provide you some inspiration how to use Sizzix products in your craft life! Today I've got for you something not very usual for me - a card! I was very excited about something totally new I could use to create - New Big Shot Starter Kit which contains not only the beautiful teal Big Shot Machine abut also a very nice set of dies I used to create a small greeting card you can see below:


Here is the supply list for this project:
- Big Shot Starter Kit
- 7 Dots Studio: "Love is All Around" and "Queen's Heart" Collection
- Prima: Canvas Resist Flowers, Crystals Swirls, "Romantique" Collection
- Scrapbook Adhesives by 3L - 3D foam Squares
- Tea Spray, Pink Spray
- Ranger: Distress Ink - Walnut Stain, Glossy Accents
- Doilies, craft glue, staples, card base, old stamp

All the cut -outs here - both butterflies and little labels are part of the Big Shot Starter Kit.
I hope you like the card - see you soon - I will have some more class photos for you... this time from sunny Brasil!

xoxoxo
Finn

Making a personalised Toddler Union Jack T Shirt

$
0
0

Hello, I am back after a bit of a rest!
I am so happy to be able to share here how to easily and cheaply personalize a blank T-shirt.

For this project I used the following:
Sizzix Big Shot
Sizzix Bigz XL Alphabet Die - Block Talk - 658563
Sizzix Bigz Die w/Bonus Textured Impressions - Union Jack - 658296

Basic Grey Hello Luscious Fabric, Jelly Rolls
Heat & Bond Ultra Hold Iron On adhesive


In this case I wanted to do one for my nephew. He is a lovely one year old boy but as he lives in Vancouver, Canada, we dont see him often enough. As I want him to remember his aunt an oncle living in the UK, I thought a T-shirt with the Union Jack die could be a good idea. I selected the materials I wanted to use, I thought it would be nice to have some soft colours with small patterns perfect for die cutting.


I hate waste, so I cut small (approx. 6" by 6") pieces of the material and iron them onto the exposed side of the Heat & Bond Ultra which is the best option of a fusible interfacing that I have found for die cutting.
As I am not the world best sewer so I I decided to use the Ultra instead of the Lite version of the Heat & Bond because I knew I would not enjoy the sewing afterwards. Hopefully, the Ultra version should  withstand machine washing, something essential for a toddler!


Once the Heat and Bond has cooled down completely - very important - I die cut the Union Jack motive placing the fabric side down.


I placed the cut outs on the front of the T-Shirt. I like to make sure the colours and patterns work well.


I remove the backing - from the Heat and Bond, place the cross first as centred as possible on the front and then I  iron it on following the instructions from the adhesive manufacturer.


I then die cut a scrap piece of coloured card using the Union Jack to use as a template. I tested its resistance to heat before hand! The template is essential to position the small pieces in the right place.


Then I iron them all in place through the template, so nothing moves.


And voila, there you have it! The fabric pieces are perfectly attached to the T shirt. If you are a good sewer, unlike me, and you would like to sew the pieces I would then recommend to use the Heat & Bond Lite version instead.


Then I proceed to cut the letters to really personalised the back of the T-Shirt. I used the fantastic Block Talk Bigz XL die. It is fantastic for fabric die cutting as well as for tradicional paper crafting.


I laid the letters on and iron them out.  And that was it.


All in all, it didn't take long to make at all once I knew what I wanted to do and what dies with which materials. So know I can repeat this project changing the patterns and colours to suit my nieces tastes.


Washi Tape Gift Card Folder

$
0
0


It's getting to be that time of year when the graduation announcements, wedding and shower invitations are rolling in. Because our family is spread out all over the country, we often choose to send gift cards to celebrate happy events. I like to make them special by making fun gift card folders to personalize them.  I used washi tape and the new Sizzix ScoreBoard Gift Card Folder to create this project. 

Sizzix Supplies:
658054  Gift Card Folder and Label- ScoreBoard
657119  Leaves

Other Supplies:
washi tape, Clearsnap Chalk Inks, twine, ribbon, letter and number stamps, Scotch ATG gun 


 opening....
ta-dah!
First, cover a sheet of matboard with washi tape striped on a diagonal leaving a little room in between each piece. Then die cut a Gift Card Folder from that matboard, making sure to lay the tape side facing the die.
First, cover a sheet of matboard with washi tape striped on a diagonal leaving a little room in between each piece. Then die cut a Gift Card Folder from that matboard, making sure to lay the tape side facing the die. 
Die cut a Gift Card Folder from that matboard, making sure to lay the tape side facing the die. 
Fold die up on score lines into folder shape.
Smear inks randomly on the inside of the folder. Blend with a sponge.

Emboss a coupon envelope with the word Congratulations. Adhere to folder.
 Ink lightly to bring out the words. Slip gift card inside.
I wound up inking the edges and open areas that did not have 
tape on them in brown at the last minute.
Add embellishments to folder.
Stamp 4 U on the label and tie firmly around folder. To open it, 
just slip the label down to the bottom and open the flap!

Love your garden? Next time I will have samples from my brand new Picket Fence collection! So excited that they will finally be in stores. Have a great weekend... Eileen

A Bunch of Flowers

$
0
0


 Good morning!
I have made a card to show you today. I have used the gorgeous bird cage die together with a Bunch of Flowers dies. They are really versatile - you can make fabulous flowers with these dies. The papers are from Maja Design. As a flower center I used some pearls to keep it simple.


And a close-up of the flowers.


Have a great Sunday!

Camilla

************************************************

God morgon!
Jag har gjort ett kort att visa er idag. Jag har använt den fina Bird Cage dien och A Bunch of Flowers dies. De är verkligen användbara - du kan göra fantastiskt fina blommor med dessa dies. Pappren kommer från Maja Design. Jag använde några pärlor till att ha som blommornas mitt för att hålla det enkelt.


Ha en härlig söndag!

Camilla

what a bind!

$
0
0


Every month I do some projects for Sizzix that are for editorials or projects that will (soon) be tutorials on the website and I thought it might be helpful to have a binding tutorial in one place for quick reference (please excuse the 11 billionty photos


bindings in progress

There are hundreds of tutorials for binding quilts online, but this is my slightly cheating, ever so easy binding tutorial.

First up you need to measure your quilt around the perimeter - so all 4 sides. Then add on 10" for good measure (to allow for when you miter the corners and to make finishing the ends easier)

Divide the total number by the measurement of the width of your binding fabric. In this case 42" (most fabrics are between 40" and 44" wide from selvedge to selvedge). This number is the how many strips you need to cut.

making binding

I like to make my double fold binding using the 2 1/2" strip die. This gives you a slightly wide binding on the back of the quilt. This isn't set in stone - some people prefer a narrower binding, but I like the look of the wider binding on the reverse of the quilt, and so that's what we're doing today!

Press your fabric well and trim off the selvedge.

Using the 2 1/2" strip die cut the number of strips you calculated.

Sew these strips end to end using a generous 1/4" seam. Press the seams to one side, all in the same direction.

making binding

Now fold in half all along the length, wrong sides together, and press.

making binding

I like to wind my binding onto an empty thread spool, so I can pop this spool onto the spare spool holder on my machine when I'm sewing on the binding, it helps keep it nice and tidy and stops it getting tangled up as you sew.

making binding

Now you're ready to attach the binding to your quilt.

Starting in the middle of one side of your quilt, match up the raw edges of the binding to the raw edge of your quilt. Leave a tail of about 4 or 5"


binding 5

Use a 1/4" seam (a walking foot is a good idea because you're stitching through multiple layers and the binding might be stretchier than the quilt) and sew along until you get to 1/4" from the first corner. Stop and backstitch. Fold up the binding at a 90 degree angle.

binding 6

  Fold right back onto itself. This gives you a mitered corner that you want when you finish sewing the binding to the reverse of the quilt.

binding 7

  Start sewing again from the very edge. Backstitch again and continue using a 1/4" seam

binding 8

  Continue doing the same with the other corners as you just did (stop 1/4" from the end, fold up 90 degrees, fold back down and sew on) and then stop (secure with a backstitch or 2) about a hand's width or so away from where you started. You'll have another tail, just like you started with (or longer - it's ok, you'll trim it in a bit - you can keep all the tails and leftovers from binding and sew them together into one lovely scrappy binding)

Binding tutorial

  Now this is the cheaty bit. Fold those tails up towards each other and press down to create a fold.

binding 10

  Pin the binding together at either side of the fold

binding 11

  And sew along the fold

binding 12

  Open out the seam (you can press to one side if you prefer), trim off the tails to 1/4" and finish stitching the binding on.

binding 13

  Flip the binding over to the reverse and hold in place with hair clips (if you're cheap like me) or binding clips (which look exactly the same but are silver and not lovely pretty pink clips) Hand stitch the binding to the reverse of the quilt using a thread that matches and small whipstitches.

binding 14

  To get nice sharp corners fold the edge of the binding down and stitch up to the corner. Take the next edge and fold down tightly, you might need to wiggle the corner about a bit to get it nice and tidy, but a few wiggles and you'll have a lovely corner. It'll pretty much fall into place without a lot of work, because you did the front correctly when you sewed the binding on, remember?

Tidy corners

And that's it. 
Go forth and bind!!

Sweet as sugar tag

$
0
0


We are already in the 3rd week of my Starter Kit Series! There is only one more to go, and it is a such a pity, because I'm having so much fun playing with this awesome kit. The possibilities are endless!


Today I am showing you how to make a tag with lots of elements, using a layering technique that is very funny and creative. Let's Start!


Supply list:
  • 658300 Sizzix Big Shot Starter Kit (Powder Blue & Teal)
  • Manila tag
  • Cardstock and paper scraps
  • Distress ink
  • Background stamp
  • Adhesives: Liquid glue, foam squares, glue dots
  • Embellishments: Ribbon, twine, stickers, buttons, rhinestones, washi tape, paper clips...
  • Others: Black gel pen, mini stapler
Start by preparing your manila tag with some distress ink and a background stamp. Then select 3 or 4 pieces of different colors of cardstock and die cut a bunch os shapes from your Starter Kit. Then place all your die cuts and your embellishments on your work surface and start creating the different layers. Place your bigger elements on your first layer and place them in the middle of the tag. Then keep creating more and more layers with smaller elements and at the end put some small details, like pins, rhinestones and, of course, some dash lines with a black gel pen.


Tags are always so fun to create, and the layering technique si perfect for these little pieces of art. You just have to be creative and keep layering and layering until you are happy with the results. And, believe me, the hardest part about this technique is knowing when to stop :)


Happy Monday!

..................................
¡Ya estamos en la tercera semana de mi Starter Kit Series! Solo queda una más, y es una pena, porque me estoy divirtiendo mucho jugando con este kit, ¡las posibilidades son infinitas!
Hoy os voy a enseñar cómo hacer un tag con muchos elementos, usando la técnica de las capas que es muy divertida y creativa. ¡Empezamos!

Materiales:
  • 658300 Sizzix Big Shot Starter Kit (Powder Blue & Teal)
  • Etiqueta de almacén
  • Restos de cartulinas y papeles
  • Distress ink
  • Sello de fondo
  • Adhesivos: pegamento líquido, foam adhesivo, glue dots
  • Embellecedores: Cinta, cordón, pegatinas, botones, brillantitos, washi tape, clips de papel...
  • Otros: Rotulador negro, grapadora
Empieza preparando tu etiqueta de almacén con tinta distress y un sello de fondo. Después selecciona tres o cuatro colores de cartulina y troquela un montón de formas de tu Starter Kit. Una vez hecho esto, coloca todos tus elementos encima de tu mesa: las formas troqueladas y todo lo que se te ocurra que puedas utilizar: blondas, cintas, pegatinas, botones... Empieza la primera capa poniendo los elementos más grandes en medio del tag. Después sigue creando capas con elementos más pequeños rodeando la primera capa y al final pon los detalles más pequeños, como los brillantitos, los alfileres y, por supuesto, el toque de rotulador negro.
Los tags son siempre muy divertidos de hacer, y la técnica de las capas es perfecta para ellos, solo tienes que ser creativo y poner capas y capas hasta que estés satisfecho con el resultado. Y, créeme, lo más difícil de esta técnica es saber cuándo hay que parar :)

¡Feliz lunes!

Mini Album

$
0
0

Hi everyone...hope you all had a great week. Today I have a Mini album to show you. I have used some "On the Edge" Dies on this album.


Supply list:
658300 Sizzix Big Shot Starter Kit (Powder Blue & Teal)
656627 Sizzix On the Edge Die - Scallops
656628 Sizzix On the Edge Die - Plaque & Postage 
657181 Sizzix On the Edge Die - Pennants
657180 Sizzix On the Edge Die - Mini Scallop & Pinking
656633 Sizzix Movers & Shapers Die - Baroque 

658570 Sizzix Movers & Shapers Die - Cameo Frame
658572 Sizzix Movers & Shapers Die - Postage Stamp Frame
656936 Sizzix Movers & Shapers Magnetic Die - Mini Ornamental
658506 Sizzix Sizzlits Die - Vintage Doily

Papers: Maja Design, Pion Design, chipboard
Stamps: Stampers Anonymous Tim Holtz Collection
Inks: Archival Ink - Jet Black, Distress ink Pad - Walnut Stain
Flowers: Wild Orchid Crafts
Other: Frame - Melissa Frances, Seam Binding ribbon, Cheesecloth, Charms, Thickers, Paper Doilies


Thanks for stopping by...see you next week.
Anne Kristine

Hei alle sammen...håper du har hatt en fin uke. I dag har jeg et mini album å vise deg hvor jeg har brukt noen "On the Edge" dies. 

Materialer:
658300 Sizzix Big Shot Starter Kit (Powder Blue & Teal)
656627 Sizzix On the Edge Die - Scallops
656628 Sizzix On the Edge Die - Plaque & Postage 
657181 Sizzix On the Edge Die - Pennants
657180 Sizzix On the Edge Die - Mini Scallop & Pinking
656633 Sizzix Movers & Shapers Die - Baroque 

658570 Sizzix Movers & Shapers Die - Cameo Frame
658572 Sizzix Movers & Shapers Die - Postage Stamp Frame
656936 Sizzix Movers & Shapers Magnetic Die - Mini Ornamental
658506 Sizzix Sizzlits Die - Vintage Doily

Mønsterark: Maja Design, Pion Design, chipboard
Stempler: Stampers Anonymous Tim Holtz Collection
Inks: Archival Ink - Jet Black, Distress ink Pad - Walnut Stain
Blomster: Wild Orchid Crafts
Annet: Ramme - Melissa Frances, Seam Binding bånd, osteklut, Charms, Thickers, kaffeservietter.

Takk for at du stikker innom her og vi ses neste uke.
Anne Kristine


Viewing all 2033 articles
Browse latest View live


Latest Images