This week I wanted to create some really simple Christmas cards which were inspired by a Father's day card that I saw Somewhere or other and I 'kind of' adapted the idea for this weeks blog. Isn't it amazing how we take in inspiration and ideas which pop up when least expected?
I know that once December arrives we will be bombarded with Christmas tunes which is just fine by me, I can't wait to get my Christmas classics on the CD player. Would I feel differently if I worked in a shop or supermarket listening to the same CD on repeat 8 hours a day....YES! I love 'em and I thought I would steal a few choice lyrical phrases today.
I wanted to use my favourite BLOCK TALK alphabet by Tim Holtz which has all the uppercase letters and numbers on a single Bigz XL die, that's right, a single die! It's a die that you will go back to time and time again because the letters are tall and thin which means that you can fit some pretty big words on a card/tag/ layout,
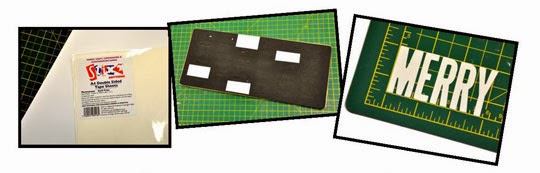
I started by attaching an A4 Double sided tape sheet (from the clever people at Stix2) to the back of a sheet of stiff white card this is a great way to add and adhesive layer to your die cuts but I want the adhesive on the front and not the rear this time. I trimmed rectangles to size to fit over the individual letters that I needed (tape sheet side against the die) and ran it all through my trusty Big Shot. Next, I placed the letters on my cutting mat against the place with the measurements and noted that the word 'MERRY' measures approximately 4 x 8cm.
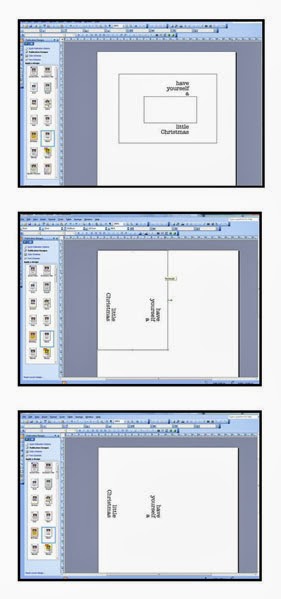
At this point I turned to my PC and created a document in Publisher I drew a rectangle measuring 148.5 x 105mm (A6) as a guide for the front of my card. I also drew a rectangle measuring 40 x 80mm which represents the word 'MERRY' I then created a couple of text boxes with rest of the text and manipulated them to fit in the large rectangle. Once I had everything in place I flipped it through 90 degrees and set it in the top left hand corner before deleting the large rectangle. I sent the document to print placing an A5 sheet of stiff white card in the feed tray.
Once the card was printed I scored and folded down the centre. Next, I cut strips of double sided 3D foam pads and attached them to the rear of each die cut letter prior to mounting them onto the base card, I drew a faint guide line to help with accurate placement.
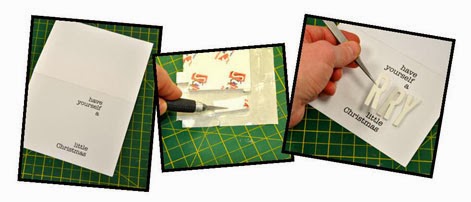
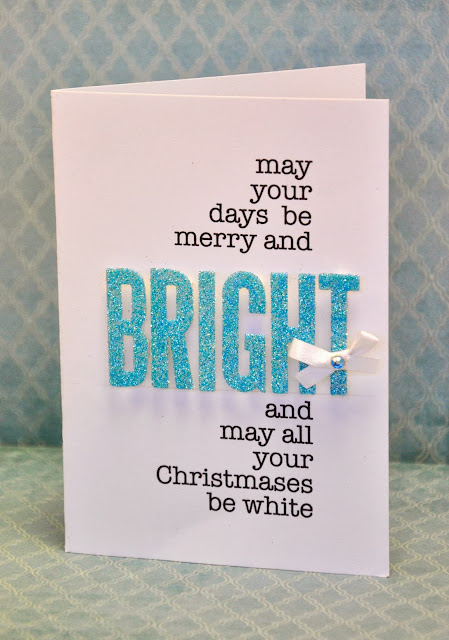
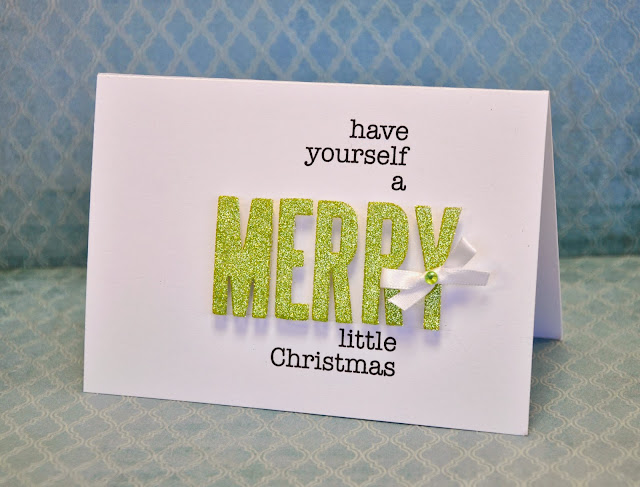
When the letters where in place I set about carefully removing the backing to the adhesive sheet on the front of each letter using the point of a craft knife. Finally I sprinkled my chosen glitter onto the face of each letter before shaking off the excess. You are probably wondering why I didn't just cut glitter card? Well, I have lots of gorgeous glitter in cool and unusual colours and I don't have the glitter card to match so it's another way that die cutting becomes a great problem solving tool.

As you can see I finished the card with a white bow and adhesive gem.
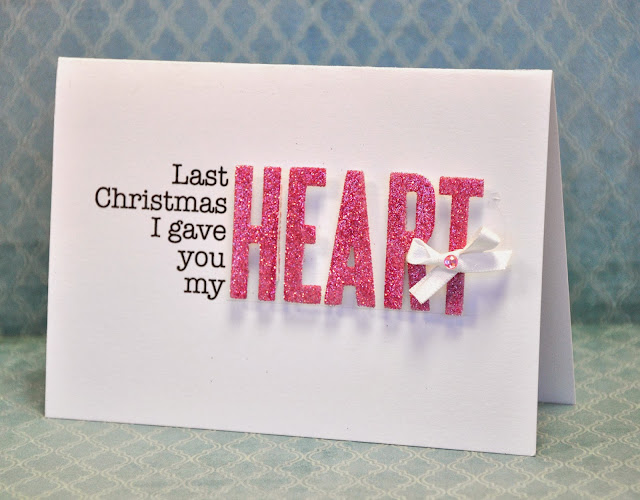
I couldn't stop at one card though.....