Quantcast
Channel: Crafting ideas from Sizzix UK
Viewing all 2033 articles
Browse latest View live

in-flight entertainment

$
0
0


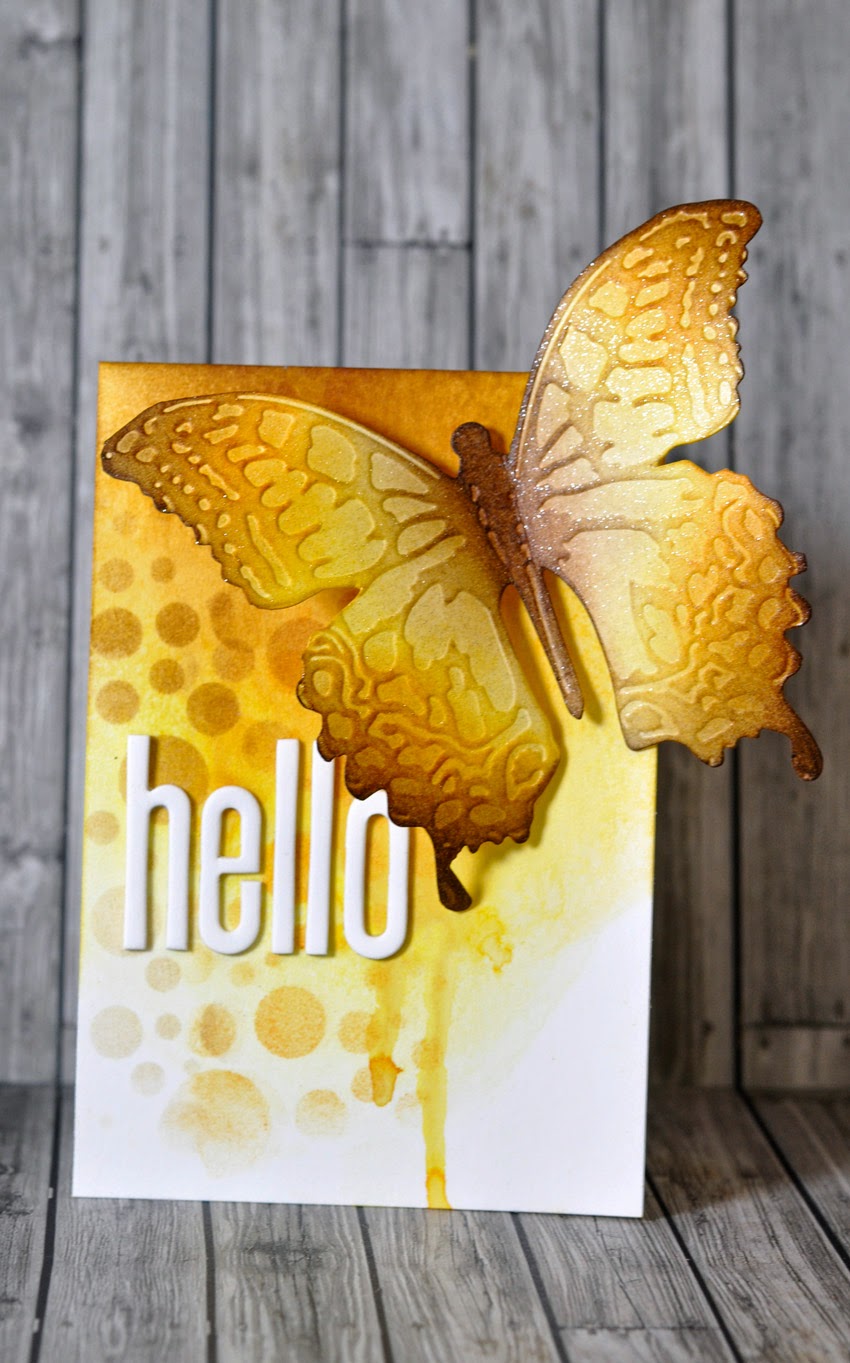
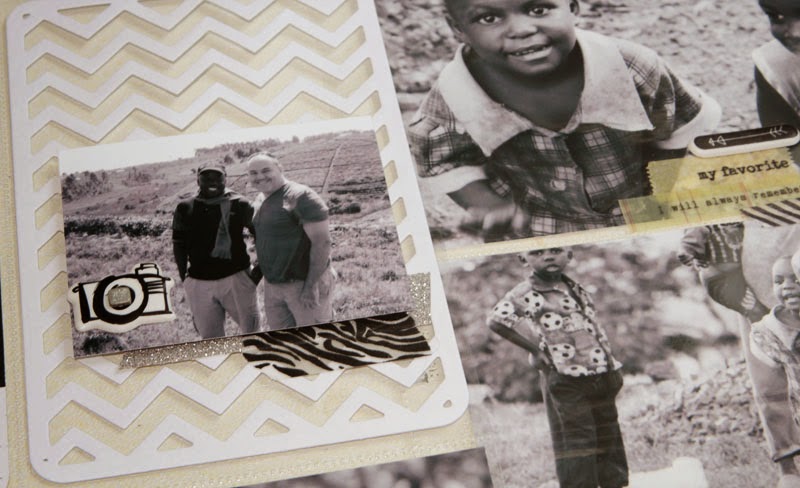
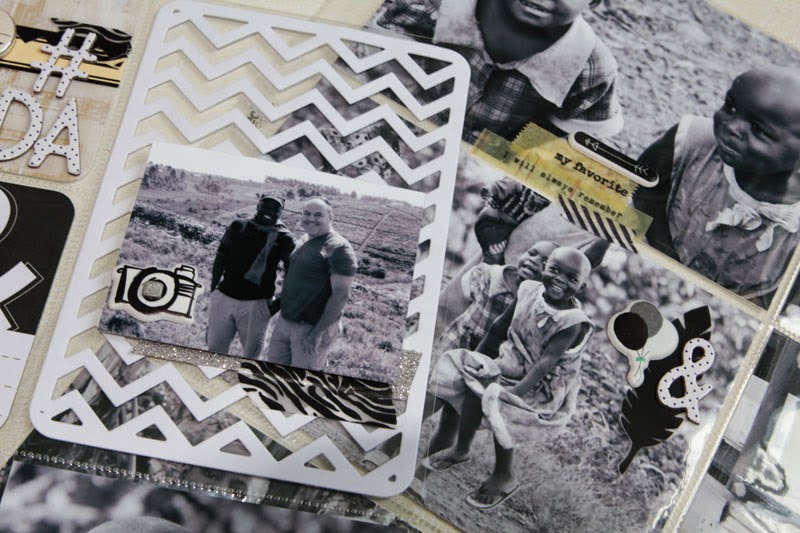
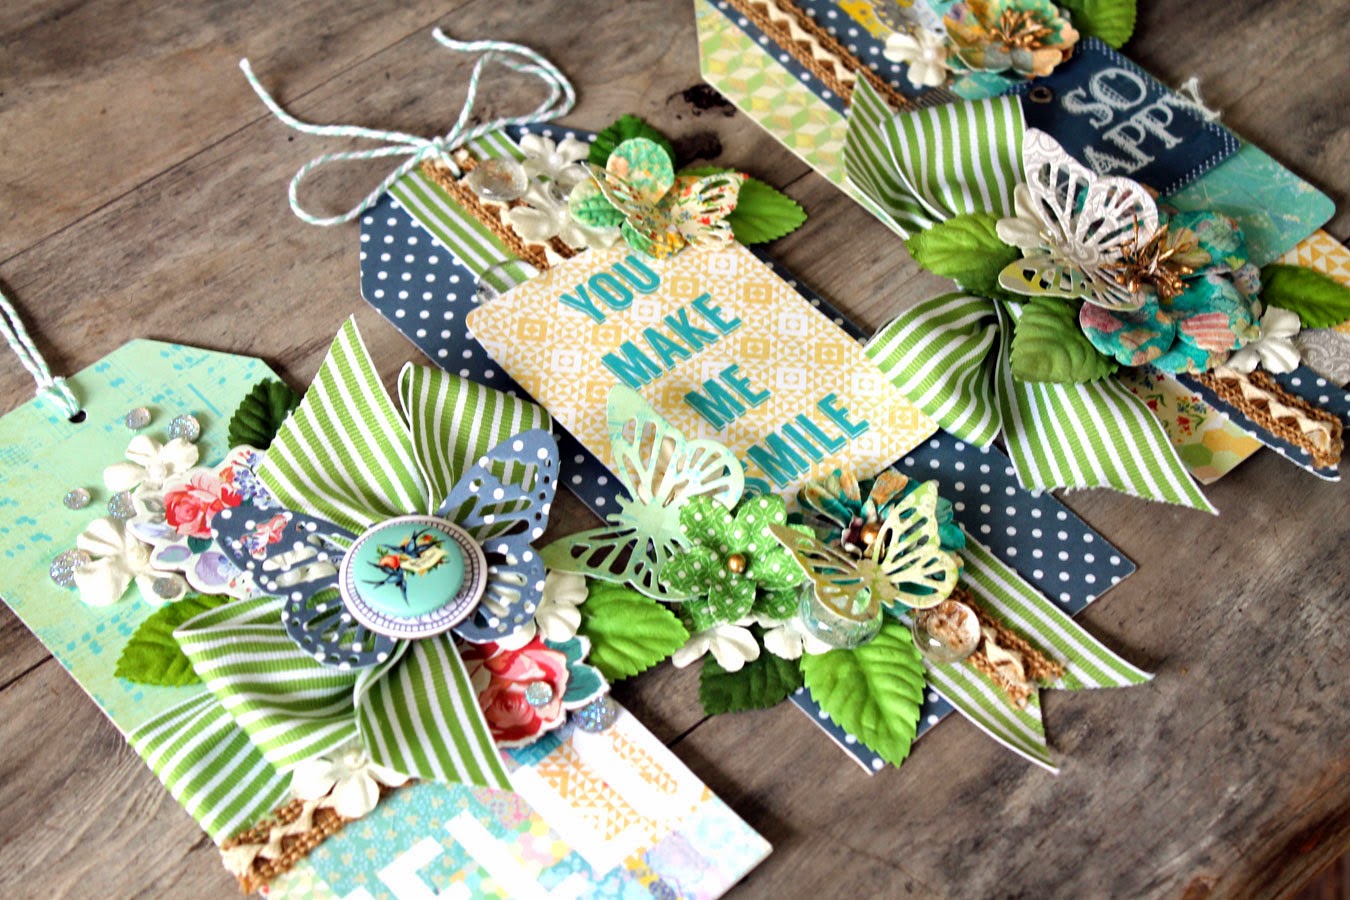
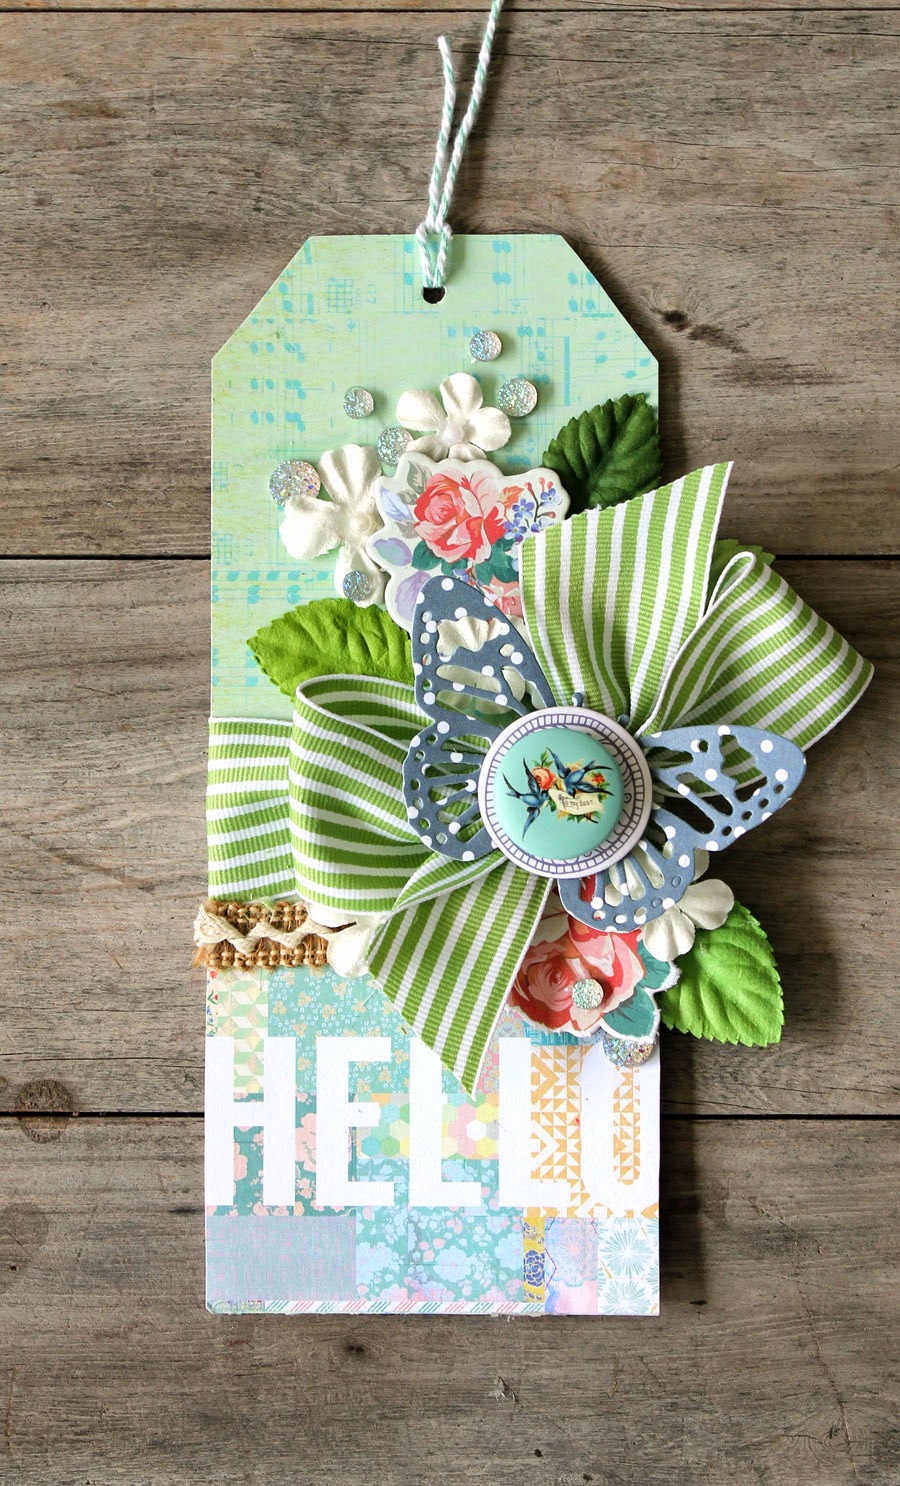
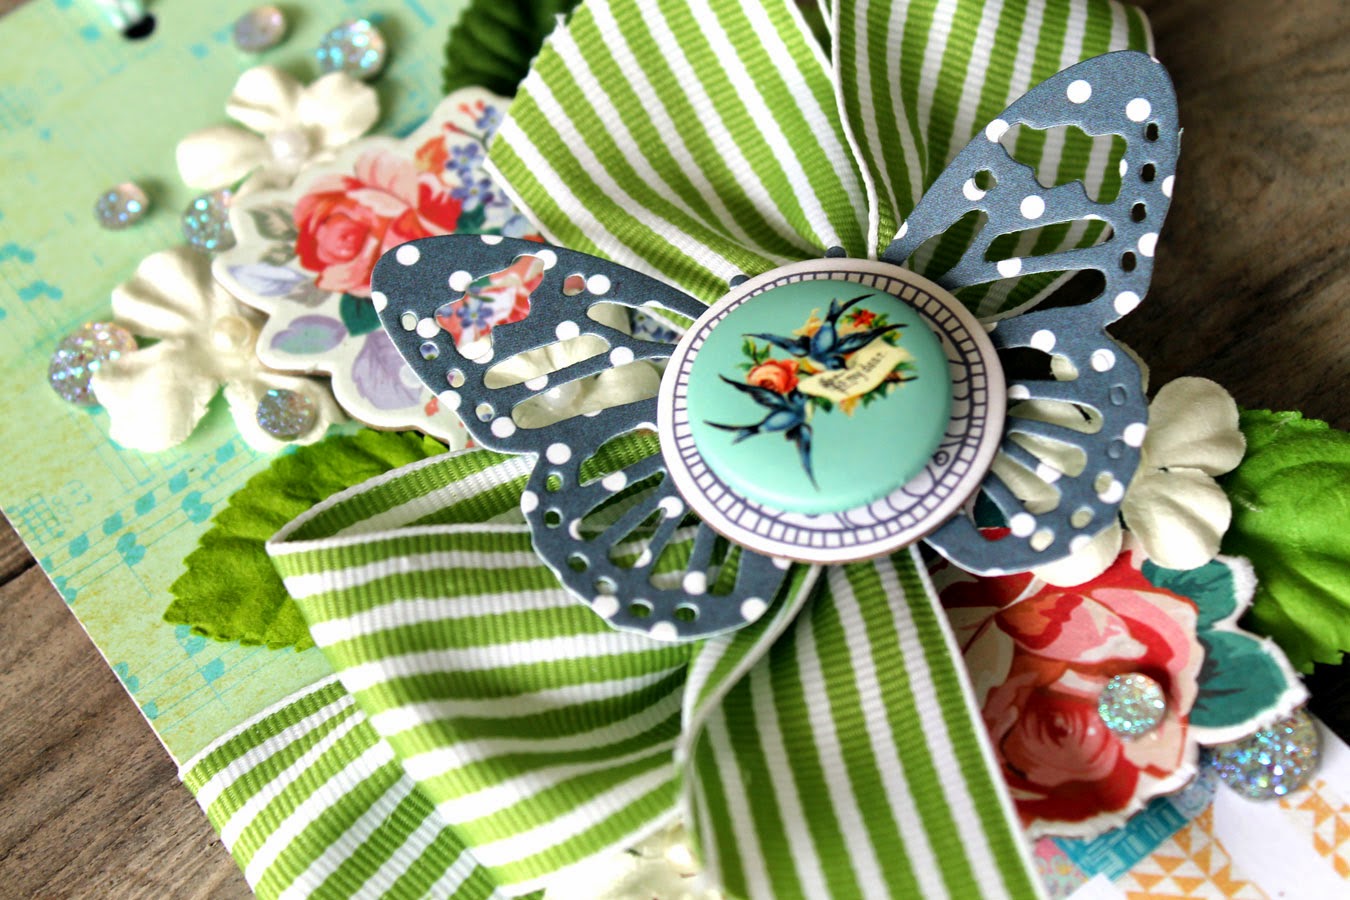
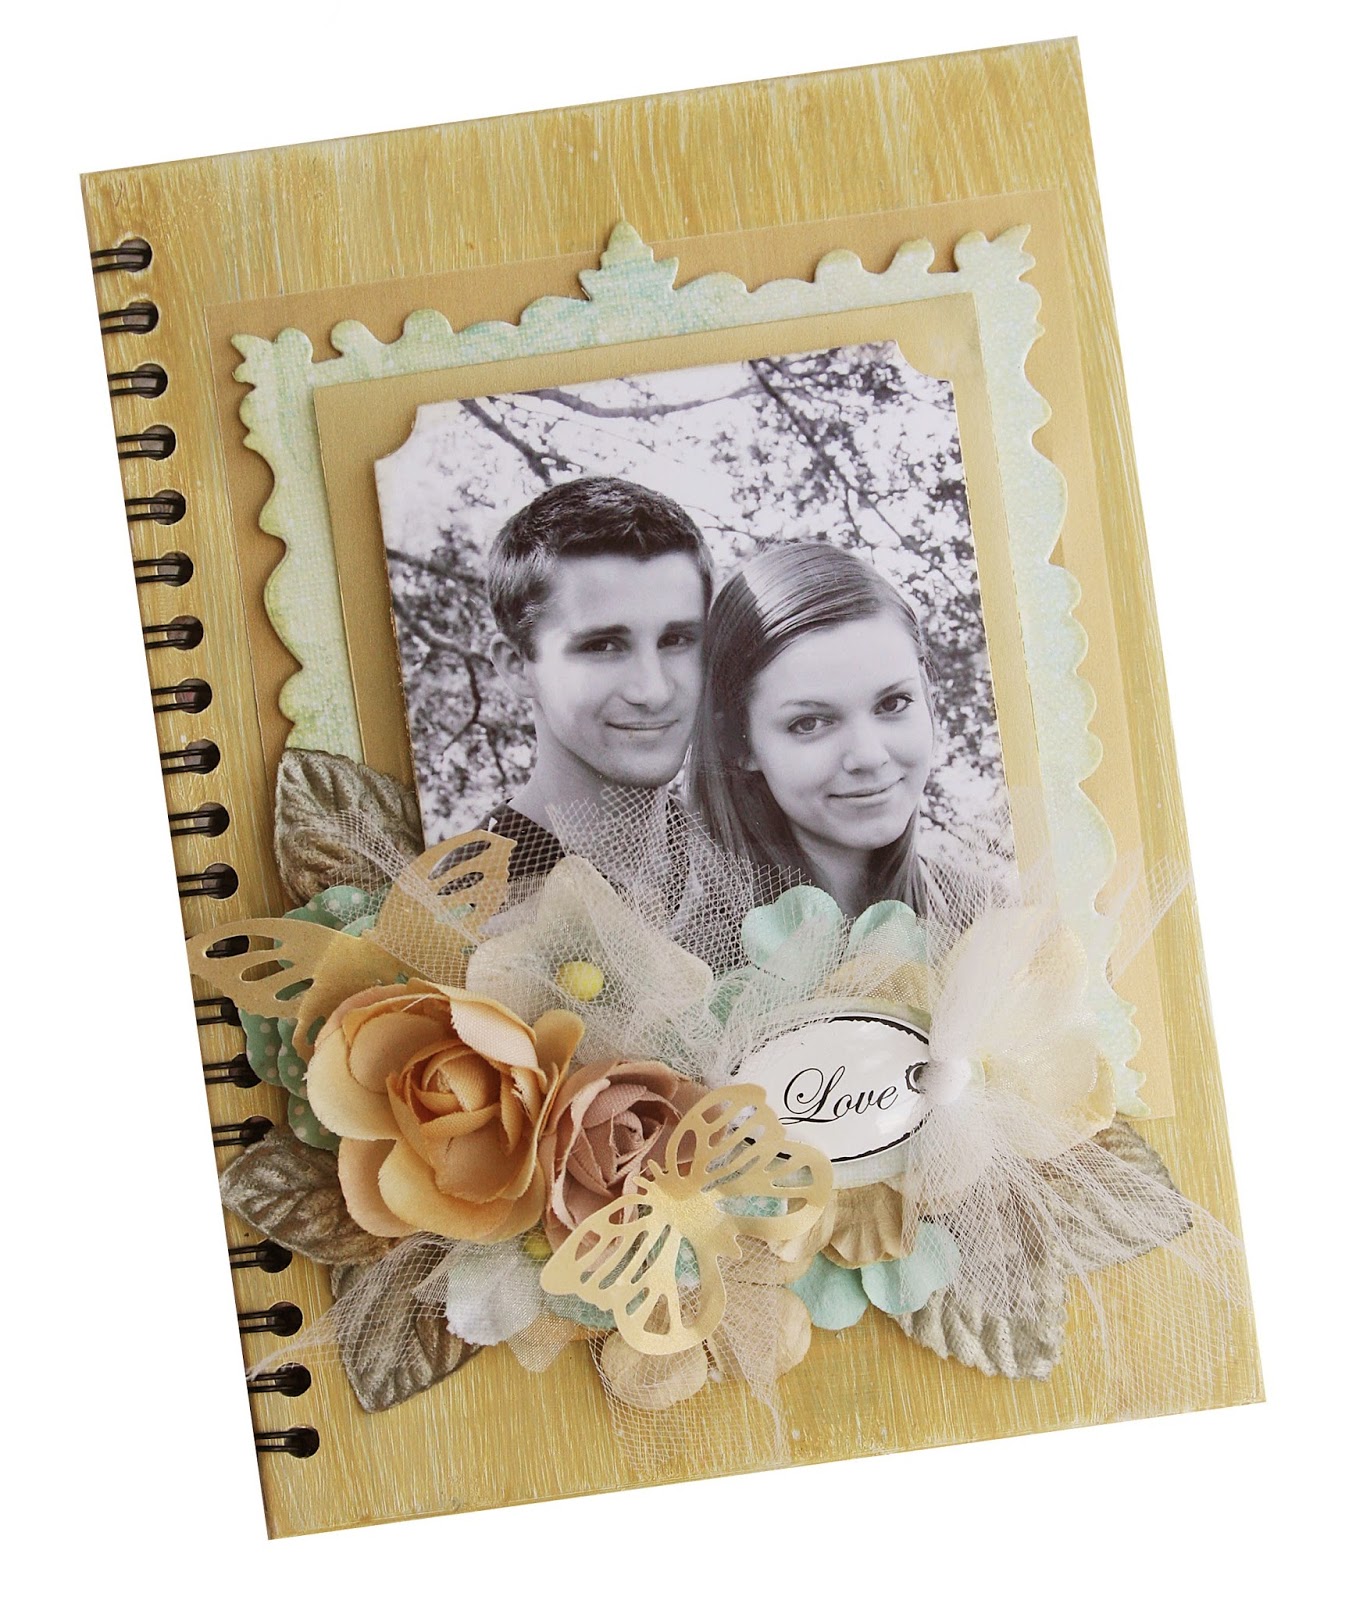
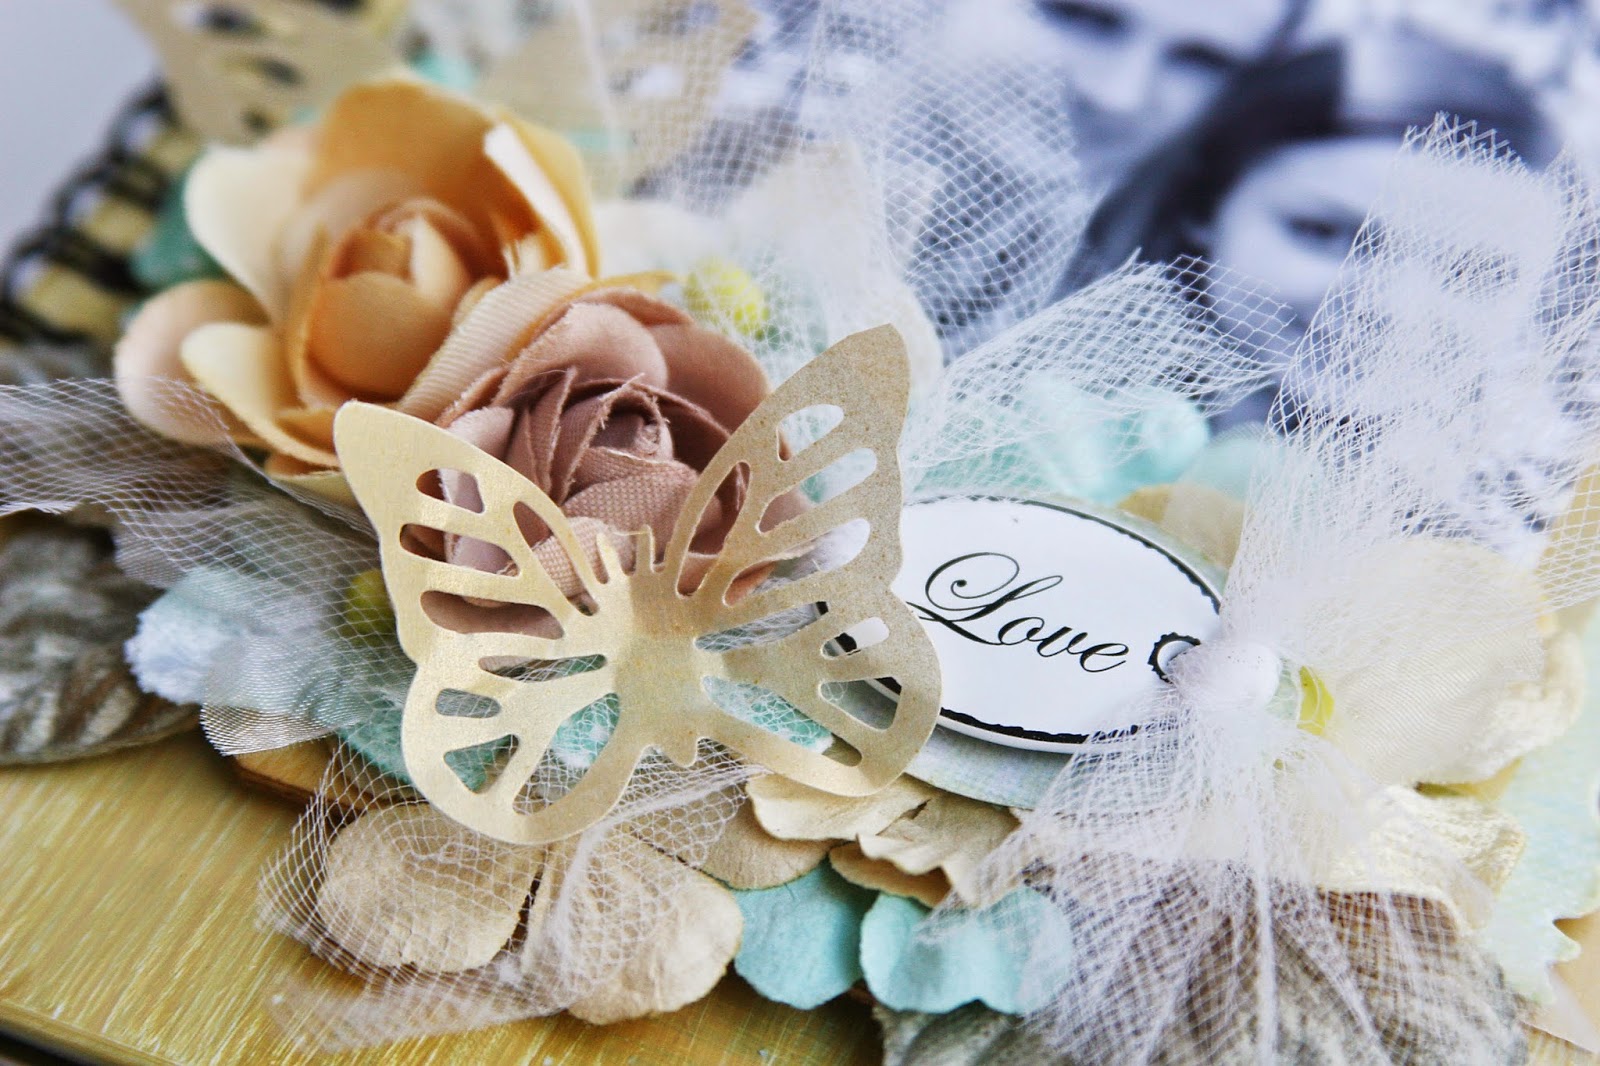
Tiny, huge, plain, intricate?.... it doesn't really matter when we are talking about butterflies. They are such a versatile shape and on many occasions provide the perfect finishing touch to lots of papercraft projects.

Today, I am proud to introduce a new die/embossing folder combo from that creative bottomless pit that is Mr Tim Holtz. I am sure that this will become a huge favourite for many of you as it is for me. I had the privilege to work with this die last December in preparation for our impending trade shows and the resulting projects drew quite a crowd. I have had to wait until now to finally use it again, Hurrah!!!

The sizzix products I'm going to be using today are:
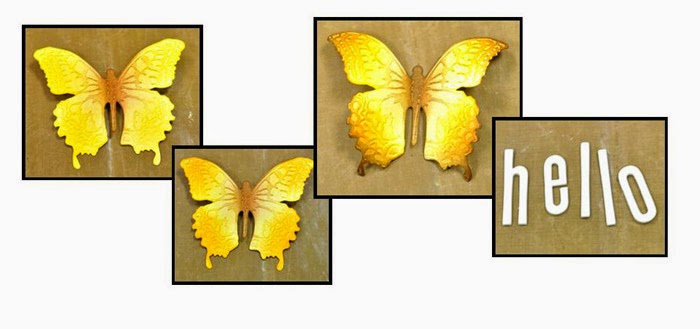
I also used some of my favourite Distress Inks namely Mustard Seed, Wild Honey and Walnut Stain (if I added Crushed Olive, another favourite of mine, they would make a great salad dressing!)


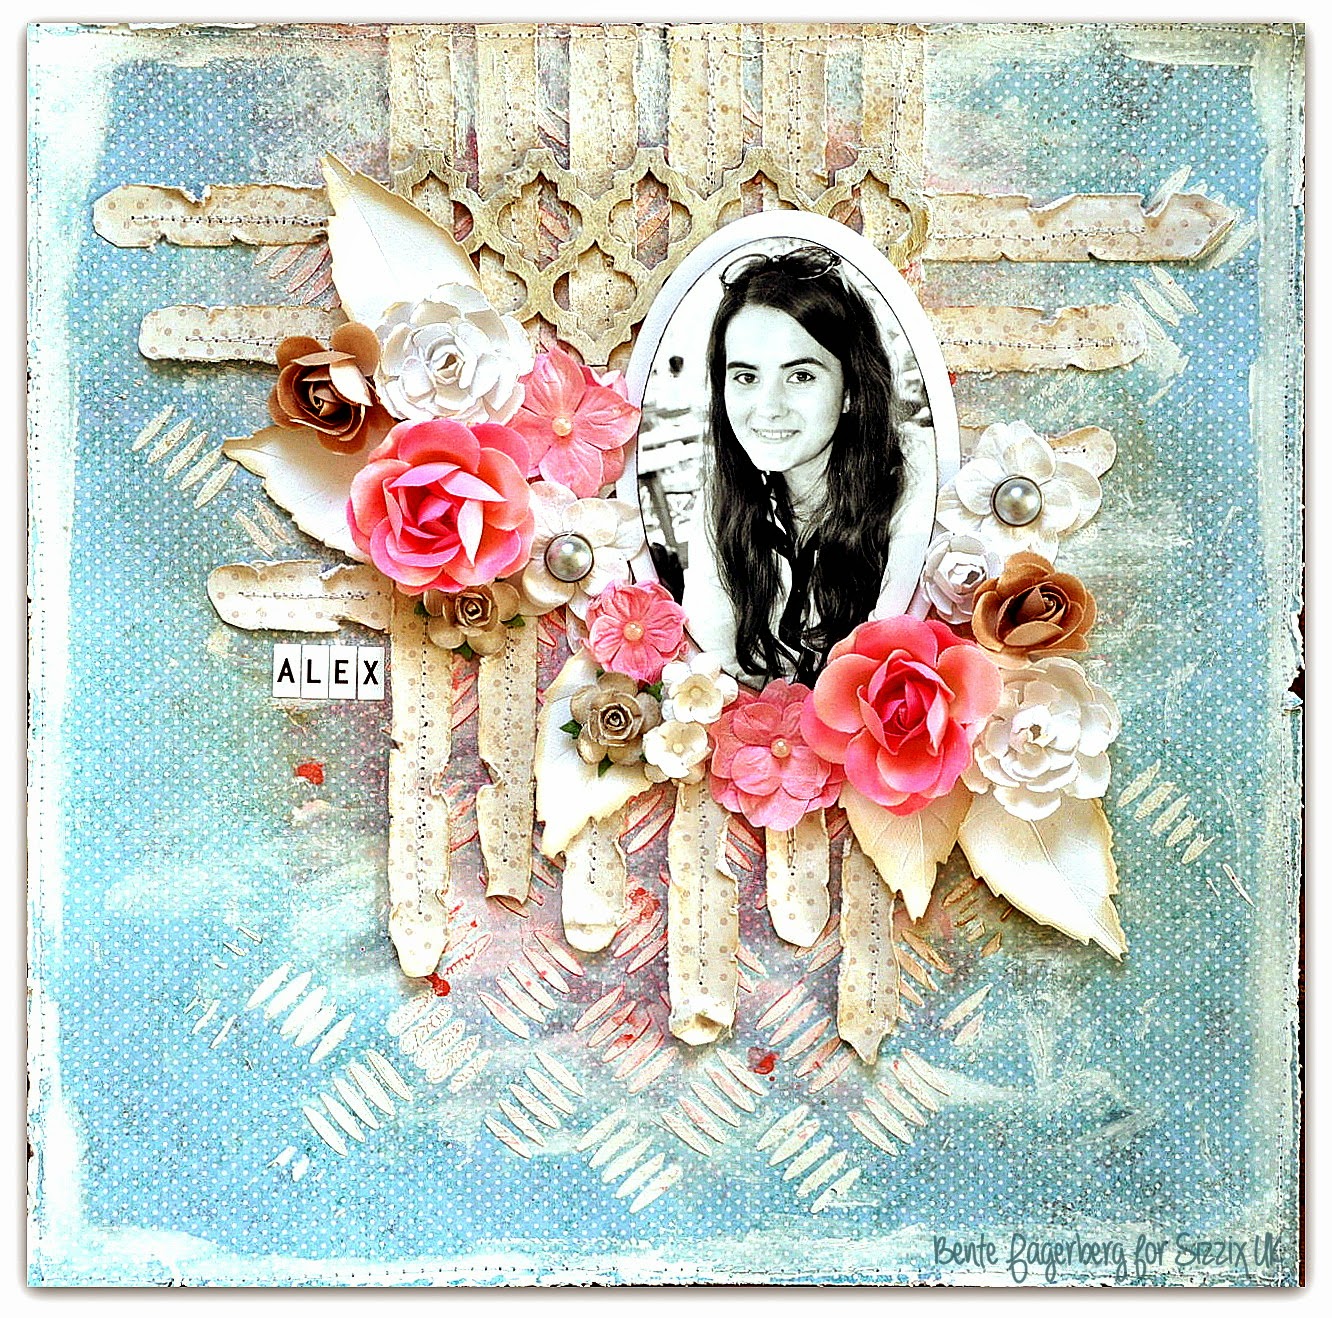
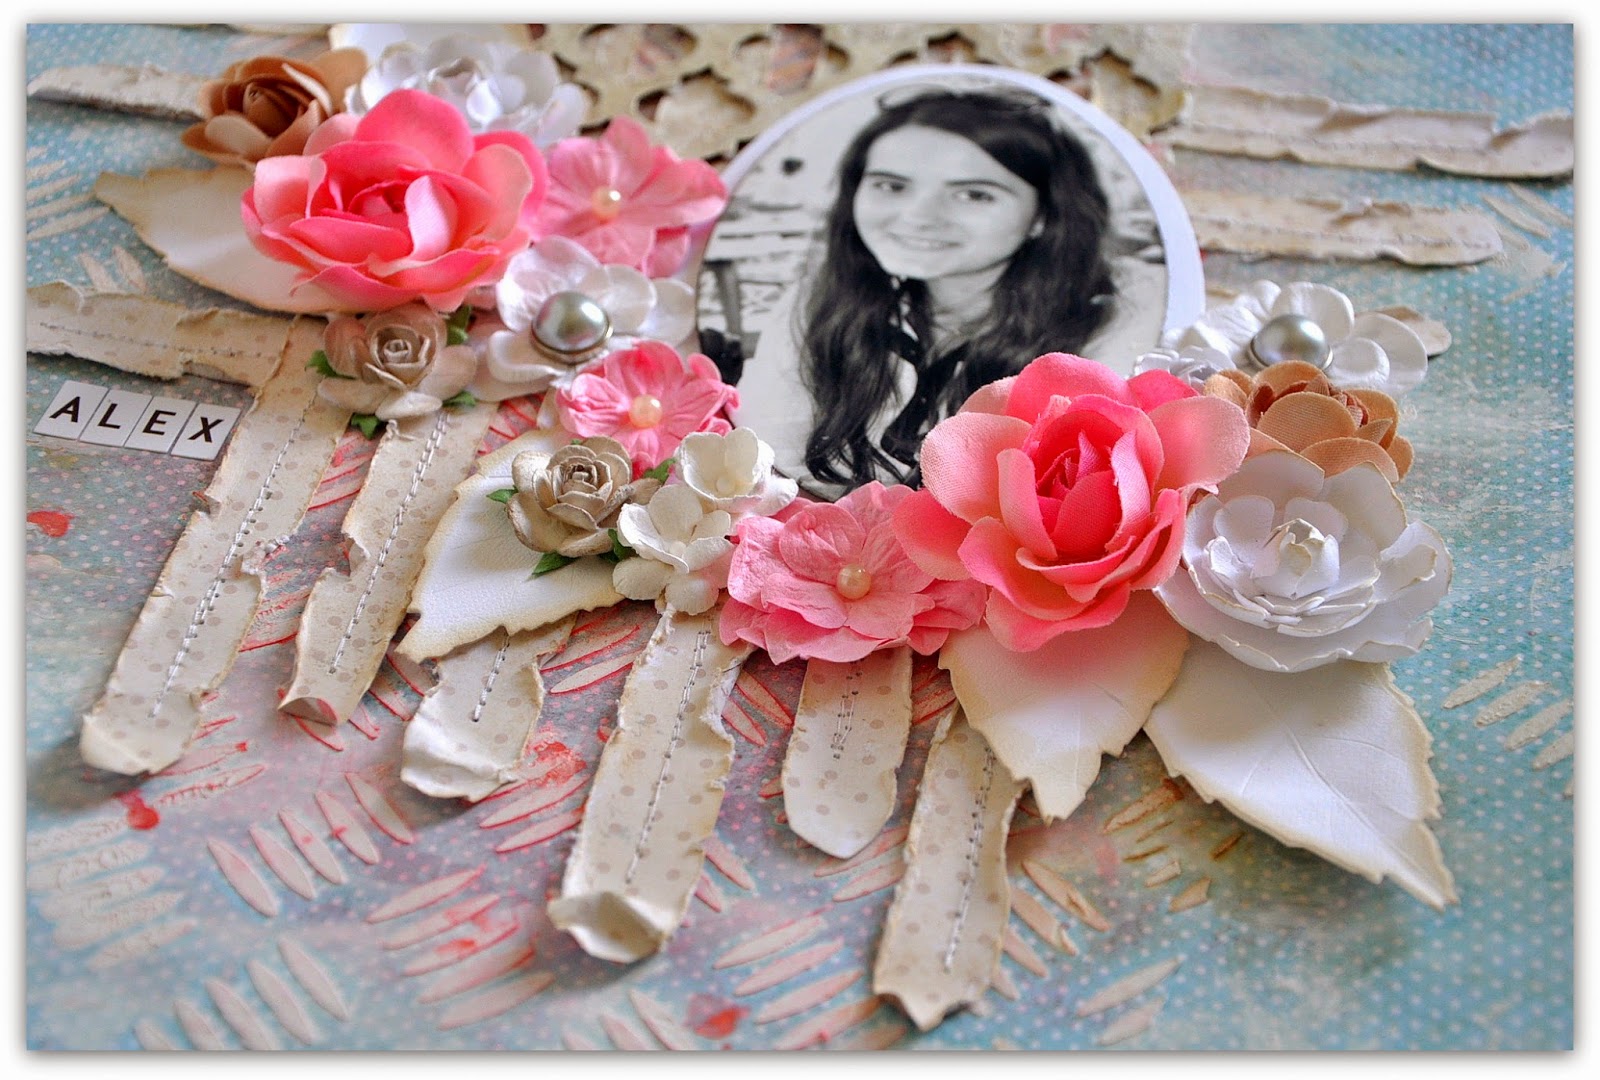
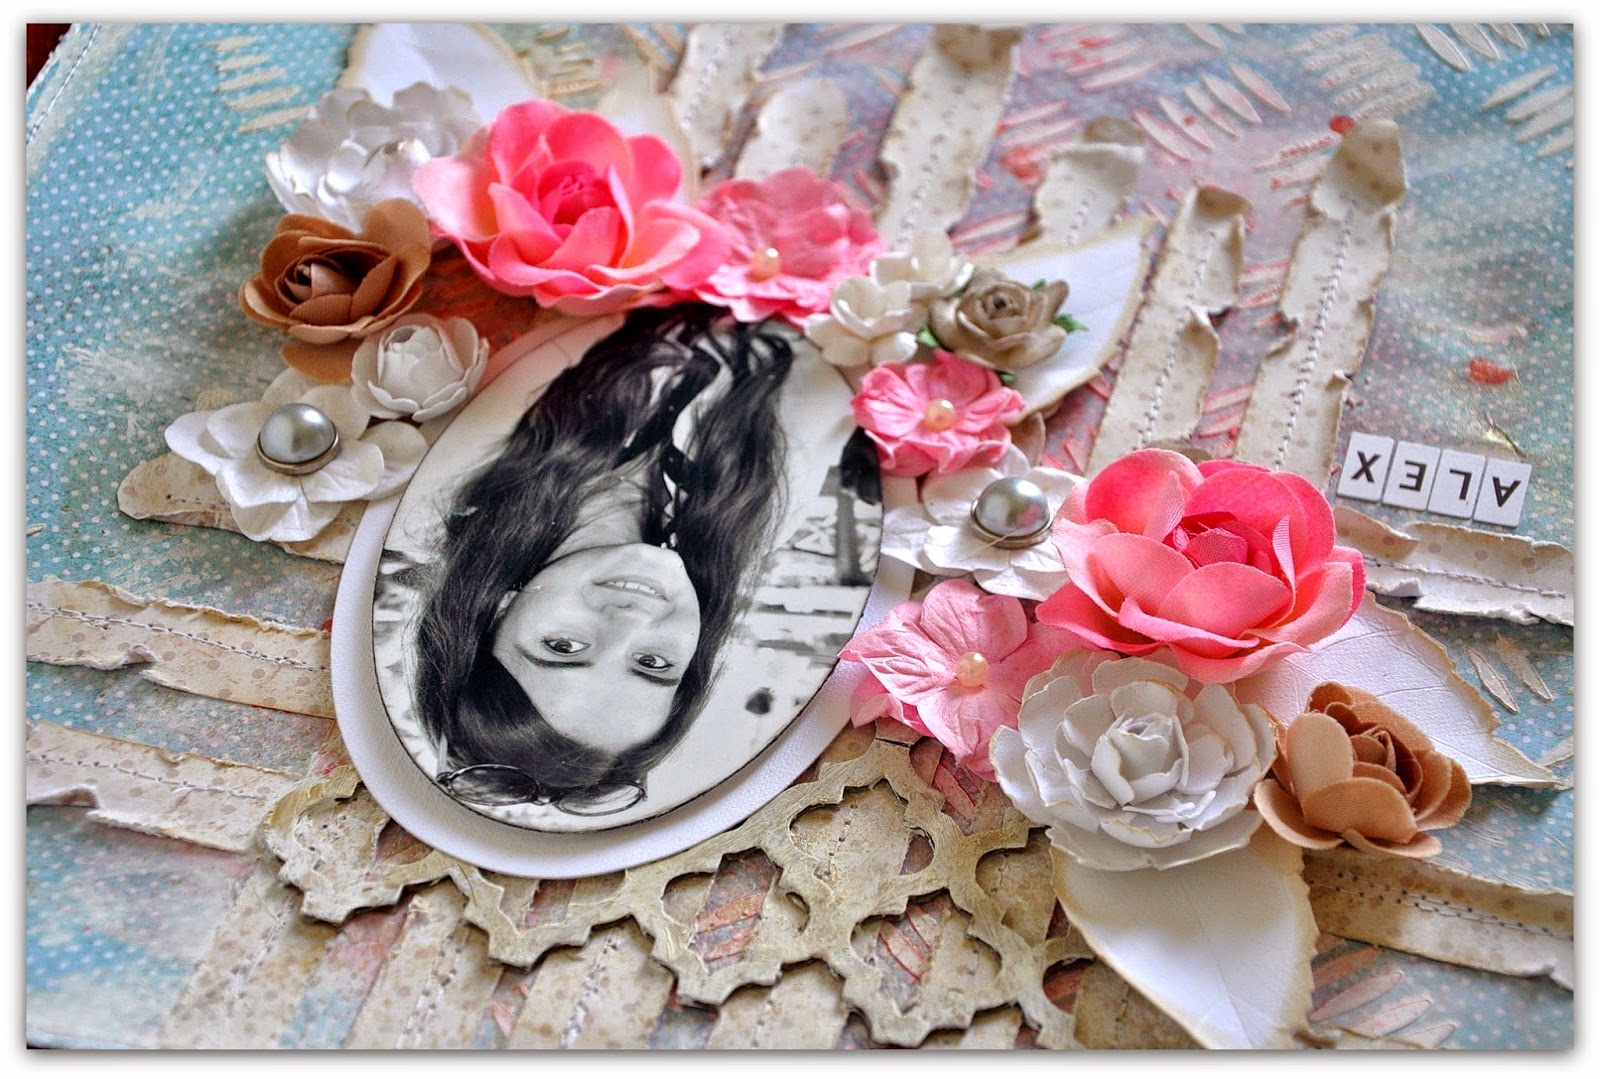
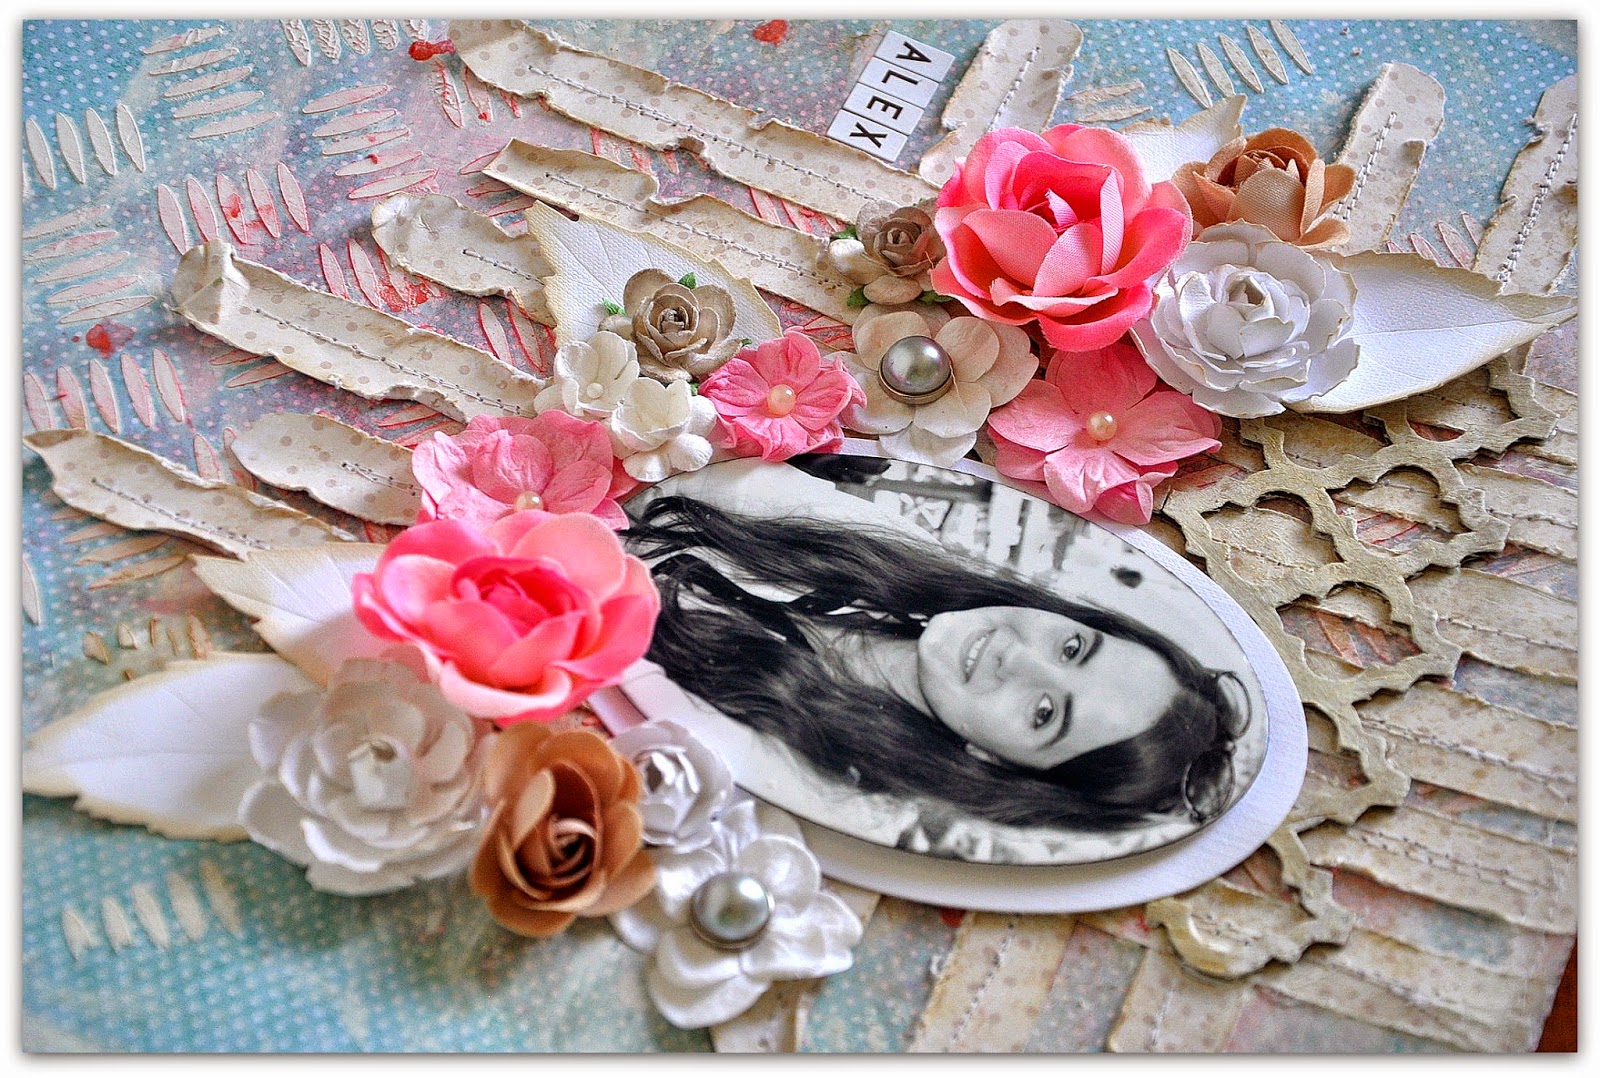
I started with an A6 sized Base card made from stiff ivory card stock and applied the inks with a foam applicator starting from the top down from the light colour (Mustard Seed) to the dark (Walnut Stain). I stood the card up and gently spritzed the top of the card with water allowing it to run down before drying with my heat tool.

I die-cut a strip of paper (thin copier paper is fine) just long enough for my card using the confetti die, this is another die which will prove a useful tool whether as a stencil or for the tiny circles which are so useful. Here I'm using it as a stencil through which to create the pattern using my inks.

I die-cut the butterfly from the same ivory card that I used before and placed the butterfly into the Texture Fades embossing folder which accompanies the Bigz die. As you can see from the image on the right, the detail is superb, but the magic really starts to happen when I start to apply the inks....

 I started with the Mustard Seed (yellow) ink before inking the centre using good ol' Walnut Stain (dark brown). Next, I applied Wild Honey (orange) blending from the tips of the wings inward before adding a little depth around the edges with the Walnut Stain again. If you loved the Block Talk alphabet die then you will love the lowercase version which is a perfect companion. I love the fact that it's a Bigz die which means Heavy weight materials like mount board, leather, textiles, balsa wood etc. can be cut with no fuss or bother whatsoever. I used the die to cut the word 'hello' from mount board covered with a sheet of the ivory card...easy-peasy!


 And here is the finished card, I gently curled the butterflies wings to add a little dimension and sprayed it with a dusting of silver Spray and Sparkle from Crafter's Companion which gives it a light gloss. I always feel that butterflies should be breaking free of a card/layout, they should give the impression that they have just stopped by for a fleeting moment and will be off the minute your back is turned.... or is it just me?


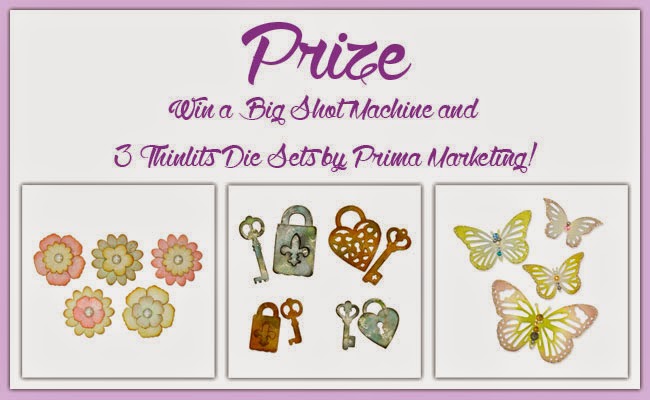
Before I forget, Check out the Prima Blog this week where I am featured with a couple of cards to celebrate the launch of the new range of Sizzix dies designed in conjunction with Prima Marketing Inc. Here is a sneak preview below.


Prima Blog Switch - Day 4!

$
0
0


Hello everyone,

I'm delighted to be part of the 2014 blog switch to launch the fantastic new collection of Flora Grande designs by Prima Marketing. 

To celebrate, don't miss your chance to win with Sizzix! Simply comment on one of the Sizzix blog switch posts such as this one, and be in with a chance of winning! Closing date Friday 18th July at 10am GMT. Good luck!


Let's get started with my projects...


The card:

Since the Love Gears Bigz Dies is made for cutting through different materials I chose to cut into a pair of old jeans. Perfect for a more masculine card. I have also used different shapes from the Enchanted die set. It is fun to have cards in different shapes. The papers and flowers I have used are from the Prima Cartographer collection.


Prima Product list: 
990077 Cartographer paper Marveilleux, fluid chalk ink - Knotted Wood, 574482 Cartographer flowers - Roamer, 574543 Cartographer flowers - Globetrotter
Sizzix Product list: 
Other: white cardstock, jeans, leaves, pearls, title sticker

The layout:
In my layout I have created my background by using masks, colour blooms and stamps from Prima. The flowers frames the photo in a soft and delicate way. Then I cut out the Sizzix dies in black to contrast the softness which makes them really pop. The frame makes a perfect photo mat. The gears and the butterflies are so beautiful together with the flowers. The small hearts are cut-outs from the gears.


Prima Product list: 
813444 Something Blue paper Wedding Planner, 813475 Something Blue Goin' to the Chapel, 813482 Something Blue paper Just Married, 563134 Lady Bird - Clear Stamp, 570514 Cling Stamp, 575311 Something Blue Flowers - First Dance, 573836 Color Bloom Vintage Metal: Tea Stain, 573737 Color Bloom Sparkling Pastels: Cotton Candy, 562939 Engraver Alphabet Stickers, mask


Other: cheese cloth, texture paste

Project Life and Sizzix ! Love it ! by karine

$
0
0

Hello!

A creation inspired by the Project Life today thanks to my set “Life made simple – anniversaire #2”.

Supply list: Folders (Becky Higgins pour American Crafts ); Pattern papers (Jenni Bowlin Mercantile);Project Life cards (Studio Calico); Cardstock (American Crafts); Alphabets (American Crafts, Basic Grey); Stickers (October Afternoon, American Crafts, Studio Calico); Rub-ons (Jenni Bowlin Studio, 7Gypsies); Badge (Jenni Bowlin Studio); Masking Tape, masking tape (Basic Grey) ; Stamps (Florilèges Design); Inks (Grey & black Versafine)

Dies:

659748 : Sizzix Thinlits Die Set 3PK-Birthday#2
658300 : Sizzix Big Shot Starter Kit

I am a big fan of the Project Life so you can imagine how pleased I was when I received the dies from the "Life made simple" collection! They’re all fantastic & so versatile!

The aim here is to create your own Project Life cards thanks to the Sizzix dies! Recycle your pattern papers or cardstock scraps and transform them into Project Life cards!

I also used a chevrons-patterned die that I particularly like! Only one go in the Big Shot and your card is cut out, scooped-out and ready to use! Here I used the "Life Made Simple-Anniversaire #2" set.

The picture will be glued with 3D adhesive for more volume.

Don’t forget that you can keep your scooped-out shapes for a future creation!

What about you? Are you addicted to Project Life?

Have a lovely day,

Karine

Bonjour !

Inspiration Project Life aujourd'hui grâce à mon set "Life made simple-anniversaire #2"

Matériel : Pochettes ( Becky Higgins pour American Crafts ); Papier imprimé ( Jenni Bowlin Mercantile);Cartes pour Project Life (Studio Calico); Cardstock (American Crafts); Alphabets (American Crafts, Basic Grey); Autocollants ( October Afternoon, American Crafts, Studio Calico); Rub-ons ( Jenni Bowlin Studio, 7Gypsies); Badge ( Jenni Bowlin Studio); Masking Tape, Scotch imprimé ( Basic Grey) ;Tampons (Florilèges Design); Encre (Versafine noire et grise)

Die utilisé :

659748 : Sizzix Thinlits Die Set 3PK-Birthday#2
658300 : Sizzix Big Shot Starter Kit

Je suis fan du Project Life, vous n'imaginez pas ma joie lorsque j'ai reçu les dies de la collection "Life made simple"! Ils sont tous à tomber et tellement versatiles !

L'idée est ici de fabriquer ses propres cartes Project Life grâce aux dies Sizzix! Recyclez vos chutes de papiers imprimés, de cardstock et transformez-les en cartes Project Life !

J'ai utilisé ici une découpe Sizzix Chevrons que j'affectionne particulièrement ! Un simple passage à la Big Shot et votre carte est découpée, évidée et prête à l'emploi ! J'ai utilisé ici le set "Life Made Simple-Anniversaire #2"

La photo sera ensuite collée à l'aide de mousse 3D pour plus de relief.

Pensez à conserver les formes évidées pour une prochaine utilisation !


Et vous ? Addict au Project Life ?

Bonne journée

Karine

Adopted blocks - the final chapter

$
0
0


 It's with a slight sigh of relief, that I'm at the point of completing the instructions for this quilt - so without more ado here are the final 4 blocks -
The following Bigz dies are used throughout this quilt, with the Big Shot machine -
657606 Square - 2 1/2" finished http://www.sizzix.co.uk/product/657606/sizzix-bigz-die-square-2-1-2-finished-3-unfinished
657620 - Quarter square triangle 2 1/2" x 5" finished  http://www.sizzix.co.uk/product/657620/sizzix-bigz-l-die-triangle-3-1-8-h-x-5-1-2-w-unfinished
657610 - Half-square Triangles 2 1/2" finished http://www.sizzix.co.uk/product/657610/sizzix-bigz-die-half-square-triangles-3-finished-square
657624 - Rectangle 2 1/2" x 5" finished http://www.sizzix.co.uk/product/657624/sizzix-bigz-l-die-rectangle-2-1-2-x-5-finished-3-x-5-1-2-unfinished
657627 - Trapezoid 2 1/2" x 5" finished http://www.sizzix.co.uk/product/657627/sizzix-bigz-l-die-trapezoid-3-x-5-1-2-unfinished
I am trying to keep the instructions simple - so use the photo of each block as a guide throughout.

Block 17 Geese and Squares
White fabric - 18" x 4" - cut 4 x 1/4 square triangles
Assorted prints - to cut 8 squares and 8 half square triangles.
Lay all the pieces out to create a mix of the prints.
Join the 8 half square triangles to the diagonal sides of the 1/4 square triangles to create the 'geese'.
Join the squares in pairs to make rectangles.
Join the rectangles to the 'geese' to create squares.
Join the 4 squares together.

Block 18 Kings Crown
White fabric - 16" x 8" - cut 8 triangles
Aqua fabric 7" square - cut 4 squares
Green print, and pink print - 7" x 3 1/2" of each - cut 2 squares of each.
Bright pink print - 18" x 4" - cut 4 x 1/4 square triangles
Join the white triangles to the bright pink triangles, to make a flying geese,and then join aqua squares to each end of 2 of these.
Join the pink and green squares together to create a square.
Join the 2 remaining flying geese to each  opposite sides of the flying geese.
Join together to finish the block.

Block 19 Endless Stairs


White fabric - 14" x 6"- cut 4 rectangles
Blue print -  fabric - 14" x 6" - cut 4 rectangles
Join the blue and white rectangles to make squares.
Join the squares to create the stairs as in the photo.

Block 20 Simply Squares
White fabric - 14" x 6"- cut 4 rectangles
Pink/black print 14" x 4" - cut 4 squares
Bright pink print and blue print - 7" x 4" cut 2 squares from each.
Join the pink/black squares to each end of 2 white rectangles.
Join the bright pink and blue squares together to make a square, and add rectangles to opposite sides. Join the pieces together to complete the square.

HOORAH - all the blocks are now complete.

To finish the quilt I cut 3" wide strips for the sashing.
Lay the blocks out on the floor,  4 blocks across and 5 down. Arrange as you like to create a balance of pattern and colour.
I created 4 rows by 5 blocks with sashing in between, and then joined the 4 rows together with the sashing.
I then added a 5 1/2" border to all 4 sides of the quilt top - 58 1/2" x 70 1/2".
I used the same fabric for the back, piecing it to create the right width.
Finally I added the binding to complete the quilt.


I t feels like it has been a bit of a marathon - but I wanted to finish  it, so that we can move onto preparations for Festival of Quilts - and to give you little glimpses of what I'm making to prepare for all the workshops! and the stand display.
It's only 4 weeks away - still too early to count sleeps - which is what I do with my grandchildren as a countdown to any important events! but there is still so much to do!!!
However it is only 1 sleep until I go to stay with my grand-daughters - and I have plans to be creative with them - so watch out for something new next week -  as well as a sneak preview of some things for Festival of Quilts.
Keep sewing.
Angela


Prima Blog Switch - Day 5

$
0
0

Hello!


These tags were so fun to create using the new Winged Beauties butterfly dies and Prima's Free Spirit collection. The fun color palette and sweet butterflies go perfectly together, for one of kind projects. The delicate butterfly images add dimension and whimsy within the flower clusters or all on their own. Plus, they make a wonderful embellishment on just about any project you want to create. The versatility of these dies make them a must have for your Sizzix die collection. 


Product List:
574208-Free Spirit-Beatniks
846695-Free Spirit 12x12 Collection Kit
573645-Free Spirit Chipboard
572983-Free Spirit Metal Clips
573232-Free Spirit Tags and Tickets
573379-Trim
572266-Lace Sticker
569532-Flair
910686-Tag Pad
Ribbon
Twine

Don't forget about your chance to win! Simply comment on one of the Sizzix blog switch posts and you could win a Big Shot and selection of Prima designed dies! Closing date: Friday 18th July at 10am GMT. Good luck!


Prima Blog Switch - The Final Day!

$
0
0


Hello!

Thanks for joining me on the final day of our blog switch! It's been a great week!

We've had some EXCITING news recently! My son, Billy, recently got engaged so I wanted to create a little journal for him, and his sweetheart, Bethany!

I started by painting one of Prima's fun journals with white paint, then spritzed a bit of Gold Foil Color Bloom spray on top for a soft, shimmery effect. Once it dried I added layers created with the Enchanted Framelit dies from the Flora Grande set.


Tip: Use the framelits for your photo too. Everything will nestle together perfectly, making the photo the star of the project. Top your framed photo with beautiful Prima flowers, and a few glistening butterflies cut with the Winged Beauty Thinlet Die and gold vellum!
Thank you, Sizzix, for letting me play with the new dies! They are absolutely marvelous and so versatile no matter what type of project you want to create with them!


Sharon Laakkonen (You can see more of my projects, and photos of my family, on my blog!)

Prima Products:
Princess Flowers 574406, Shabby Chic Treasures Metal Nameplate 892319, Something Blue Flowers 575274, Fairy Rhymes Journal 950644, Gold Foil Color Bloom Spray 573805, Wood ATCs 572921, Annalee Paper 841812

Sizzix Products:

Don't miss your chance to win a Big Shot machine plus 3 of the dies from our new collection. Simply comment here and you could win! Closing date for comments : Friday 18th July at 10am GMT. Good luck!


A birthday card by Olga

Card with the new butterfly dies from Sizzix/Prima.

$
0
0

Hi, today I'm here to share a card using some new and very lovely dies that resulted from  a collaboration between Prima Marketing and Sizzix. This time I have used the butterflies, but the Flora Grande collection has lots of other beautiful designs to choose from.

And a couple of close ups:


1. Cut out your cardbase ca 14cm X 14 cm.
2. Cutout two triangles, one just slightly larger than the other..
3. Chalk around the edges.
4. Layer and glue all the pieces together with the triangles in the center .
5. Die cut three middle sized butterflies and three smaller ones..
6. Glue the small butterflies on top of the middle sized ones.
       Add a rose on top as embellishment.
7. Place the three layered butterflies on your card and fasten with pop dots.


Sizzix Thinlits die set Winged Beauties

I used additional supplies from Prima Marketing collection Almanac and Delight.
The mini roses are by Papirdesign.

Thanks for looking!
See you next Sunday!
 

-----------OOOOOOOOO-----------


Hei hei! Idag vil jeg vise dere et kort jeg har laget med en av de nydelige Flora Grande diesen
Disse er et resultat av samarbeidet mellom Sizzix og Prima Marketing.
Denne gangen har jeg valgt sommerfuglene, men den nye FloraGrande kolleksjonen inneholder mange andre supre varianter å velge mellom.!

1. Lag en kortbase, min er ca 14cm X 14 cm.
2. Klipp ut to triangeler, det ene ca 0,5 cm större enn det andre.
3. Ta litt chalk/ink runt kantene.
4. Lim sammen alle lager med trianglene i mitten.
5. Stans ut tre mellomstore og tre mindre sommerfugler.
6. Lim den lille sommerfuglen på den store og til sist en minirose.
7. Plasser de tre sommerfuglene på kortet med limputer.

Jeg brukte.

Sizzix Thinlits die set Winged Beauties

Dessuten brukte jeg  papir fra Prima Marketing (Almanac, Delight)
og mini roser fraPapirdesign.

Takk for at du kikker in!
Ses på söndag igjen!


Shabby chic flower card

$
0
0
Hi everybody!

Today I want to share with you a Shabby chic card using basic dies and embossing folders.


Sometimes I'm in a romantic mood and I like to craft something Shabby chic. I love to use the Textured Impressions embossing folders in this style, in combination with some distress ink for a little bit of color and softness. In this case I have applied this technique in the card background and also in one of the scallop ovals. Then I have created  a bouquet with some paper flowers and leaves from Tim Holtz's Garden Greens Bigz die. Finally I have attached some pearls and the card is done. Very easy and romantic :)

Happy Monday!


..........................
¡Hola a todos!

Hoy os enseño una tarjeta Shabby chic utilizando troqueles básicos.

A veces tengo un humos un poco romántico y en esos momentos me gusta scrapear algo en estilo Shabby chic. Me encanta utilizar las carpetas de textura en estos casos, combinadas con tinta Distress para dar un poco de color y suavidad. En esta tarjeta he utilizado esta técnica en el fondo y en uno de los dos óvalos. Después he creado un bouquet de flores de papel y hojas troqueladas con el troquels Garden's Green de Tim Holtz. He puesto unas perlitas y tarjeta terminada. Muy fácil de hacer y muy románitca.

¡Feliz lunes!


YOU ARE BEAUTIFUL.......

$
0
0
Hi everyone
I hope you all had a great week, today I will show you a layout. I have used the amazing Tim Holtz dies and a photo of our lovely granddaughter.
Items used:
Supply list:
Paper: Paperstash Tim Holtz WallFlower 12x12 Menagerie 8x8
Ink: Archival ink Coffee
Stamp: Design Stempelglede.com -Follow Your Heart-
Glossy accent

Thanks for stopping by and thanks forthe kind commentsin my lastblogpost, it makes meso happy
Wish you a beautiful week
Pia
Hej alle
Jeg håber du har haft en dejlig uge, i dag vil jeg vise et layout hvor jeg har brugt de fantastiske Tim Holtz dies, fotoet er fra vores smukke barnebarns konfirmation.
Items used:
Supply list:
Papir: Paperstash Tim Holtz WallFlower 12x12 Menagerie 8x8
Ink: Archival ink Coffee
Stempler: Design Stempelglede.com -Follow Your Heart-
Glossy accent
Tak fordi du kiggede forbi og tusind tak for de søde kommentarer i mit sidste blogindlæg , det gør mig så glad
Pia
 

Little Princess

$
0
0

Hello to everyone:) Today I want to show you this tag I made for a baby girl.


Sizzix products:
Sizzix Big Shot Starter Kit (Powder Blue & Teal) 658300
Sizzix Frameworks Die - Courtyard 659429
Sizzix Bigz Die - Tattered Florals 656640


Other products:
Pion Design papers; Sweet Baby
Stempelglede stamp from the set Follow Your Heart
Distress Ink Crackle Paint - Rock Candy
Distress Ink - Frayed Burlap
seam binding ribbon
glue
tape
tag
fastener

How to do:
1. Cut the patterned paper size 8,5 cm x 16,5 cm (shape like tag)
2. Distress and sew all the edges. Ink them using Frayed Burlap DI and tape it on to the tag.
3. Cut the framworks using Sizzix Frameworks Die - Courtyard 659429 and apply crackle paint, allow to dry.
4. Cut also the big flower using Sizzix Bigz Die - Tattered Florals 656640 and the big butterfly using the die what is included the Sizzix Big Shot Starter Kit (Powder Blue & Teal) 658300.
5.  Take the piece of patterned paper (size 7,5 x 11,5 cm and tape it on to tag.
6. Fasten the framework using fastener.
7. Cut the baby image and the butterfly out from the patterned paper, stamp the sentiment and place all them like above.
8.  Finally make a bow and glue it on to the top of tag.

Wishing you a warm and sunny Wednesday, Minna

*   *   *   *
Hei, tällä kertaa tagi pienelle tyttövauvalle.

Sizzix tuotteet:
 Sizzix Big Shot Starter Kit (Powder Blue & Teal) 658300
Sizzix Frameworks Die - Courtyard 659429
Sizzix Bigz Die - Tattered Florals 656640

Muut tarvikkeet:
Pion Design paperit; Sweet Baby
Stempelgleden tekstileima setistä Follow Your Heart
Distress Ink Crackle Paint - Rock Candy
Distress Ink - Frayed Burlap
saumanauhaa
liimaa
teippiä
valmis tagi
nitoja

Kuinka teet tämän:
1. Leikkaa kuviopaperi tagin muotoiseksi n. 8,5 cm x 16,5 cm.
2. Ressaa ja ompele kaikki reunat, levitä DI mustetta Frayed Burlap reunoihin ja teippaa tagiin.
3. Stanssaa framework käyttäen  Sizzix Frameworks Die - Courtyard 659429 ja levitä Distress Ink Crackle Paint - Rock Candy, anna kuivua.
4. Stanssaa myös iso kukka käyttäen  Sizzix Bigz Die - Tattered Florals 656640 ja iso perhonen käyttäen stanssia joka sisältyy kittiin Sizzix Big Shot Starter Kit (Powder Blue & Teal) 658300.
5. Ota pala kuviopaperia  7,5 x 11,5 cm ja teippaa se tagiin.
6. Kiinnitä framework nitojalla tagiin.
7. Leikkaa vauvakuva ja perhonen kuviopapereista, leimaa teksti ja asettele ne kaikki kuten kuvassa.
8. Lopuksi tee rusetti saumanauhasta ja liimaa se tagiin.

Oikein aurinkoista keskiviikkoa,
Minna


A nod to the 80's

$
0
0


This week I felt like creating a card with a nod to the neon trend that is raging through scrapbooking, card making, clothes and interior design. I never thought I'd fall in love with neon colours (I grew up in the 80's so I've had my fair share of neon things) but never say never, right?
 
 
My first step was to emboss a piece of white paper using the embossing folder that comes with the Big Shot Starter Kit and then take it outside to spray it using various glimmer mists and ink sprays. I started with the light yellow at the top, then the green and finally the dark turqoise. Once I had all the colours on the paper I went over the entire page with a light coating of the yellow glimmer mist, because I wanted the entire paper to have a bit of the sheen from the glimmer.
 
 
Now it was time to make the embossed paper work as the centerpiece for my card. I didn't want to overwhelm the paper with a lot of embellisments so I chose to add some cotton lace, seam binding, dymo tape greeting and a few sequins.


I am really pleased with the way the embossing stands out and disappears across the card because of the different colours I used. Embossing is such a fun and easy technique and I hope you are inspired to pull out some of your embossing folders.
 
Supply list:
Cardstock
Glimmer Mist (Tattered Angels)
Ink spray (Ranger)
Seam binding
Cotton lace
Dymo tape
Staples (Tim Holz)
Sequins
 
---o---
 
I denne uge havde jeg lyst til at lave et kort, der knytter an til den neon-trend, der løber gennem kortmageri, scrapbooking, mode og indretningen. Jeg havde aldrig forestillet mig, at jeg skulle forelske mig i neonfarverne (jeg voksede op i 80'erne, så jeg har haft masser af neon i mit liv), men man skal aldrig sige aldrig, vel?
 
Første skridt var at embosse et stykke hvidt papir med den embossingfolder, der følger med Big Shot Starter Kit, og derefter tog jeg det med udenfor for at spraye det med forskellige glimmer mists og ink sprays. Jeg startede med den lyse gule på toppen af papiret, derefter den grønne og til sidst den mørke turkise spray. Da alle farverne var på, sprayede jeg et let pift af den gule glimmer mist, så hele papiret fik lidt glimmer.
 
Nu var det tid til at lade det embossede papir være stjernen på mit kort. Jeg ville ikke overdøve det embossede, så jeg tilføjede bare lidt bomuldsblonde, seam binding, dymotape og palietter.
 
Jeg er ret tilfreds med den måde embossingen kommer til at stå frem og forsvinde lidt på grund af de forskellige farver, jeg har brugt. Embossing er sådan en sjov og nem teknik, og jeg håber, at du er blevet inspireret til at hive dine embossingfoldere frem.
 
 
Ingredienser:
Karton
Glimmer Mist (Tattered Angels)
Ink spray (Ranger)
Seam binding
Bomuldsblonde
Dymo tape
Hæfteklammer (Tim Holz)
Palietter

Owl Mash Up!!

$
0
0

A'mash up' started as a musical term which describes the blending of two songs very often in very different styles/genres, think ABBA and Black Sabbath...... you get the idea!

This month we are releasing three new collections from Tim Holtz, Prima and Lori Whitlock. I love them all and I want to share as much as I can but time is against us my friends, so I got thinking and.......

Here is a gift box made using the Bigz XL owl bag. It's a really lovely die perfect for party favours and the like and I'm sure you will be seeing it in many magazine projects and in many different colour combinations and materials.


This is a fabulous and super-useful die and as I said above, you will see oodles of pretty owl boxes so I wanted to shake it up a bit and throw in a die from the Prima (Flora Grande) collection. When I say die I am actually referring to a set of dies (nine to be exact) named Rondeaux which are basically, gears with hearts between the spokes in various sizes (I LOVE!!!!!).

I also want to use only one colour, (What!!!) and that colour is black, (Gasp!!!) so I will need a little help from my silver gilding wax (Phew!!!)

I started by die-cutting the four parts to make up the main body of the box from graphite sparkle which is a black heavy weight card with holes drilled through it and is made by Inspire Me Papers, check out the link above. Next, I set about putting the box together which is surprisingly simple as these things can often be quite fiddly! Once it was ready I gently rubbed the edge using the gilding wax, the one I used is called Treasure Pewter you can use a soft cloth but I prefer to use my finger tips which gives you more control but mainly because it smells like boot polish Mmmmmm! 


I Die-cut all the elements to finish the owl and embossed the main body using the Sweet Dots folder from the new Lori Whitlock collection. Next I strategically applied the wax to all the die-cuts except the eyes. and gently curled the three rows of feathers before assembling the owl.

There was still one bit missing, this is where the gears come in. I die-cut two sets to create the eyes and gave them the pewter treatment.

And here is the finished 'Steampunk' owl. For the finishing touches I used screw head brads in the centre of the eyes and mounted both sets of gears with 3D foam pads. I embossed the owls nose using the folder from the new Big Shot starter kit, don't worry if you don't have it there are plenty that will do the job just as well.


Just a reminder, if you want to see a little more of the Prima dies I featured as a guest designer on their blog last week and here is the link. the image below is one of two projects featured.


Mini books covers by Karine

$
0
0


Hello!

It’s been a while since I haven’t shown you a mini book! Here are the covers of mini books that I will teach in a few months.

Supply list:

Papers: Basic Grey, Crate Paper
Alphabets: Glitz Design
Stickers: Basic Grey, Jenni Bowlin Studio, Glitz Design
Wood Decoration: Scrapfellow
Stamps: Florilèges Design
Inks: Chalks
Spray ink: Scrap Plaisir
Others: tag, masking tape, 3D foam, twine

Die:

658300 : Sizzix Big Shot Starter Kit
656545 :Sizzix Bigz Die-Flower 3D

Here is the perfect die for a 3D feminine easy-to-do decoration! It is ideal for mini books covers or for your scrapbooking pages.

Cut your two different sizes of shapes out of pattern paper, white Bristol paper or cardstock like I did here.

Spray generously some “vert orchidee” ink spray and let it dry in the open. Add a bit of water to your spray bottle should you want to lighten the shade.

Once your paper is dry, all you need to do is roll it from the outside towards the core of your flower. Fix with liquid glue! Your embellishment is now ready to use!

To use again & again!


See you next Thursday!

Have a lovely day!

Karine

Bonjour !

Ca fait un petit moment que je ne vous ai pas présenté de mini album ! Voici aujourd'hui deux pages de couverture de mini albums que je présenterai à la rentrée prochaine.

Matériel :

Papiers : Basic Grey, Crate Paper
Alphabets : Glitz Design
Autocollants : Basic Grey, Jenni Bowlin Studio, Glitz Design
Décoration en bois : Scrapfellow
Tampons : Florilèges Design
Encres : Chalks
Encre en spray : Scrap Plaisir
Divers : tag, masking tape, mousse 3D, cordelette

Die :

658300 : Sizzix Big Shot Starter Kit
656545 :Sizzix Bigz Die-Flower 3D

Voici le die parfait pour une décoration en volume facile à faire et très féminine ! L'idéal pour des couvertures de mini albums ou encore sur vos pages de scrap.

Découpez vos deux formes de tailles différentes dans une chute de papier imprimé ou dans un bristol blanc, cardstock comme ici.

Vaporisez généreusement d'encre en spray vert orchidée, laissez sécher à l'air libre. Ajoutez un peu d'eau au vaporisateur si vous souhaitez éclaircir votre teinte.

Une fois votre papier sec, il vous suffit de l'enrouler en commençant de l'extérieur pour aller vers le centre de votre fleur. Fixez avec de la colle liquide ! Votre embellissement est maintenant prêt à l'emploi !

A utiliser sans modération !

A jeudi prochain

Bonne journée

Karine


Countdown to Festival of Quilts!

$
0
0

In just 3 weeks time the show will be open and in full swing! As I write this I'm holding down the panic and telling myself calmly that everything will be ready in time! So what has me in such a spin - to start with  - I need to prepare the kits for the workshops - 432 - and make sure that we have all the necessary pins, needles, scissors and threads.
Then I'm making new pin cushions - to co-ordinate with our new bunting ( which is complete ), and then there are table runners and some cushions for display - so these items will be appearing on this blog over the next few weeks, and of course you'll be able to see the real things if you come by and see us at the Festival.
So this week I'm previewing the pincushions - I saw a pincushion similar to this one in Love Patchwork and Quilting - so I've adapted it and altered the size a bit to fit in with our dies - 

To make this I used small pieces of 4 fabrics - and the new 1" finished square die -http://www.sizzix.co.uk/product/659987/sizzix-bigz-die-squares-1-finished-1-1-2-unfinished
This really can use up some of your scraps - and you could start now to make a basket full for little Christmas gifts  -
Using the appropriate dies and Big Shot  cut 2 x 1 1/2" squares from 2 contrasting fabrics
Cut 1 x 2 1/2" square from fabric 3 and finally cut a rectangle with the 4th fabric.
 
Join the small squares together in pairs -
 
and then join the pairs together and join to the larger square -
Join the front to the rectangle back with right sides together - leaving one end open turn right side out
Stuff the pin cushion and slip stitch the opening shut.
Attach ribbon around the middle to complete -
I think it's cute - and if you slipped some plastic or cardboard in the back then you could attach elastic to the back and make it a wrist pin cushion.
So 1 down 15 more to go!!
More projects with new dies next week - and it will be only 2 weeks until the show - have you got your tickets yet?
Have fun.
Angela


Back to basic - circles & butterflies

$
0
0


Hello Sizzix UK fans! It's Karola here with a new inspiration for you today! For my today's post I created a layout with the photo of me and my Ireland sweet friend Marta. This time I decided to do not use patterned papers, just the white cardstock with some mediums, Sizzix dies and embossing folder. I just wanted to back for a while to basic way for creating simple, but fantastic handmade embellishment for our pages or cards. I think it is very easy and you will have a lot of fun while creating with use just scissors, dies and simple material. 


Circles are my one of the most favourite motifs, these are so versatile and useful for any occasion and for every style. For my background I used watercolor paints and stamps, but to create embellies I used Sizzix Framelits Die Set 8pk - Circles2 to cut a few circles in a various sizes and create interesting addition to my page. Each circle was embossed coloured with spray paints and embossed using folder with trellis motif. 


I just cut out also some various butterflies using Sizzix Sizzlits Decorative Strip Die - Butterfly Frenzy, then I coloured each of them and added some white gesso on the top of the circles and butterflies  to create an interesting texture and more delicate and shabby look to my embellies. As you can see, I stuck cirlces using 3D foam tape and created a few layers with them. Butterflies are an amazing motif to make an airy, light, delicate look on any projects, i just love this design and love the possibility that with the Butterfly Frenzy die we can cut lots of tiny butterflies in a few shapes and sizes at the same time! Very, very useful and versatile die!


Sizzix supplies used:
658356 Sizzix Textured Impressions - Rose Vines & Trellis 2pk


Thank you for visit us today! 
Have a wonderful weekend! 
~~ Karola ~~ 


****************************


Witajcie fani Sizzixa! Tu Karola i dzis znow moja kolej, aby podrzucic Wam odrobine inspiracji. Tym razem mam do pokazania layout z wykorzystaniem prostych ale bardzo efektownych motywow kolek oraz motyli, bez wzorzystych papierow do scrapbookingu - tylko wykrojniki i foldery Sizzix oraz bialy brystol i odrobina kolorowych mediow.  Po prostu chcialam na chwile wrocic do prostych rzeczy - prostych motywow, nieskomplikowanych, lecz ciekawych dodatkow, o ktorych wygladzie w duzym stopniu decydujemy sami. Mysle, ze nie bedziecie miec zadnych trudnosci z samodzielnym tworzeniem ciekawych dodatkow do prac, korzystajac z produktow Sizzixa.

Kolka to jeden z moich ulubionych motywow, sa niezwykle uniwersalne, ponadczasowe, pasuja na kazda okazje i do kazdego stylu. Moj layout zaczelam od stworzenia tla za pomoca farb akwarelowych oraz stempli. Nastepnie wycielam kilka roznej wielkosci kolek, korzystajac z wykrojnikow Sizzix Framelits Die Set 8pk - Circles2. Kazde z kolek pokolorowalam za pomoca farbek w sprayu i wytloczylam na nich wzory, korzystajac z folderu do embossingu. 

Wycielam rowniez troche roznej wielkosci i ksztaltu malenkich motyli za pomoca wykrojnika Sizzix Sizzlits Decorative Strip Die - Butterfly Frenzy i pokolorowalam je tak samo jak wczesniej wyciete kolka. Na koniec dodalam nieco bialego gesso na wierzch zarowno kolek jak i motyli, aby dodac lekkosci i delikatnosci do moich ozdob. Kolka przykleilam do pracy za pomoca tasmy 3D, tworzac z nich kilka warstw. Motyle takze sa bardzo uniwersalnym motywem, szczegolnie w okresie wiosenno-letnim. Dzieki wykrojnikowi Butterfly Frenzy mozecie wyciac mnostwo niewielkich motyli w kilku roznych ksztaltach i rozmiarach podczas tylko jednego ciecia! To ogromne ulatwienie!

Mam nadzieje, ze udalo mi sie zainspirowac Was do wlasnorecznego stworzenia kilku ciekawych dodatkow do prac, za pomoca wykrojnikow i folderow Sizzix.

Wykorzystane materialy Sizzix:
658356 Sizzix Textured Impressions - Rose Vines & Trellis 2pk


Dziekuje za odwiedziny na naszym blogu i zycze Wam jak zwykle wspanialego i kreatywnego weekendu!

Karola 

Appliqueing Tattered Dies

$
0
0


Hi again, today I wanted to share a project in work I have been doing some time ago.It´s about applique again but this time using some of my favourites Tim Holtz dies,  bird and flowers and leaves.


Sizzix Bigz Die - Tattered Florals


Sizzix Bigz Die - Tattered Leaves

Sizzix Bigz Die - Caged Bird


My first idea was triying to use some different dies that are not especially for quilting and see how they work.
I must to say I loved what I got.
Here they are some pics.


Now I need to finish some quilting and sew all the pieces. Then , I will show you the finished project.


This is a project that I´m wishing to finish because I have been working on it a lot of time so I hope I you can see it soon.


Hope you have a wonderful weekend!!

Love
Mercedes


...........................................*************............................................


Hola de nuevo a todos, hoy quería compartir un proyecto  que he estado haciendo hace tiempo. Se trata de nuevo de hacer aplicaciones pero esta vez usando los troqueles de Tim Holtz, concretamente unos que son mis favoritos, flores, hojas y pajarito.

Mi primera idea era usar troqueles que no fueran específicamente para patchwork y ver cómo funcionaban.
El resultado me ha encantado y ahí podéis ver algunas fotos.

Ahora tengo que terminar de acolchar, coser y hacer el montaje y entonces te  enseñaré cómo queda acabado.

Estoy deseando acabarlo  porque he estado trabajando bastante tiempo en ello  asi que espero que pronto lo puedas ver. 


Que tengas un maravilloso fin de semana
Cariños 
Mercedes

Bunch of flowers Card

Summer Happenings

$
0
0


I hope you all have been enjoying your summers! I am back from my #PaperTrail Tour teaching crafts from my vintage camper. Read about my teaching travels on my blog here.

It was so much fun I am now gearing up for the next one. Here's my feature in Where Women Create! Road trip!


I leave on September 2 for TWO MONTHS. There are all kinds of fun events planned along the way, including stops to teach in stores, visiting craft celebrities and I'll be teaching private classes too. Scotty is being set up as a Pop-Up Trailer Shop as we speak, and will be loaded up with dies and vintage embellishments. I can't wait and am so blessed to be able to take the time to do this. I hope you will follow along on my Facebook page and blog where I will be posting pics and videos.

My Inspiration Team has been going to town creating beautiful projects while I have been on the road. Please hop on over to my blog on Tuesdays to see the latest designs from them- I promise it is worth the trip! Each month we have a theme for our Art With Heart Challenge. For July it is Red, White and Beautiful. You are invited to play along and post your latest creations- there's a fun prize involved too!
Here are a few inspirational peeks...


Visit Shelly's blog for a great tutorial on how to construct this amazing Garden Tote.


Michelle Zerull shows how to make a cool Mail Box.


Anna-Karin Evaldsson created a summer album- love it! 
Rina Gonzales makes a cool summer banner from the Canning Jar die.


Here's a fun patriotic block from Tracy Evans.

A flower arrangement by Donna Budzynski makes a great patriotic centerpiece!

On Thursdays we have new projects posted on The Artists on the Block site where artists from all over the world are taking the Sizzix 3" Block/Cube/Bank die to the next level- exploring new techniques and combining the blocks to make storage pieces- so inspiring!

Pam Bray created this beautiful block for her son's wedding. So many flowers and all handmade!


Next time I will share more Team ATB photos. Keep on crafting...

'Alex' using Frameworks die and Tattered florals and leaves

$
0
0


Hi friends!
I am very happy to be back here with you to share my latest page.
I used a lovely picture of my eldest DD  (I can't believe I have grown up daughters already,.... :-D )
and some of my favourite Sizzix dies.


1. I started by prepping my background with gesso and then modeling paste.
2. When dry I sprayed with two different colours of mist.
3. I cut and distressed strips of papers and arranged them on my page. I then stitched them in place.
4. I used the Frameworks die to cut three pieces from corrugated cardboard that I painted with gesso.
5. I I cut and assembled some Tattered florals and Tattered leaves.
6. I die cut  my photo with the ovals die set and also some white Bazzil to back it.
7. I arranged and glued down all my elements and added the title.


I used one of the Susan's Garden tools to scratch a pattern into the leaves to make them more dimensional.


I really love the way the Bigz dies let you cut almost anything.
Today I upcycled an old cardboardbox that I received soem scrapbook supplies in.
The Bigz die cut through it 'like butter'.


These are the Sizzix products I used:


Most other ther supplies are by Papirdesign. 
Brads are by Kaiserkraft. 
Pink and brown fabric flowers are by Prima.
Prima Color Bloom mists.


---------------------------------oooooooooooooooo-------------------------------------

Hejsan, kul att vara tillbaka här med en ny sida att visa.
Jag använde en vacker porträttbild på äldsta dottern (kan inte fatta att jag har så vuxna barn,.... :-D ) och några av mina favorit dies från Sizzix.
1. Jag startade med att preparera bakgrunden med gesso och modelleringspasta.
2. När det torkatsprayade jag på det med två olika färger av mist.
3. Jag klippte ut och distressade några pappers strips och arrangerade dom på sidan. Sedan sydde jag fast dom.
4. Jag använde Frameworks die Trellies och skar ut motivet från en bit pappkartong från en låda jag fått scrapsaker i. Sedan målade jag dom med gesso.
5. Jag skar ut och satte samman några Tattered Florals och Tattered Leaves.
6. Jag ville ha en annan form på fotot så jag skar ut det med Sizzix framelits ovals. Jag skar även ut en som var snäppet större i Bazzil för att ha som bakgrund för fotot.
7. Jag placerade slutligen ut mina element där jag ville ha dom och limmade fast dom.


Jag använde ett av verktygen från Susans Garden tool kit att skrapa på löven så det såg ut som bladnärver.

Jag gillar skarpt hur du kan använda Sizzix Bigz dies för att skära ut nästan vad som helst!

Idag gav jag nytt liv till en gammal pappkartong som jag fått scrapbooksaker i.
Bigz dieen skar genom det som om det vore smör.....!


Här är de Sizzix produkt jag har använt:


De flesta andra produkterna är från  Papirdesign. 
Brads kommer från Kaiserkraft. 
Rosa och bruna tygblommor tillverkas av Prima Prima.
Dessutom Prima Color Bloom mists

Viewing all 2033 articles
Browse latest View live