Quantcast
Channel: Crafting ideas from Sizzix UK
Viewing all 2033 articles
Browse latest View live

"Joyful Days in Rome" Layout

$
0
0


How can we capture a happy day of our life??
Thanks to the Big Shot and to the fantastic Sizzix dies!!
In this work I wanted to remember a few days spent in Rome with my husband.
I used a lot of dies and I had so much fun with autumn colors.
 I used:
Cardstocks
Hot Glue
Glue
Scissors
Ink Pads
to create a floral background on the white cardstock.
to die cutting the photos.
 I used some dies from
to die cutting many leaves of various colors.
to die cutting three 3D roses. I die cut the "Joyful" and "Holiday" words
I cut off "Holi" from the "Holiday" word.

I assembled everything and created this beautiful layout!!
I love it!!

Thank you for visiting today!!


Christmas Card Prototype #1

$
0
0


Hey guys,
it´s time for the first protoypes of christmas cards, right? So here is my first idea. In turquoise, mint, gold and white. I think this looks really cute! :)


List of supplies that I used:
Sizzix Big Shot Plus Starter Kit (White & Gray) #660515
Sizzix Accessory - Cutting Pads, Standard, 1 Pair (Mint) #660522
Sizzix Accessory - Standard Magnetic Platform for Wafer-Thin Dies #656499
Sizzix Framelits Die Set 8PK - Circles #657551
Sizzix Thinlits Die Set 11PK - Handwritten Holidays #660979
Sizzix Textured Impressions Plus Embossing Folder - Happy Texture #660876

Have you started making your christmas cards yet? :)
Have a nice day, xo Julia

Gift Boxes

$
0
0


Hi there,
I love the new gift box dies in plus size and it was so difficult to take a choice to start with.
So today I take two of them.


This is one of my favorite paper designs. It is from Create Paper, Bliss Collection.
It is some years old but still wonderful.


I used just a little bit yarn and ribbon, Cardstock for the tags and some eyelets.
I thought he paperdesign and eye-catching packaging form need no more decoration.


I hope you will like it and wish you a lovely weekend.

Paper Bunting Banner

$
0
0


A theme for most of my craft projects is positivity. I like to create prints, cards and banners to hang in my home studio to put me in a good mood. So today's project is a quick DIY paper banner for your craft space!

I started with some pretty mint coloured scrapbooking paper and the Bunting Framelits Plus Die Set. The bunting die set is really good as it includes so many different sizes and can be used as a stencil if preferred.


Once I had cut out my paper bunting flags on the Sizzix Big Shot Plus, I used a length of white cotton yarn and some washi tape to fix the flags on. Washi tape is great for quick projects because it is repositionable and doesn't leave a residue.


I then used some gold thickers stickers to spell out the word YAY! on the flags.


It looks really cute don't you think? A super quick project to brighten your space and bring some positivity. 


I also made a banner for my kitty so everyone knows her name is Tammy! 


How to make a treat Christmas bag

$
0
0


Hello Sizzix Friends!
Making treat bags is so funny, especially in this period, so inspiring for me.

Christmas treat bags are perfect for sweets, small gift and handmade presents.
Here is my personal treat bag created with this amazing Set: Sizzix Thinlits Plus Die Set 8PK - Bag, Tall (660840).


You need:
Sizzix Big Shot Plus Machine Only (White & Gray) (660020)
Sizzix Thinlits Plus Die Set 8PK - Bag, Tall (660840)
Sizzix Framelits Die Set 10PK - Rectangles #2 (658610)
Sizzix Thinlits Die Set 16PK - Holiday Words 2: Block (660976)
Sizzix Accessory - Die Brush & Foam Pad for Wafer-Thin Dies (660513)
Glitter Cardstock
Kraft shiny Golden paper
Cardstocks
Scissors
Double-sided sticky tape
Double-sided foam pads

Die cut the treat bag using the kraft shiny golden paper sheet and the die from Sizzix Thinlits Plus Die Set 8PK - Bag, Tall (660840).
Realize the decoration using one the the Thinlits available in the Set.
Because of its intricacy, Thinlit Die may require up to three passes to cut.
You need the Sizzix Accessory - Die Brush & Foam Pad for Wafer-Thin Dies (660513) to remove excess papers from the decoration.
Arrange the bag using double-sided tape and embellish it as you prefer.

Happy Sunday!
Silvia


*Per i lettori italiani*
 
Buongiorno amici creartivi!
Adoro creare sacchetti regalo specialmente in questo periodo dell'anno che trovo sempre ricco di ispirazione per me.

I sacchetti regalo Natalizi sono perfetti per contenete dolcetti, piccoli regali o doni fatti a mano.

Ecco il mio personale sacchetto realizzato con un Set favoloso: Sizzix Thinlits Plus Die Set 8PK - Bag, Tall (660840).

Ho usato:
Sizzix Big Shot Plus Machine Only (White & Gray) (660020)
Sizzix Thinlits Plus Die Set 8PK - Bag, Tall (660840)
Sizzix Framelits Die Set 10PK - Rectangles #2 (658610)
Sizzix Thinlits Die Set 16PK - Holiday Words 2: Block (660976)
Sizzix Accessory - Die Brush & Foam Pad for Wafer-Thin Dies (660513)
Cartoncino glitter
Cartoncino satinato oro
Cartoncini
Forbici
Nastro biadesivo
Gommini biadesivi


Fustellate il sacchetto regalo usando un cartoncino satinato e la fustella principale del Sizzix Thinlits Plus Die Set 8PK - Bag, Tall (660840).
Realizzate gli intagli usando uno dei thinlits presenti nel set.
Probabilmente, visto la quantità di intagli,  ci vorranno almeno 3 passate all'interno della macchna Big Shot Plus.
Una volta fustellato utilizzate Sizzix Accessory - Die Brush & Foam Pad for Wafer-Thin Dies (660513) per rimuovere l'eccesso di carta dalla decorazione.
Componete quindi il sacchetto utilizzando del nastro biadesivo e decoratelo a piacimento.

Buona domenica!
Silvia

Christmas Cards by Gerry van Gent

$
0
0
Happy Sunday friends!

I am sharing today two Christmas cards which I created 
while giving a Sizzix demo at Dhondt Hobby Products 
Open Days in Desselgem, Belgium.


For the base of the first card I used the Tickets framelits dies to create a double card.
After die cutting the Tattered Poinsettias I embossed them by using
 the Springtime Background embossing Folder. 
Then I used ink to distress (more to pop up) the embossed parts.
660515 Sizzix Big Shot Plus Starter Kit
657569 Sizzix Framelits Die Set Tickets
658261 Sizzix Bigz Die Tattered Poinsettia
657491 Sizzix Texture Fades Embossing Folders
660725 Sizzix Thinlits Die Christmas Stockings
658279 Sizzix Die Set w/Stamps Tags by Hero Arts 
*        *       *
For the back of the card I used once again the three first die cut 
  and then embossed Tattered Poinsettias.

For the centers of the Tattered Poinsettia I used the stars which 
were leftover from the die cut  Christmas Stockings.
Added some Stickles as a final touch.

The  Christmas Stockings were die cut from self-adhesive red foam.

*          *          *
For the second card I die cut the decorative frames from
white cardstock and glitter cardstock.
660515 Sizzix Big Shot Plus Starter Kit
660882 Sizzix Thinlits Die Set Winter Wishes
658261 Sizzix Bigz Die Tattered Poinsettia
657938 Sizzix Framelits Die Set Frames, Decorative #2
*         *        *
The Tattered Poinsettia was die cut from
vellum, cardstock and corrugated cardboard.


Thank you for visiting us today!
Have a creative day!


Recycling maps for cards and layouts by Paula Pascual

$
0
0

Last week I recorded a little segment for a UK TV program called The Crafty Beggars in which I showed some of my projects upcycling old papers including maps. Inspired by that I created two projects using old maps and the Big Shot Starter kit, one card and one quick layout. Maps are great as they have pattern, colour and they are free!


I just used the Sizzix Big Shot Starter Kit  | 659765, maps, a used stamp, white and Kraft card, cork and spray ink.


Before I did anything, I glued the thin old map paper on to white card using spray adhesive. Then I die cut it using the larger Framelit heart from the Starter kit.
I then layer them together over a square piece of Kraft card. I attached it using foam pads and then added it to the card.


Finally, I added this lovely used stamp - rescued from a packaged sent from my best friend from the USA - and glued it to the card.


To make this quick and easy layout, I simply trimmed a piece of white card to measure 6 x8 inches. I spray gently the colours on the card and let then dry. Then I die cut the 1 from the map using one of the circle dies and the Heart using a cork thin sheet.

I hope you like it and inspires you to make use of those old maps and books laying around!

Paula

Pumpkin Candy Holder

$
0
0


Hi everybody! Elena here. 

Today I want to show you a small box that you can use as a candy holder perfect for autumn or Halloween.


Supply list:


To make this candy holder I have die cut the box shape out of Kraft card and assembled it using some strong double sided tape. Then I have die cut the decorative strip and glue it around the box. To make the main embellishment I have die cut two small circles and attached to the front of the box using some foam squares. 

Finally, I have stamped the pumpkin, I have cut it very carefully, glued to the circles and put some glossy accents on top.

I hope you like it!

Elena


..........................

¡Hola a todos!

Hoy os enseño una pequeña caja perfecta para regalar una par de chocolatinas este otoño o como detalle de Halloween.

Para hacerla he troquelado la forma de la caja con cartulina craft y la he pegado con cinta de doble cara fuerte. Después he troquelado y pegado la tira decorativa y un par de círculos con foam adhesivo.

El último toque lo pone la calabaza estampada, que he recortado a mano con mucho cuidado, coloreado un poco, pegado en los círculos y puesto un poco de Glossy Accents.

¡Espero que os guste!

Elena

6th June

$
0
0


Hi everybody!

Today, I propose a mini album with a few pictures taken last June at my friend’s wedding, Elodie.


This is a simple album to realize because it is about simple rectangles of different sizes, folded in two and sewn in the centre to create a small unstructured pad.


It is entirely decorated with the new collection "Sydney" of Swirlcards, the colours went perfectly with my photos!


I chose to embellish the pages with Sizzix cuts, as they bring elegance to every layout. The die "butterfly" of the Big Shot Plus starter kit is ideal for a lovely decor on tracing paper.


And I liked the words’ delicacy of the Tim Holtz’s die "friendships"; you’ll find them almost on all pages of the album!


I hope you liked this mini, see you soon!


paper & stamp: Swirlcards
strass: Scrapboukits

Have a good day,


*************

" 6 juin ",

Aujourd'hui, je vous propose un mini album avec quelques clichés pris au mariage de mon amie Elodie en juin dernier.

C'est un album simple à réaliser puisqu'il s'agit de simples rectangles de tailles différentes, pliés en 2 et cousus au centre pour en faire un petit carnet déstructuré.

Il est entièrement décoré avec la nouvelle collection " Sydney" de Swirlcards, les couleurs allaient parfaitement avec mes photos!

J'ai choisi d'embellir les pages  avec des découpes Sizzix, car elles apportent de l'élégance à chaque mise en page. Le die "papillon" du kit de démarrage de la big Shop plus est idéal pour une jolie décor sur du papier calque.
Et j'ai adoré la finesse des mots du die "friendchips" de Tim Hotz, on en retrouve presque sur toutes les page de l'album!

J'espère que ce mini vous a plu, à très bientôt"

Cork Number Tags for Gift Wrap

$
0
0

 Hi friends!


Today we wrap original gifts using number tags cut into cork sheets and decorated with washi tape. It is an original idea for personalized gifts with the age of the celebrated, or year anniversary, etc.


You need:


Cut a square of the cork sheet about the size of our number die, and you decorate it as you like using washi tape. Cut the number with our Big Shot.

We can wrap the gift with a nice paper, take several turns of thread and fix the number with a small peg.


We may also use a paper bag and close it or placing the numbers on the edge with a peg


What do you think? From these basic ideas you can personalize your gifts in a thousand different ways, until next tutorial!


////////////////////////////////////////////////////////////

Ciao amici!

Oggi faremo dei pacchi regalo originali usando etichette a forma di numero, tagliate in fogli di sughero e decorati con washi tape. E' un'idea originale per personalizzare i regali con l'età del festeggiato, oppure gli anni di un aniversario.

Materiali
Tagliare un quadrato di sughero della misura della nostra fustella e decorare con washi tape. Tagliare il numero con la Big Shot.

Possiamo incartare il regalo con una bella carta, avvolgerlo con diversi giri di filo e fissare il numero con una molletta, oppure usare un sacchetto di carta e chiuderlo fissando il numero con una molletta al bordo.

Che ne pensate? Partendo da queste idee potete personalizzare i vostri pacchi in mille modi diversi. Ci vediamo il prossimo martedì con un altro tutorial!

////////////////////////////////////////////////////////////

Hola amigos!

Hoy envolveremos regalos originales usando etiquetas en forma de números recortados en láminas de corcho y decorados con washi tape. Es una idea original para personalizar regalos con la edad del festejado, o los años de aniversario, etc.

Materiales

 Cortamos un cuadrado de la lámina de corcho del tamaño aproximado de nuestro troquel de número, y lo decoramos a gusto usando washi tape. Cortamos el número con nuestra Big Shot.

 Podemos envolver el regalo con un papel bonito, darle varias vueltas de hilo y fijar el número con una pinza pequeña. También podemos usar una bolsa de papel, y cerrarla colocando el o los números en el borde con una pinza.

 Qué os parece? Partiendo de estas ideas básicas podéis personalizar vuestros regalos de mil maneras diferentes, hasta el próximo tutorial!

Lots of Layers on a Card

$
0
0
Hi Sizzix fans!
Today I would like to show you a card that features lots of layers of paper. Layering is something I almost always do on my project and I especially love layering several die-cut images on top of each other. 

Today's card is inspired by the beautiful colours of fall and I used the beautiful Bigz Tattered Leaves dies to capture the fall feel in my card as well. 


Sizzix products:
Bigz Die Tattered Leaves

For the background of my card, I cut out a ticket shape from a lilac sheet of paper with the Framelits Die Set Tickets. On top of this ticket, I attached two scribble circles, which were cut out with the Thinlits Die Set Festive Scribbles


I then cut out two large leaves from green paper with the Bigz Tattered Leaves die. I inked the edges to make the leaves stand out more. After that, I also punched out two large butterflies with the Paper Punch Butterfly Large and attached these on the left and right side of my card. I then cut out several tiny butterflies with the Sizzlits Decorative Strip Die Butterfly Frenzy and attached two of these butterflies on top of the larger butterflies. I randomly added some of these butterflies on other spots on my card as well. 


Finally, I added a title at the bottom of my card. The text 'For you' was cut out with the Thinlits Die Set Tag & Phrases. I just love the simple yet playful script of this die and figured it made a nice finishing touch on my card.

Thank you for stopping by on the Sizzix blog today!
Have a wonderful day!

In Dutch:
Hoi Sizzix fans!
Vandaag wil ik graag een kaartje laten zien waarop ik veel met laagjes heb gewerkt. Ik vind het altijd erg leuk om verschillende lagen papier te gebruiken, vooral als daar ook een paar gestanste vormen tussen zitten. 

Mijn kaart van vandaag is geïnspireerd door de mooie herfstkleuren. Ook gebruikte ik de mooie Bigz Tattered Leaves stans om een paar blaadjes aan mijn kaart toe te voegen en hem zo nog meer herfstachtig te maken. 

Sizzix producten:
Bigz Die Tattered Leaves

Voor de achtergrond heb ik een ticket gestanst uit lila papier met de Framelits Die Set Tickets. Op dit ticket heb ik twee cirkels geplakt, die ik heb uitgestanst met de Thinlits Die Set Festive Scribbles.

Daarna heb ik twee grote bladeren uitgestanst uit groen papier met de Bigz Tattered Leaves stans. Ik heb de randjes beïnkt om de bladeren meer op te laten vallen. Daarna heb ik twee grote vlinders uitgeponst met de Paper Punch Butterfly Large en deze heb ik links en rechts op mijn kaart geplakt. Vervolgens heb ik een paar kleine vlinders uitgestanst met de Sizzlits Decorative Strip Die Butterfly Frenzy en heb ik twee van deze mini-vlinders op de grote vlinders geplakt. Verder heb ik nog een paar kleine vlinders willekeurig verspreid over mijn kaart opgeplakt.

Tenslotte heb ik nog een titel onderaan op mijn kaart geplakt. De tekst 'For you' is uitgestanst met de Thinlits Die Set Tag & Phrases. Ik vond het lettertype van de letters zo mooi simpel en toch speels en vond het daarom wel een leuke finishing touch op mijn kaart.

Dankjewel voor je bezoekje aan het Sizzix blog!
Nog een fijne dag!

Autumn copper home decor

$
0
0


Hi everybody!

I was determined flowers also can have an autumnal look... a nice copper cardstock and the great Brenda Walton Camellia Bigz die were the solution for me.


I decide to use them to create a seasonal home plaque


Here you have the step by step to create this gorgeous flowers


Tell me if they aren't beautiful!


This are the Sizzix products used in this project:
660020 Sizzix Big Shot PLUS (White & Gray)
659242 Sizzix Bigz Die - Camellia
657837 Sizzix Bigz XL Alphabet Die - Word Play

Be happy!!

------------

Hola a todo el mundo!

Estaba empeñado en que las flores también pueden tener un aspecto otoñal... una buena cartulina color cobre y el genial troquel Bigz de Brenda Walton Camellia, fueron la solución para mí.

Decidí utilizarlos para crear una bonita placa estacional para casa.

Arriba tienes el paso a paso para crear estas preciosas flores

Dime si no quedan bonitas!

Estos son los productos Sizzix utilizados en este proyecto:
660020 Sizzix Big Shot PLUS (White & Gray)
659242 Sizzix Bigz Die - Camellia
657837 Sizzix Bigz XL Alphabet Die - Word Play

Sed muy felices!!

A little bird......

$
0
0

Another week another great collection from Brenda Walton. 

This week we are looking at a Thinlits set called Birdcage which comprises the eponymous cage and a couple of gorgeous bird dies.

I come from an Illustration/cartoon background and my real strength is in my draughtsmanship. I spent the first 18 years of my life sat cross-legged on the floor with a pencil and a pile of paper, I can still sit like this for hours but nowadays it takes me a while to get back up after!

As the result of my background, great draughtsmanship really stands out for me and Brenda's dies never disappoint on this score. They are always sleek, elegant and well balanced which makes me very happy.

I have die-cut half of the cage from light grey card and the birds from white card (aren't they great?)


Next, I rolled out some white chalky finish paint with a brayer and applied to the die-cut cage, I deliberately left it patchy so not too much paint! Once it was dry I used some text stamps to add a little detail.


I applied some aqua coloured acrylic to both birds with my brayer followed by a little grey. Next, I applied a little green paint using a foam applicator before adding stamped detail using grey ink.

I chose a phrase which I typed into my PC before printing out. I then trimmed the phrase into three separate lines before applying a little Distress Ink. Next, I stamped the large body of text onto my white base card using the grey ink again.
 Here is the finished card all assembled and that should be that..... but I got a little carried away!


I had to make another quick card so I cut a stencil using the splatter die from the Thinlits Scribbles & Splat Set by Tim Holtz. I placed the stencil onto a white base card and used Mustard Seed and Wild Honey Distress Ink applied with a foam applicator. While the stencil was still in place I flicked some water onto the image before dabbing with a clean tissue.


 I applied the 'Thank you' stamp (Darkroom Door) with black ink and added some extra stamped detail before die cutting the bird from black card.


 It's simple but I like it and that wraps up this week...... Oh! shall we do one more?


I cut a rectangle of wood effect patterned card and used a craft knife to give the appearance of miss-matched planks before applying dark Distress Ink to the edges.


I die-cut the bird from grey patterned card and die-cut a circle aperture into the card using one of my beloved circle Framelits. I then cut a rectangle of the grey patterned card and rounded off the corner with a punch before applying Distress Ink around the edges and stamping the legend 'Home Sweet Home' using dark grey ink.

Bit of Distress Ink around the edges of the bird to add a little contrast and layer it all up using adhesive foam pads.... Simple! 

Love this set in case you hadn't guessed!


Urban mini book by Karine

$
0
0


Hey!

Here is my latest “Travel” mini book realized with primary colours with the superb paper collection Atlas from Pink Paislee.

Supply list:

Papers: Pink Paislee
Cardstocks, mechanism, corners: Ephéméria
Stickers: Pebbles, Pink Paislee, Jenni Bowlin Studio
Alphabets: Pebbles
Stamps: Craft Origine, Stampers Anonymous, Florilèges Design, Aladine
Inks: Versafine, Studio Calico
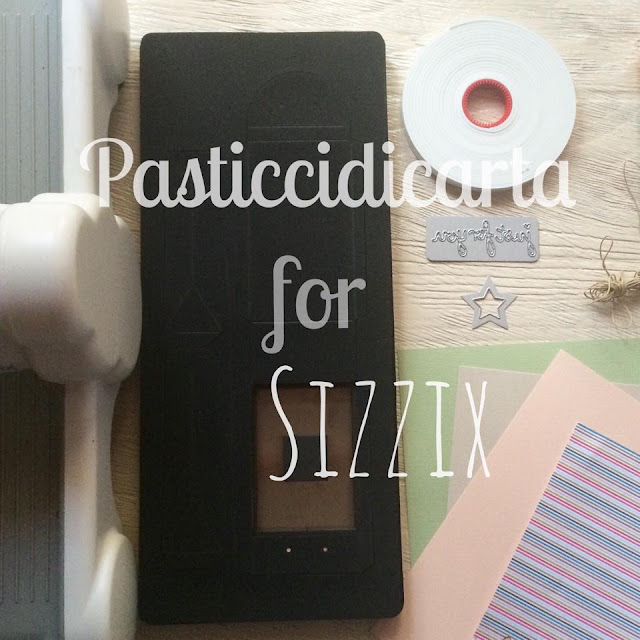
Dies:

650515 :  Sizzix Big Shot Plus Starter Kit
660320 :  Sizzix Accessory -Precision Base Plate for intricate Thinlits Dies
660837 :  Sizzix Framelits Plus Die Set 10PK-bunting
655128 :  Sizzix Bigz Alphabet Set 7Dies-Serif Essentials
656616 :  Sizzix Bigz Alphabet Set 2 Dies-Serif Essentials numbers

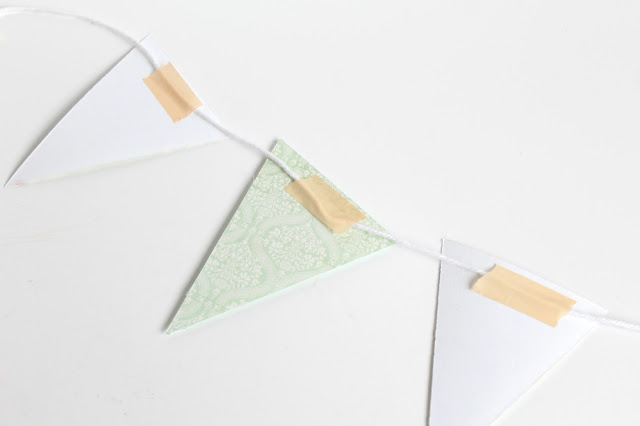
What’s best for a townly mini book than the Sizzix triangle shapes dies? This is a set I don’t grow tired of! I used it for my graphic Mint page last week and now here are these little triangles cut out of pattern papers and cardstock. They are used as a common thread in my album.

I also set my heart on the big alphabet letters and numbers! They are cut out of black plain paper for more contrast.

The letters NYC are glued with 3D black foam to add some volume. They will be decorated with embellishments.

Time for pictures of the pages realized with these fantastic dies!


Have a nice day,

Karine

Bonjour !

Je vous présente aujourd'hui mon tout dernier mini album voyage réalisé dans un combo de couleurs primaires avec la superbe collection de papiers Atlas de Pink Paislee

Matériel :

Papiers : Pink Paislee
Cardstocks, mécanisme, angles : Ephéméria
Stickers : Pebbles, Pink Paislee, Jenni Bowlin Studio
Alphabets : Pebbles
Tampons : Craft Origine, Stampers Anonymous, Florilèges Design, Aladine
Encres : Versafine, Studio Calico

Dies :

650515 :  Sizzix Big Shot Plus Starter Kit
660320 :  Sizzix Accessory -Precision Base Plate for intricate Thinlits Dies
660837 :  Sizzix Framelits Plus Die Set 10PK-bunting
655128 :  Sizzix Bigz Alphabet Set 7Dies-Serif Essentials
656616 :  Sizzix Bigz Alphabet Set 2 Dies-Serif Essentials numbers

Quoi de mieux comme motifs pour un mini album urbain que les dies triangulaires Sizzix ? Voici un set que je ne me lasse pas d'utiliser ! Pour une page Mint et graphique la semaine dernière, aujourd'hui les petits triangles sont perforés dans des chutes de papiers imprimés et cardstock et s'utilisent tel un fil conducteur tout au long de mon album.
J'ai également jeté mon dévolu sur les grosses lettres et chiffres ! Ceux-ci sont découpés dans du papier noir uni pour un maximum de contrastes.

Les lettres NYC sont montées en 3D avec de la mousse noire afin d'apporter du volume. Elles seront ensuite simplement décorées avec des embellissements

Place aux visuels des pages réalisées avec ces superbes dies !

Bonne journée

Karine

Fan blade Dresden Plate - part 1

$
0
0


 I really enjoyed working at the Knitting and Stitching Show at Alexandra Palace last week, with Lady Sew and Sew. Of course I had to buy some fabric for some new projects - and this has caused a slight re-arrangement of my planned blogs!! - (I just had to use some new fabric this week so I will come back to the blog I wrote last week in a week or so - sorry I've digressed a little!)
So this week I have used the fan blade to create a Dresden plate with points, rather than curves -


The fabric that distracted me is from one of the Kaffe Fassett ranges and it is different coloured stripes down the length of the fabric so that you have a bit of several colours across the width of the fabric.
So I thought it would be fun to make some flowers using this fabric - so I folded the fabric so that the stripes would lie across the fan blade, and cut, then I moved the fabric so that I could cut a different colour and so on to give me a mix of pink, lilac, and green blades. (This is not an economical use of the fabric - but I can cut out hexagons, or triangles from the remaining fabric so it won't be wasted)
To make the points fold a blade in half, right sides together, down the length and stitch across the widest curve -
and then turn the right side out and press the edge to make the point -
 
Stitch 12 blades to create a plate -

for each complete plate you will need 60cm x 12cm, and the completed plate measures 18cm across
So far I have made 5 plates - each one different - aren't they pretty!
I am going to make a few more - and then next week I will show you an easy way to make a lovely, easy quilt with them.
Time for a cup of tea and then a bit more sewing I think.
Have fun this week.
Angela


Bird house - decoration with pine cones.

$
0
0


Hi Sizzix Friends!!
I love decorating my house with pine cones at Christmas.
They are very easy to find and they are beautiful painted white or natural!
This time I added one more element, a delicious bird house!

You need:

Cardstocks
Hot Glue
Pine cones
white paint


I love it!!
See you next week!!


-PER LETTORI ITALIANI-

Ciao amici!
Nel periodo natalizio adoro decorare la mia casa con le pigne.
Sono facili da reperire e bellissime dipinte di bianco o lasciate al naturale!
Questa volta ho aggiunto un elemento in più,
una deliziosa casetta per uccellini!

Per questo progetto avrete bisogno di:

Cartoncini
Colla a caldo
Pigne
Vernice bianca

Alla prossima!!!!


Soap Wrapping idea

$
0
0


Hello, welcome to a new inspiration! It's Anna posting today.
Today I’m sharing this felt flower soap wrap.
 
gift-favors-soap-felt flower-sizzix big shot-by cafecreativo (1)
 
I chose autumnal colours. I love how they turned out and I hope you do too.
 
gift-favors-soap-felt flower-sizzix big shot-by cafecreativo (2)
 
You can do this using colour combination of your choice.
 
gift-favors-soap-felt flower-sizzix big shot-by cafecreativo (3)
 
Firstly wrap the strip of fabric around the soap.
Using the Bigz die Garden Flower cut out flowers and twig from felt. Sew a button and glue the elements on top.
That’s it! Super easy. I think this would make great gift for Christmas and favour.
 
Thanks for stopping by.
 
Items used:
Sizzix Big Shot Plus Machine (660020)
Sizzix Bigz Die - Garden Flower (660874)
scraps of felt for flower
a strip of fabric
soap bar
button
hot glue gun
 
**************************************
Flag_of_Italy
 
Ciao, sono Anna con un nuovo progetto Sizzix.
Oggi vorrei condividere con voi una semplice idea per avvolgere ed abbellire un piccolo oggetto.
Può capitare di dover fare un piccolo regalino ed una profumata saponetta è sempre un bel pensiero. Ma per presentare meglio il regalo, ecco che la Big Shot e le fustelle ci vengono in aiuto.
Per la mia confezione ho scelto colori autunnali, vista la stagione, ma potete usare una combinazione di colori a vostra scelta.
 
La realizzazione è molto semplice, ma vi spiego comunque come ho fatto.
Innanzitutto avvolgere una striscia di tessuto attorno al sapone e fissarla con colla o biadesivo.
Utilizzando la fustella Bigz Garden Flower tagliare i fiori e il ramoscello dal feltro. Cucire un bottone per fissare i fiori e dividere il ramoscello in modo da creare delle foglie da mettere su entrambi i lati del fiore. Incollare così tutti gli elementi sulla parte superiore della saponetta.
Questo è tutto! Super facile!
 
Credo proprio che terrò presente quest'idea per i pensierini di Natale, ma anche per realizzare profumate bomboniere.
 
Ciao, alla prossima!
 
Materiali:
Sizzix Big Shot Plus Machine (660020)
Sizzix Bigz Die - Garden Flower (660874)
ritagli di feltro per il fiore
una striscia di stoffa
saponetta
bottone
colla a caldo

Little pack for you

$
0
0


Hello crafter!
I always begin in October to prepare the packaging for Christmas,
and today I had fun with the punches of the new collection Sizzix.

In less than ten minutes I created

a personalized box
and wrapped MY gift
(who knows what was in it .. :)))

And you started to pack ??

NECESSARY:
Cardstocks or paper scrap
twine
tape with thickness


*per i lettori italiani*
Ciao crafter!
Io inizio sempre ad ottobre a preparare il packaging per Natale, 
e oggi mi sono divertita con le fustelle della nuova collezione Sizzix.
In meno di dieci minuti ho creato 
una scatola personalizzata
e impacchettato il regalo
(chissà cosa c'era dentro..:))))

E voi avete iniziato ad impacchettare??

OCCORRENTE:
Cartoncini colorati o carta scrap
spago
scotch con spessore


Manuela

Pasticci di carta

My new handbag notebook

$
0
0


Hi Sizzix friends!!!

On Summer I showed you my handbag notebook, and today it's time to show you my new one, and of course I've inspired by the autumn.


I love the handmade notebooks!!!  Only playing with the Big Shot, Sizzix dies and beautiful scrapbooking papers we have a cute result.


I've only used three Sizzix dies, the 660822, the 657569 and the 660233.


Do you like colour blue in autumn? I like a lot !!! And I also like the neutral colours and orange for this season.


I like to create with paper and I use few decorative elements. In this case, I've only used the adhesive pearls and the ribbon.


To finish my notebook I've drawn a pencil border line around the cover and around the ticket die-cut.


I have used the following Sizzix products:

660020 Sizzix Big Shot Plus Machine Only (White & Gray)
656499 Sizzix Accessory - Standard Magnetic Platform for Wafer-Thin Dies
660522 Sizzix Accessory - Cutting Pads, Standard, 1 Pair (Mint)
660233 Sizzix Bigz Die - Heartfelt
657569 Sizzix Framelits Die Set 5PK - Tickets
660822 Sizzix Thinlits Die Set 3PK - Back to Nature #2


I hope you liked my new notebook and that it has given you a bit of inspiration. Thank you for your visit!


Have a creative and a happy Friday!
Raquel


------------------------♥------------------------♥--------------------------♥------------------------

¡Hola a todos!
En verano os enseñé mi  libreta para el bolso;  y hoy os enseño la que acabo de estrenar y claro, me he inspirado en el otoño.

Me gustan mucho las libretas personalizadas!!! Tan solo jugando con la Big Shot, los troqueles y unos bonitos papeles conseguimos bonito resultado. 
En esta ocasión he utilizado tres troqueles de Sizzix: el 660822, el 657569 y el 660233.

¿Os gusta el color azul para el otoño? A mí me encanta!!! Y también me gustan mucho los colores neutros y el naranja para esta estación.

Me gusta mucho trabajar con papel en mis proyectos y no suelo utilizar muchos elementos decorativos. En este caso tan solo he utilizado una cinta y las perlas adhesivas.
Para acabar la libreta he dibujado una línea a mano alzada en la portada y también en el tiquet troquelado.


He utilizado los siguientes productos Sizzix: 

660020 Sizzix Big Shot Plus Machine Only (White & Gray)
656499 Sizzix Accessory - Standard Magnetic Platform for Wafer-Thin Dies
660522 Sizzix Accessory - Cutting Pads, Standard, 1 Pair (Mint)
660233 Sizzix Bigz Die - Heartfelt
657569 Sizzix Framelits Die Set 5PK - Tickets
660822 Sizzix Thinlits Die Set 3PK - Back to Nature #2

Espero que os haya gustado mi nueva libreta  y que os animéis con las vuestras. ¡Muchas gracias por la visita!

Feliz y creativo viernes
Raquel

gift wrapping.... how we give self made pralines

$
0
0


Hello there...

we love to give self made gifts when we are visiting friends.
This time we love to make pralines on our own.

But before producing the pralines - i was thinking about the wrapping.

I decided to use Sizzix Thinlits Plus Die Set 8PK - Bag, Tall...

This is what you also need:
Sizzix Bigz Die - Garden Greens
Sizzix Accessory - Die Brush & Foam Pad for Wafer-Thin Dies
Sizzix Thinlits Die Set 4PK - Speech Bubbles
Sizzix Big Shot Plus Starter Kit (White & Gray) (i took the beautiful butterfly out of it)
Breakfast-Bags


I took the brush to remove the small pieces out of the pattern - but i did not remove all.
I love the unfinished look...


I fixed the butterfly at the breakfast-bag...


Have a beautiful weekend, Stephanie
Viewing all 2033 articles
Browse latest View live


Latest Images