![]()
![]()
![]()
![]()
![]()
![]()
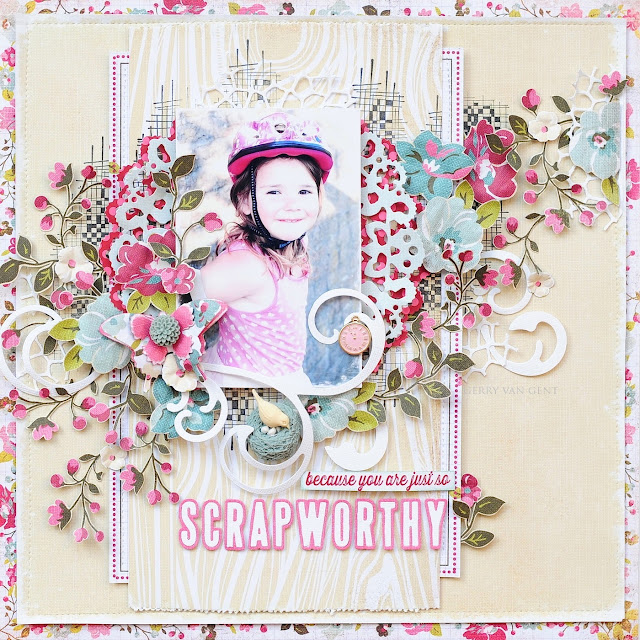
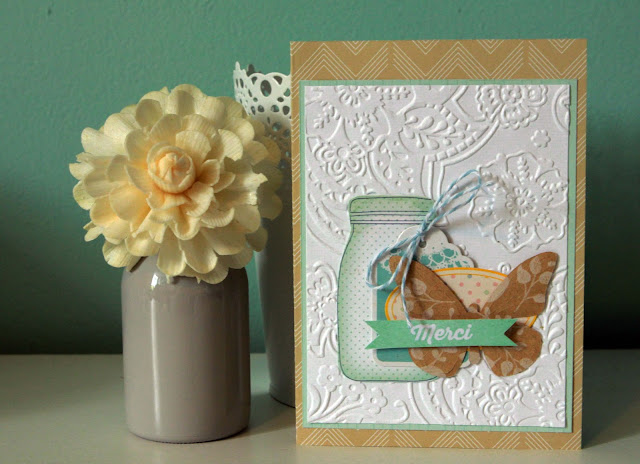
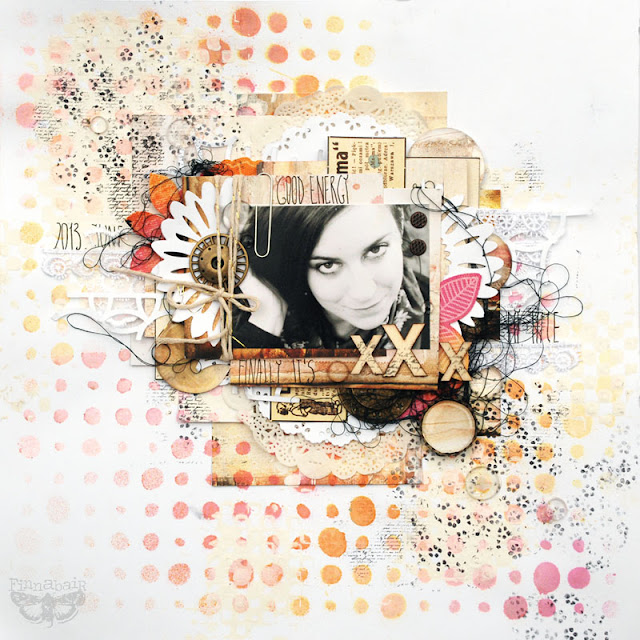
Hello Sizzix Friends!
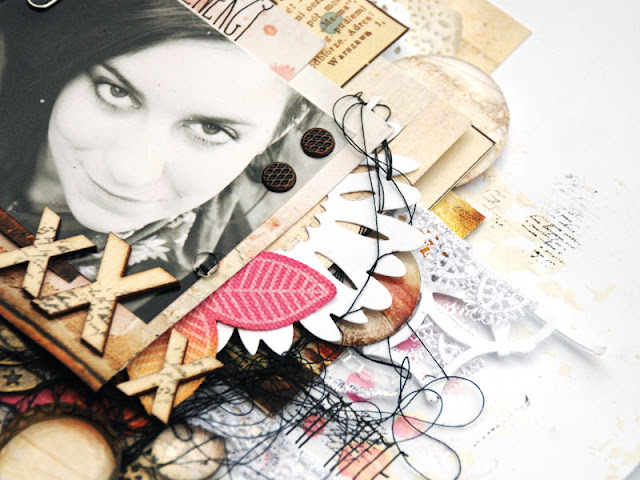
Today I've got a layout to share with you where
I combined old & new Sizzix dies.
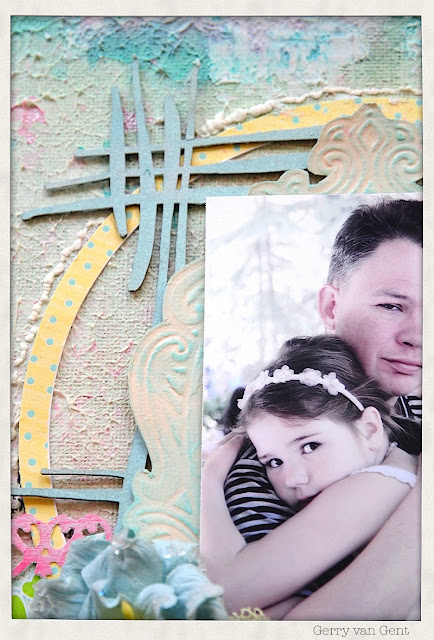
![]()
I combined old & new Sizzix dies.

657900 Sizzix Big Shot Machine
658524 Sizzix Bigz Die Classique
658530 Sizzix Bigz Die Mariposa
657496 Sizzix On The Edge Die Distressed Doily
658252 Sizzix Sizzlits Dec. Strip Cobblestones
657827 Sizzix Sizzlits Dec. Strip Die Inside Out Alphabet
* * *
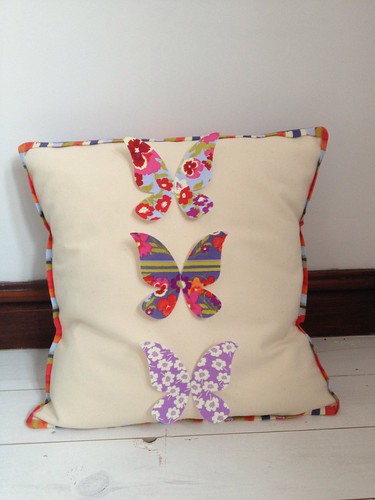
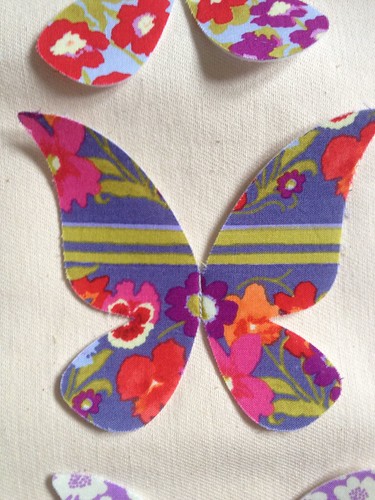
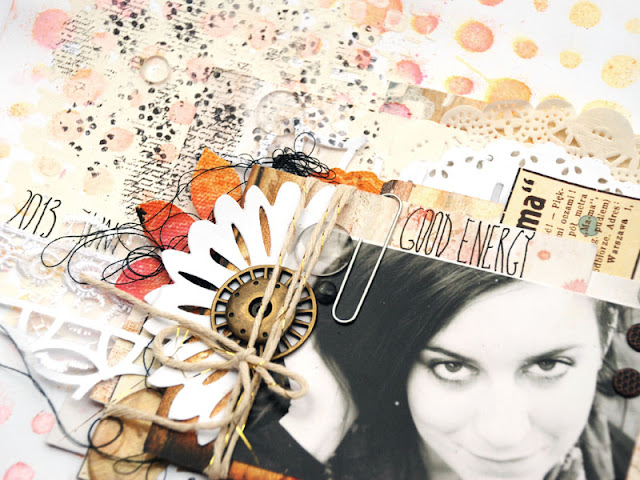
The new butterflies Mariposa are so cute and adorable.
Love the fact that you can cut separately small wings and
adhere them so you'll achieve more dimension.

On my project the small butterfly was die-cut twice and the wings once.
I`ve used different pattern papers and as a final touch I added a resin in the centre.
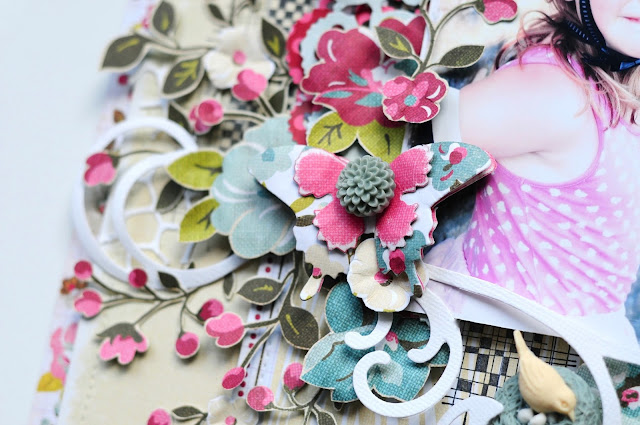
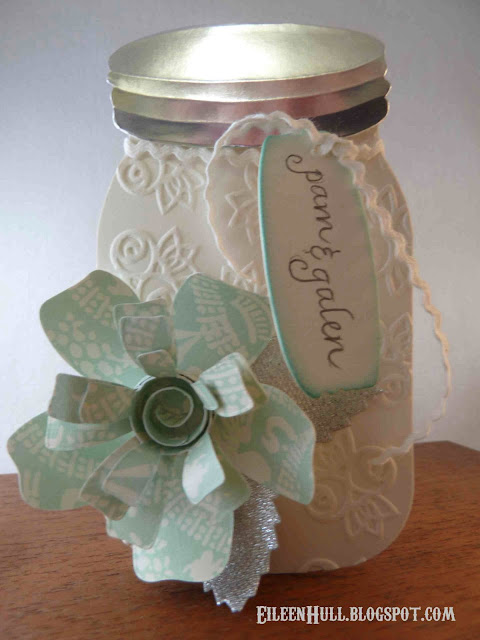
The other new die I used is the beautiful and so exquisite Classique Swirl.

The swirl was cut a few times from white cardstock.
I cut into pieces the swirl itself so I can have more swirls :-)
and added to my project.


OTHER PRODUCTS I USED:
Webster's Pages - "Plum Seed" paper collection
Webster's Pages - silhouettes, metal trinket
KaiserCraft - Clear Stamp
* * *
Dutch Translation
![]()
Hallo Sizzix vrienden!
Vandaag wil ik een layout met jullie delen waarmee
ik oud en nieuw Sizzix stansen heb gebruikt.
* * *

Hallo Sizzix vrienden!
Vandaag wil ik een layout met jullie delen waarmee
ik oud en nieuw Sizzix stansen heb gebruikt.
* * *
De nieuwe Mariposa vlinders zijn zo schattig en mooi.
Het feit dat je kleine vleugels kunt stansen en gebruiken
op je vlinder creëert een prachtig dimensie.
The new butterflies Mariposa are so cute and adorable.
Love the fact that you can cut separately small wings and
adhere them so you'll achieve more dimension.
* * *
Op mijn pagina heb ik de vlinder twee keer gestanst
en de vleugels een keer.
Ik heb verschillende patroon papieren gebruikt en
in het eind heb ik een kleine decoratie toegevoegd.
* * *
De andere nieuwe stans dat ik heb gebruikt is de schitterende Classique Swirl.
* * *
De "swirl" is paar keer uit witte cardstock gestanst.
Daarna heb ik de "swirl" zelf in stukjes geknipt om
meer "swirls" :-) te krijgen.
* * *
I hope you enjoyed my project.
Thanks for visiting us today & happy Creating!


 Die cut


 Hello crafty friends, this is


")
")
")
")


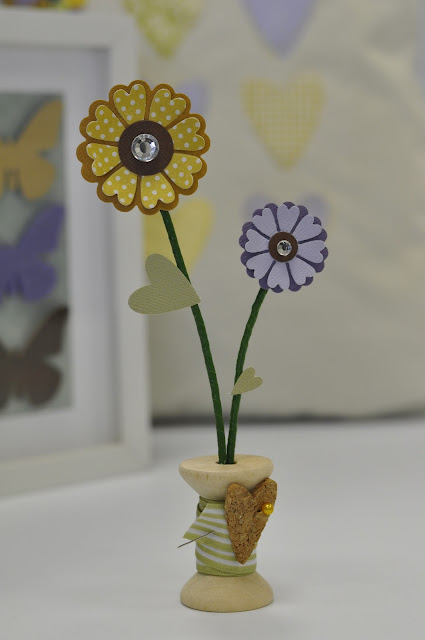
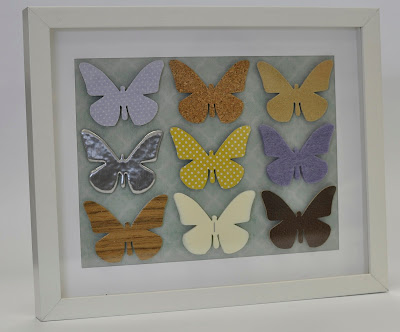
 Today I want to share with you some home decor ideas using the new