Quantcast
Channel: Crafting ideas from Sizzix UK
Viewing all 2033 articles
Browse latest View live

Chaotic photo session / Lettere kaotisk photo session

$
0
0


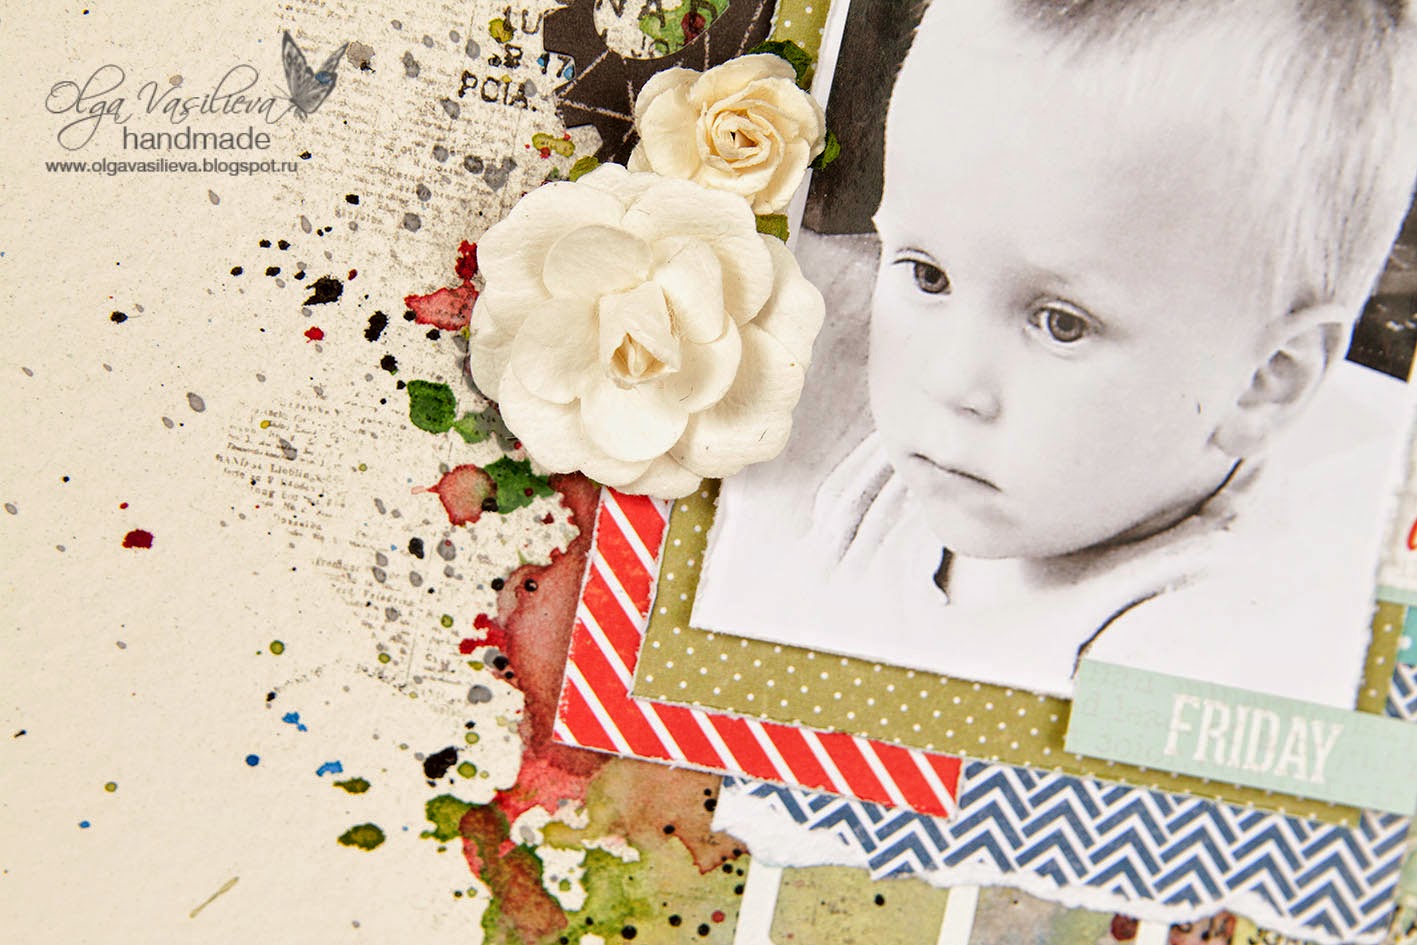
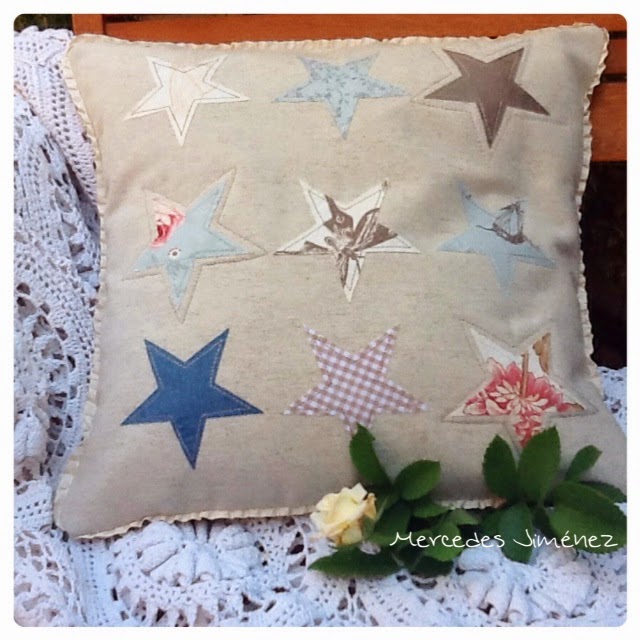
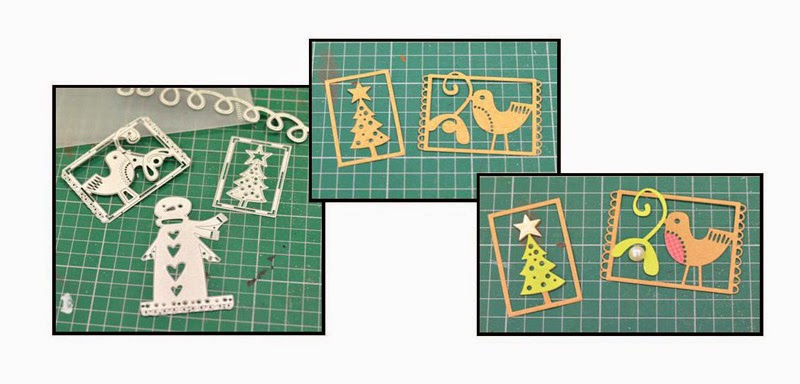
Sizzix has come up with some really cool products designed for those scrappers doing Project Life. I am a digital project-lifer but I love the products for cards and layouts.


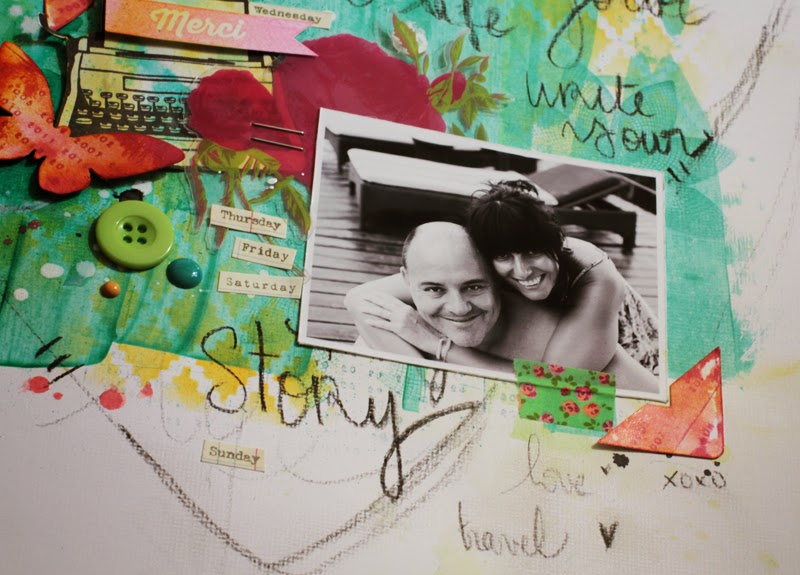
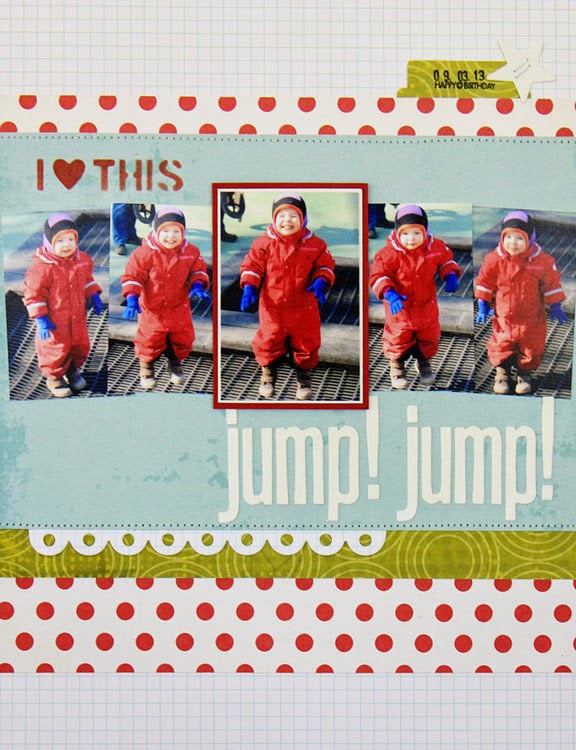
I had had the nine pictures printed some time ago with a different page design in mind but I thought they were so much fun that I decided to use them this week. I mounted all nine pictures on a piece of cream coloured cardstock giving some of them a slight angle and leaving others straight.


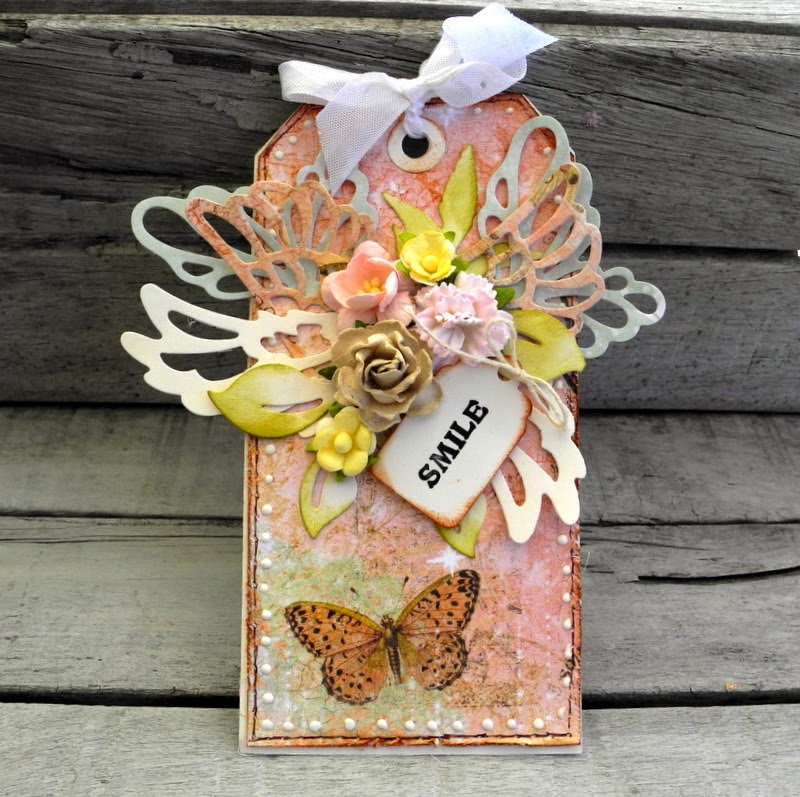
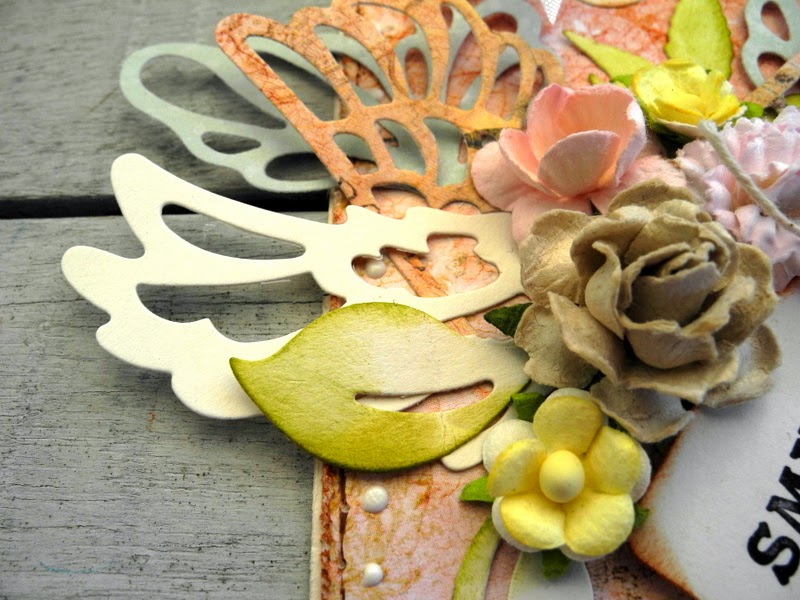
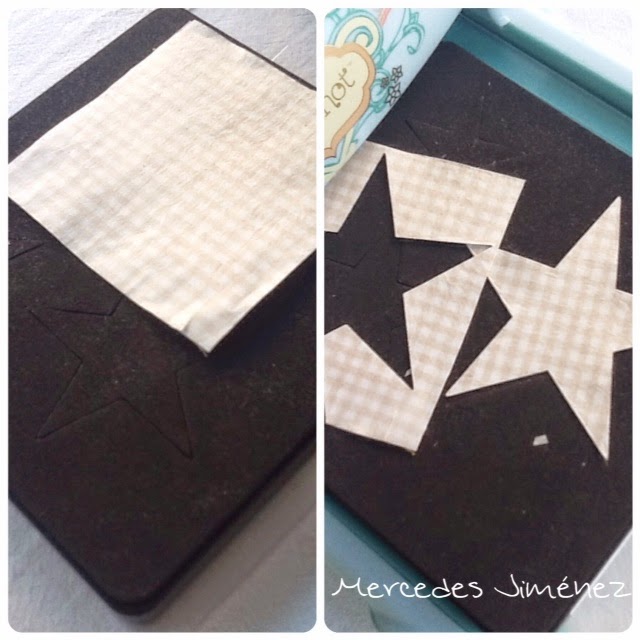
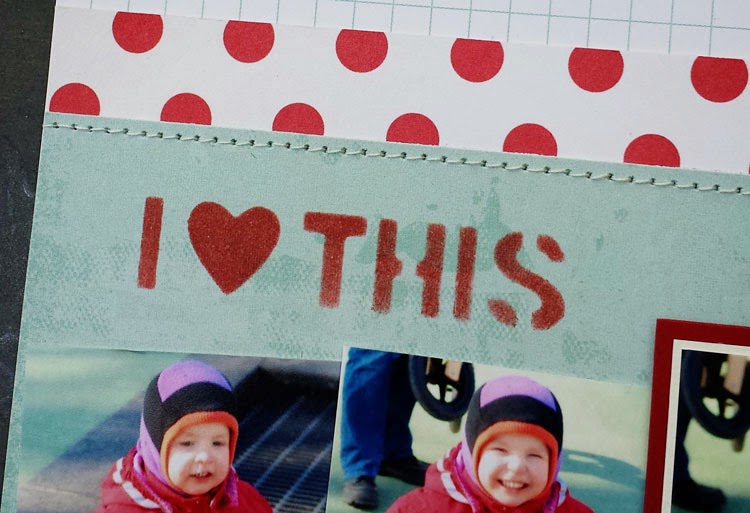
I thought the speech bubbles from Thinlits Die Set 6PK - I Heart This and Thinlits Die Set 8PK - Basics would make for great embellishments and so I combined them with a die cut camera and the word smil (the die says smile but I cut the e off to make it a Danish word) from Thinlits Die Set 7PK - You & Me.
 
 
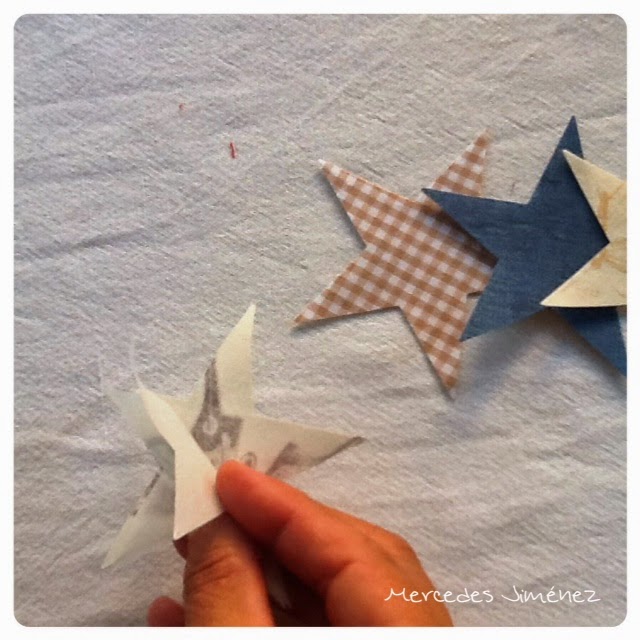
I did another cluster of speech bubbles in the top left corner of the layout. For all the speech bubbles I drew lines in black ink by hand giving each speech bubble a defining edge but still keeping everything playful and fun.
 
Supply list:
 
Cardstock
Vellum
Paper (October Afternoon)
Veneer figures (Studio Calico)
Sticker alphabets (LillyBee & JilliBean)
Stamp (Papertrey Ink)
Enamel dots (My Mind's Eye)
 
 
---o---
 
 
Sizzix har lavet nogle fede produkter, som kan bruge til Project Life, men da jeg laver mit PL digitalt har jeg været begejstret for at bruge produkterne til kort og layouts.
 
Det er noget tid siden, at jeg printede disse ni billeder ud, og jeg havde egentlig et andet design i tankerne, men da billederne er så sjove, besluttede jeg mig for at bruge dem i denne uge. Jeg satte alle ni billeder på ét stykke karton: Nogle af dem sidder lige, andre er vippet lidt til den ene eller anden side.
 
Jeg syntes, at taleboblerne fra Thinlits Die Set 6PK - I Heart This ogThinlits Die Set 8PK - Basics  ville være gode som pynt, så jeg kombinerede dem med et udstanset kamera og ordet smil (jeg skar bare e'et af det engelske smile) fra Thinlits Die Set 7PK - You & Me.
 
I øverste venstre hjørne lavede jeg endnu en samling af talebobler, og på alle talebobler tegnede jeg sorte streger langs kanten for at give dem lidt kant, mens jeg fortsat holdt det sjovt og kækt.
 
Ingredienser:
 
Karton
Vellum
Papir (October Afternoon)
Finérfigurer (Studio Calico)
Stickers (LillyBee & JilliBean)
Stempler (Papertrey Ink)
Enamel dots (My Mind's Eye)


Christmas Tri

$
0
0

Now I know what you are thinking, " Silly old Pete has spelt Tree wrong!" well, I wasn't actually trying to spell 'tree'. I have made three different cards using the new Triplits dies from Stephanie Barnard and the word 'three' in Welsh is Tri so it turns out that I knew what I was doing all along...... for once!

Triplits are wafer thin die sets representing staggering value in the sense that they are incredibly versatile and offer multiple options for those wishing to flex their creative muscles.

 I'm concentrating on the Christmas Trees set which includes no less than 14 separate elements as you can see below.


Sticking with the 'three' theme I'm want to demonstrate how easy they are to use by showing the cards from start to finish in a series of three pictures, so without further ado.......

I used my PC to print my 'Merry Christmas' Greeting onto 3 separate A6 blank white cards, Next, I die-cut the base tree from corrugated card and the other elements from matt gold card which I then lightly distressed with a sanding pad.


I then assembled the tree and attached it to the base card using 3D foam pads. I also tied a length of natural twine around the base.
Add caption
For the next card I die-cut the base tree from deep red card and the other elements from patterned paper from a Hobbycraft 6 x 6 paper pad that goes by the name of 'Love Collection'. I attached these separate elements to the base tree using 3D foam pads.


I die-cut the star and attached everything to the base card again using 3D foam pads before decorating the base of the tree using a length of knotted pink ribbon tied in a bow.


For our third card I used the large tree die to cut an aperture through the front of the base card before die-cutting a smaller white tree and a selection of assorted circles from silver mirror card.

I attached a folded rectangle of turquoise card into the base card as my insert and mounted my die-cut white tree onto it through the aperture. I then decorated the tree using the silver die-cut circles and added the die-cut star.


Here are the finished cards seen all together, given time (a luxury in my line of work!) I'm sure I could have gone on to create dozens more even in this restrictive format. I love these clever little die sets and they are one of the first items on my creative Christmas list.


Last week I was in Norway, or to be more exact, the beautiful city of Oslo where I was representing Sizzix as the guests of Global Hobby who are based in Bergen (Stunning place!). They were fabulous hosts and I would like to thank Alf Christian and his team for making me feel so welcome. 

While I was there I thought that I would create few cards with a Norwegian flavour using some of the wicked Papicolor card which they distribute. It folds, cuts, tears and creases so beautifully... I think I'm in love!

The first thing I made was the gift box using the Tim Holtz Pillow Box die which I decorated with torn strips of card replicating the Norwegian national flag. I  then added some die-cut floral elements from the Big Shot Starter Kit.

With the card and tag I took a slightly different approach. I used the flag motif as before but I also wanted to celebrate Norway's proud history for exploration by using a Tim Holtz Texture Fades embossing folder from the Airmail & Compass Set and a few butterfly's die-cut using the Butterfly Frenzy decorative strip die

I really love the colours and it was so much fun to do I hope you like them to?


It's summer time ! by Karine

$
0
0

Hello!

Here is a new page 100% free style and full of colours! It’s summer so let’s take the opportunity to scrapbook the first portraits of the season.

Supply list:

Cardstock: American Crafts
Paint: Pébéo
Spray ink: Tattered Angels
Enamel Dots: Studio Calico
Stickers: Studio Calico
Die Cuts: Heidi Swapp
Masking tape
Stamps: Glitz Design, Craft Origine
Inks: Chalk Prima
Others: charcoal, buttons

Dies:

658300 : Sizzix Big Shot Starter Kit
659108 : Sizzix Thinlits Die Set 6PK-For the record
658334 : Sizzix Sizzlits Die-Flights of Fancy

I had fun creating a custom-made background with a white cardstock and green acrylic paint.
Apply the paint vertically with an old loyalty plastic card.

While the paint dries, cut some shapes with your Big Shot for future decoration.
I chose a little butterfly and photo corners.
These embellishments are cut out of white paper then shaded with Adirondack watermelon ink. Then I stamped on them for more fancy.

Have fun writing all that comes to your mind with your charcoal. Dim it lightly with your fingertips. Draw a heart free-hand.

Add some colourful dots, buttons and stickers.


Your page is done!

Have a lovely day,

Karine

Bonjour !

Une nouvelle page ce jour 100% patouille et haute en couleur ! C'est l'été on en profite et on scrappe les premiers portraits de saison !

Matériel :

Cardstock : American Crafts
Peinture : Pébéo
Encres en spray : Tattered Angels
Enabel Dots : Studio Calico
Stickers : Studio Calico
Die Cuts : Heidi Swapp
Masking tape
Tampons : Glitz Design, Craft Origine
Encres : Chalk Prima
Divers : fusain, boutons

Dies utilisés :

658300 : Sizzix Big Shot Starter Kit
659108 : Sizzix Thinlits Die Set 6PK-For the record
658334 : Sizzix Sizzlits Die-Flights of Fancy

Je me suis amusée ici à créer un fond sur mesure en utilisant un cardstock blanc et une peinture acrylique verte.
Appliquez la peinture verticalement à l'aide d'une carte en plastique.

Pendant que la peinture sèche, découpez des formes à la Big Shot en vu de décorer votre création. J'ai opté ici pour un petit papillon et des coins photos.
Ces embellissements découpés en blanc sont ensuite ombrés à l'encre Adirondack watermelon. Ils sont ensuite tamponnés pour plus de fantaisie.

Amusez-vous à écrire tout ce qui se passe dans votre tête à l'aide d'un fusain, estompez légèrement au doigt. Dessinez un coeur à main levée.

Complétez votre page avec des pastilles colorées, boutons et autocollants.

Votre page est terminée !

Très belle journée à vous

Karine

Cotton and Steel

$
0
0

Hello - how is  your week turning out? I have my 3 grand-daughters staying with me this week - they are 1,3 and 5 - so as you can imagine there hasn't been a lot of sewing going on here! Well I have been altering some dresses for them as they are flower girls at a wedding next week - so I'll save showing you  their photo until they are all scrubbed and dressed up next week!
Needless to say I haven't had a moment to finish the bird table runner from last week - even though 5.30 a.m., has become a normal time in my day - so I'm afraid I'll have to postpone showing the finished item.
So why is the blog called Cotton and Steel this week - well it's because I have a selection of fabrics from the collection to start a new project -

There are quite a lot of fabrics in the fun new collection by some talented new designers - I love all the new colour and print mixes coming onto the market this year and hope it will continue for a long time. 
I have been given these to make a padded cover and top for a coffee table - we saw a picture of one we liked but decided that the budget wouldn't stretch to buying it - so we are going to make our own variation - so watch this space over the next few weeks to see how it progresses - and if it turns out the way we imagine!
Well the sun is shining and I have some little girls waiting to go shopping for a present for a birthday party tomorrow. When we come back we are going to use the Big - Shot and some Bigz dies to cut paper and card shapes to make some birthday cards and gift tags.
It won't be long now until bedtime - not the girls - mine!!
That's all for this week - I'm off to have some fun with 3 little beauties - more sewing news next time.
Angela

Stars in my cushion !!!

$
0
0


Hi everyone again !!!I was wishing to try the stars die that  Sizzix sent me some time ago, so I did another cushion in the same size  I showed  the last one in june.  Again  applique patchwork technique.


My cushion is 13" x 13 "

Supplies :


656339


14"x 14" rustic cotton fabric ( top )
14" x 9.5 rustic cotton fabric ( back )
14" x 5" rustic cotton fabric ( back )
14" x 2 " gingham fabric ( back ) 
Scraps of fabrics for stars ( 10 )
14" x 14 " batting
14"x 14" white fabric for the backing
 53"  ruffle ribbon for the borders ( mine by Mokuba )
5" ruffle ribbon for clousure ( mine by Mokuba ) 
1 Button
Vliesofix  termoadhesive ( doble size ) 


Here it´s is how I started. First I  chose the ten  fabrics and ironed the  termoadhesive in the squares of the fabrics  , then I cut the  big stars with the Big Shot machine. 


Peeled the paper from the wrong side of  each star and ironed on the rustic cotton square, three in a row., nine in total.


Then I sew  inside the stars with a multicolored thread for quilting  and  did a sandwich with the batting and white fabric for quilting just three stars  out of them ( 1/4 " )


Finally I sew the top and back in the same way I did in my Three Heart Cushion tutorial  but adding the ruffle ribbon before sewing the back of the cushion and a  another star on the right botton corner. Take a look to the pictures.


Hope you have a wonderful weekend!!!I can ´t believe  how summer is finishing and come back work again!!
Love


Mercedes

..................................................................************* .................................................................. 


¡¡¡ Hola a todo el mundo otra vez !!! Estaba deseando  probar el troquel de estrella que Sizzix me envió hace algún tiempo así que hice otro cojín del mismo tamaño del que te mostré en junio. De nuevo he  vuelto a la técnica del aplicado.

Mi cojín mide lo mismo : 33cm x 33cm
Las medidas de los materiale son casi las mismas con alguna pequeña variación.

35.5 cm x 35.5 cm de algodón rústico ( top)
35.5cm x 24cm  de algodón rústico ( trasera )
35.5cm x 12.5 cm de algodón rústico ( trasera )
35.5 cm x 5 cm de tela de vichi ( trasera)
Restos de telas para las estrellas ( un total de 10 )
35. 5 cm x 35.5 cm de guata  y lo mismo de tela blanca para la trasera del top.
135cm de cinta rizada para el borde ( Mokuba )
12.5 cm de cinta rizada para el cierre ( Mokuba )
1 botón
Fliselina termoadhesiva de doble cara

Esto es lo primero que hice, elegir las diez telas , cortar cuadrados a medida de las estrellas grandes  y planchar la fliselina en cada uno . Luego corté con la máquina Big Shot .
Le quite le papelito y situé   nueve estrellas centradas en el cuadrado grande de tela rústica. Planché y  cosí una costura dentro de cada estrella con un hilo matizado para acolchar. 
Luego hice un sanchwith con la guata y la tela blanca y acolché solo tres estrellas por el borde exterior dejando un margen de 1/4 “ .

Finalmente coloqué la cinta rizada sujeta con alfileres y cosí  cojín de la misma manera que hice  en el tutorial del  Cojín de los tres corazones, solo que antes cosí  la última estrella que quedaba en la esquina inferior derecha . Echa un vistazo a las fotos.

Que tengas un maravilloso fin de semana. ¡ No puedo creer que el verano se está acabando y vuelvo al trabajo la semana que viene !

Cariños
Mercedes

A layout with lots of different dies

$
0
0
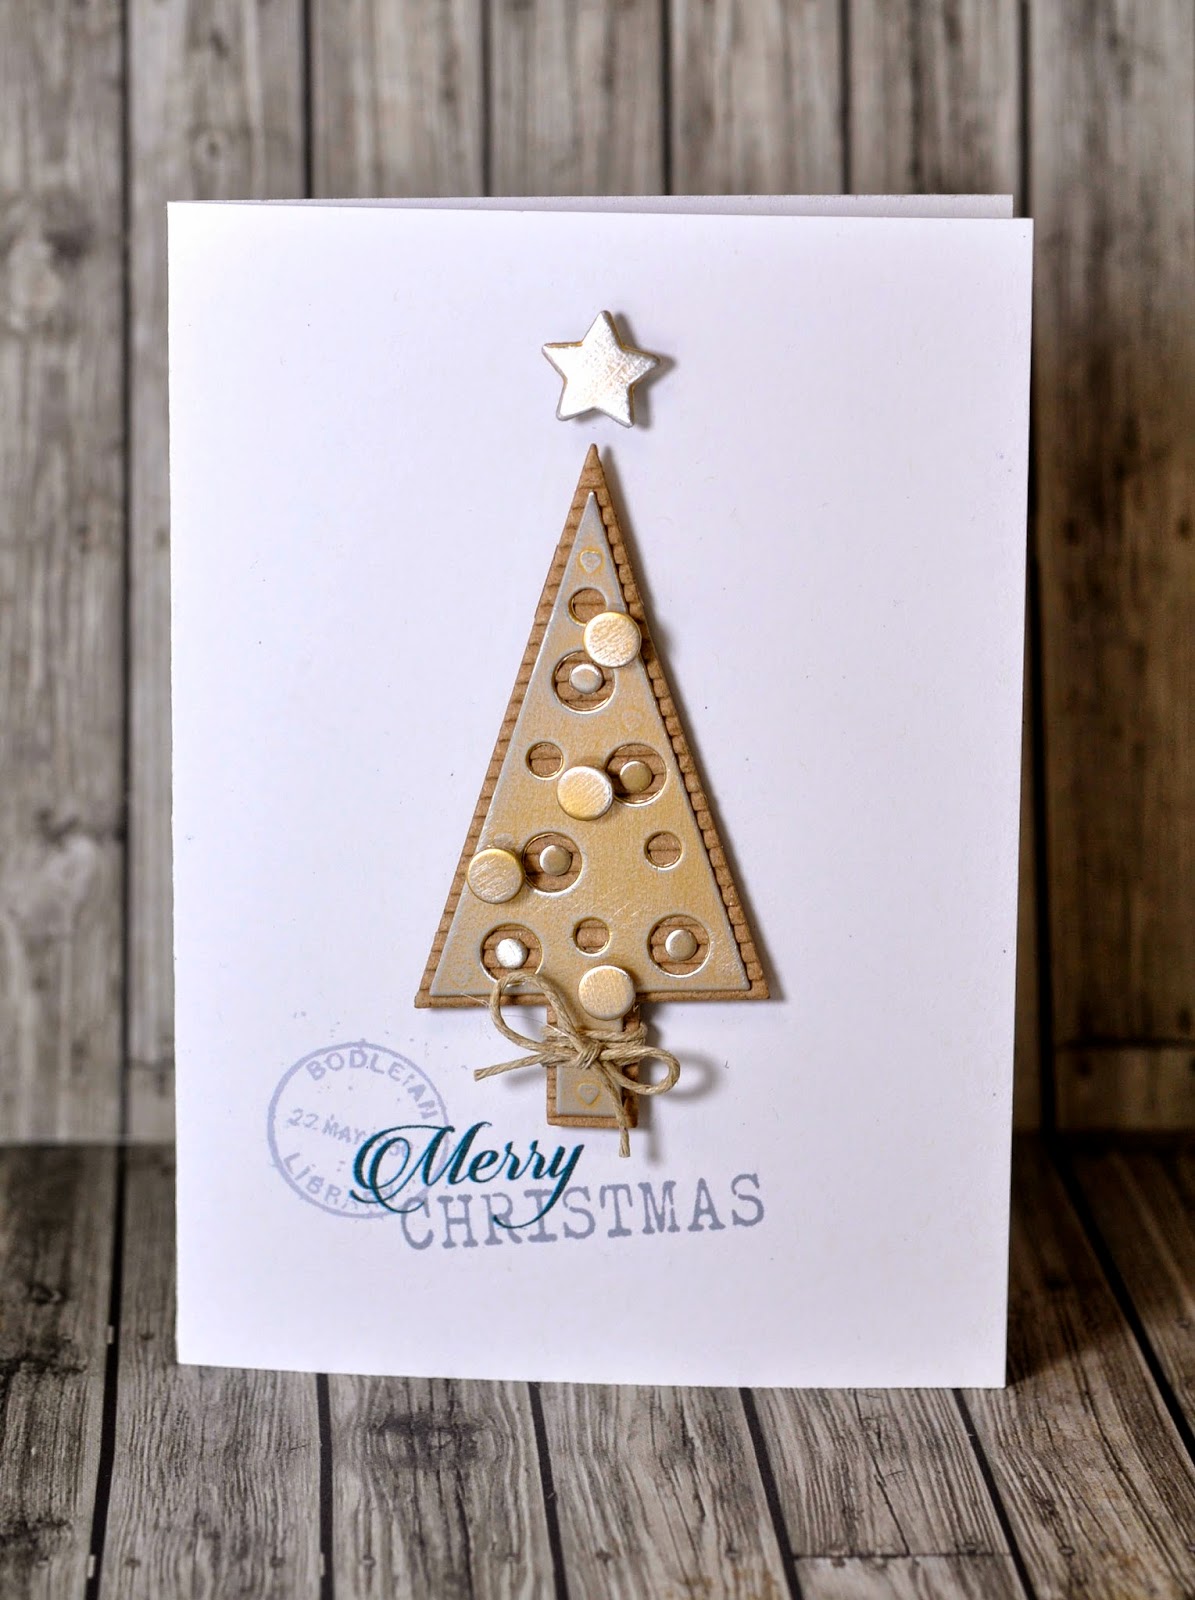
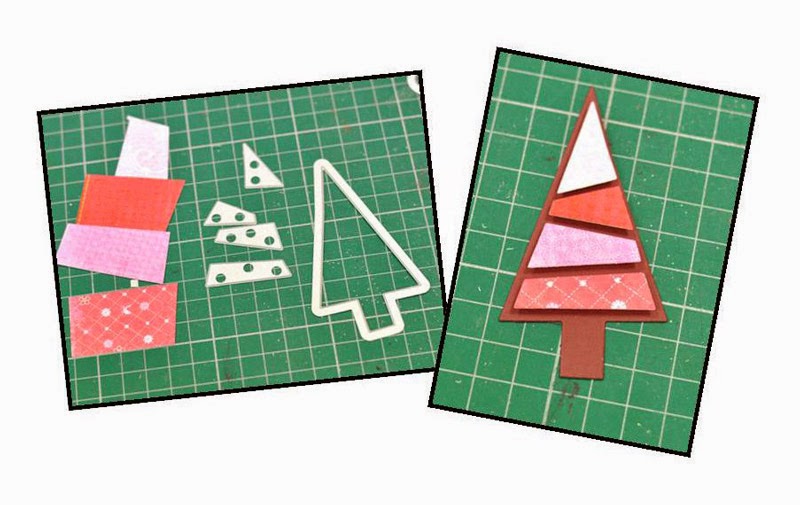
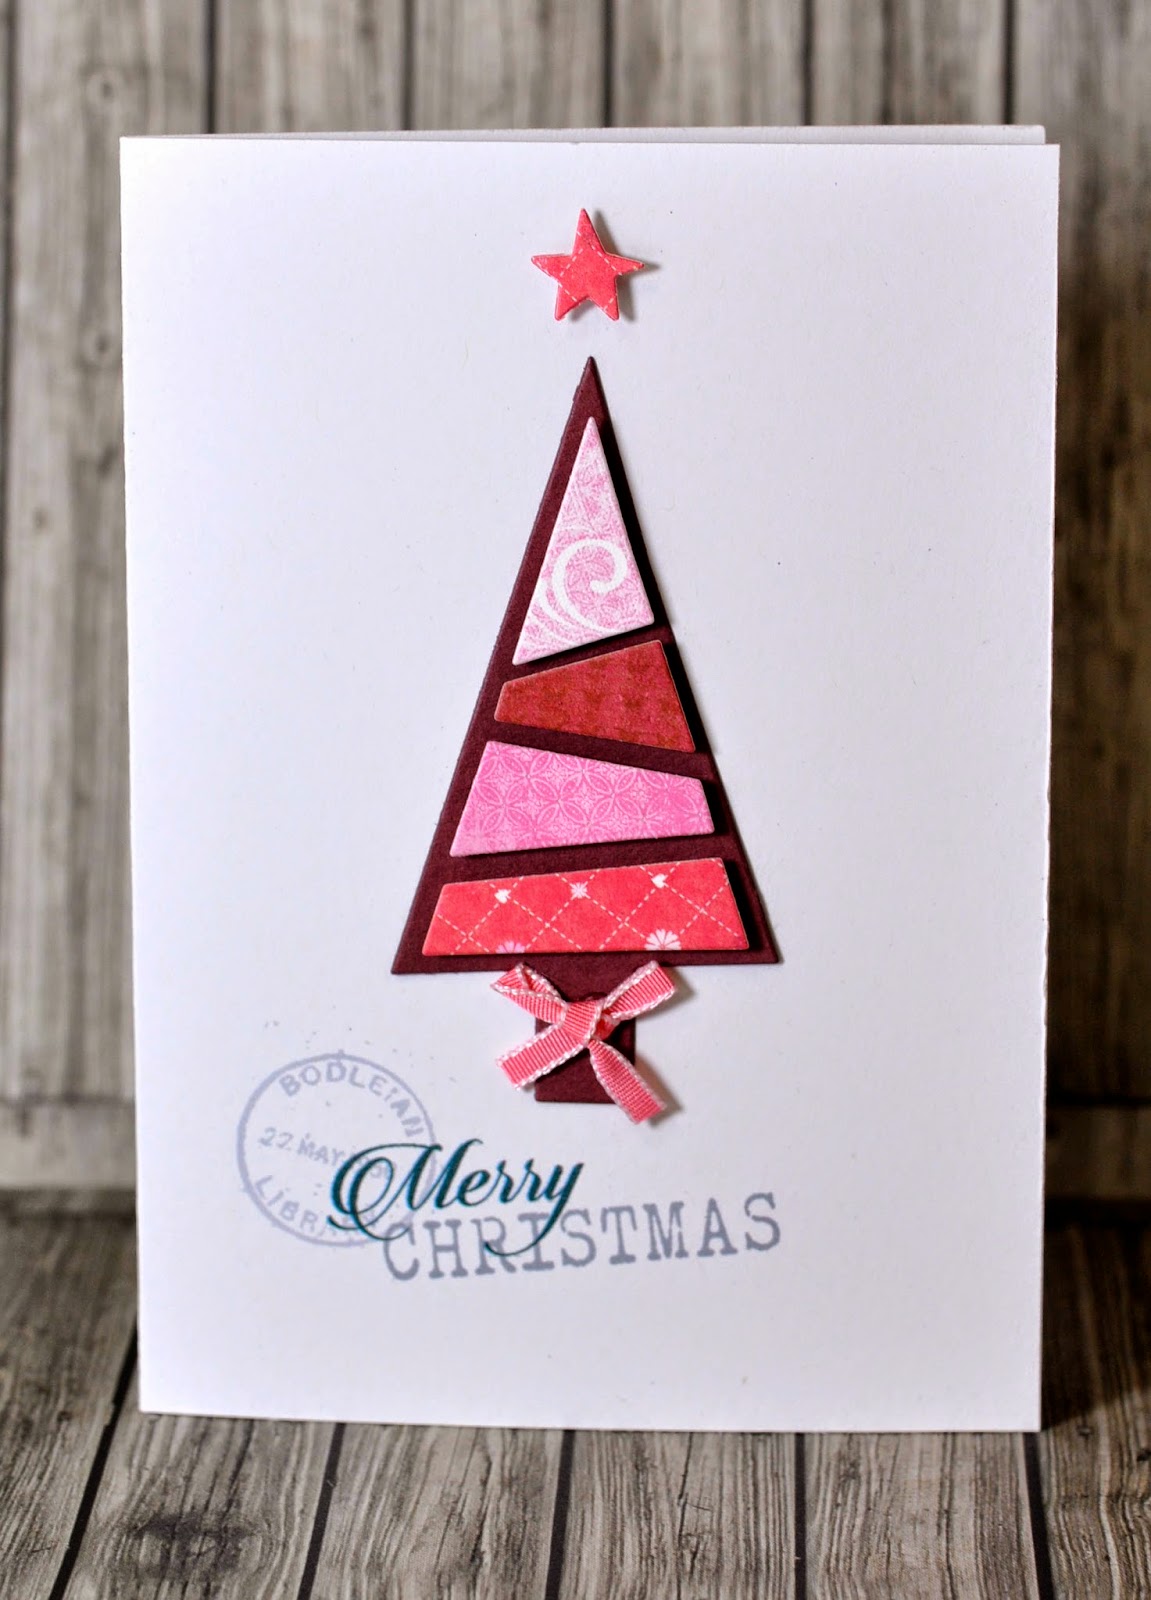
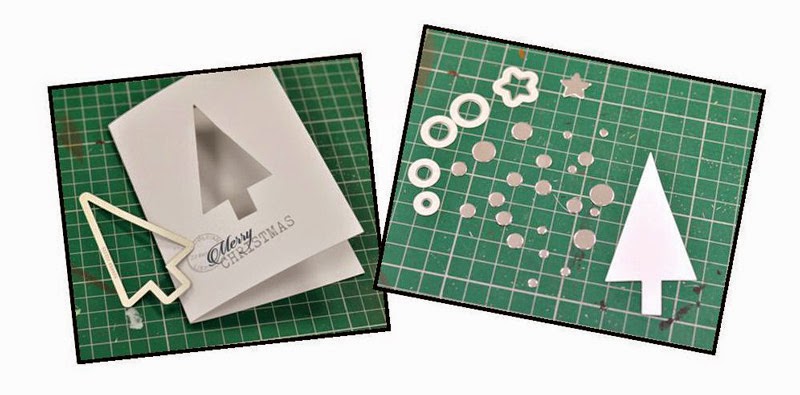
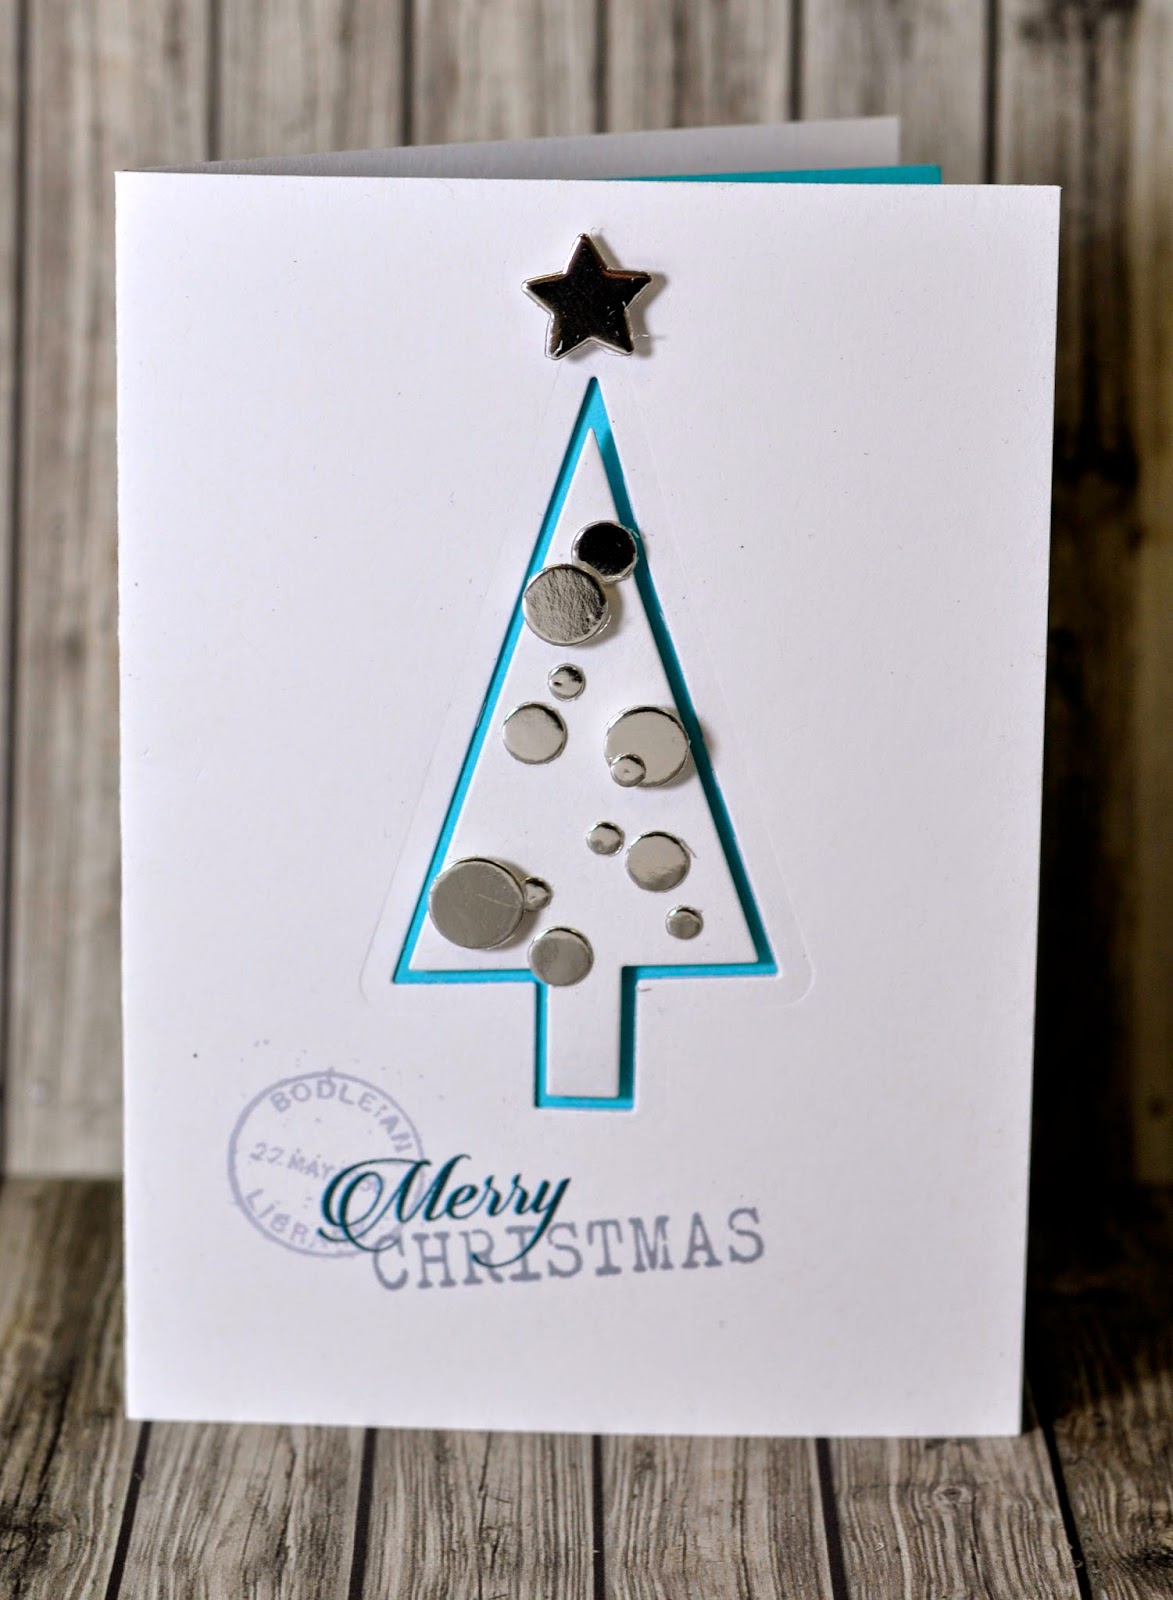
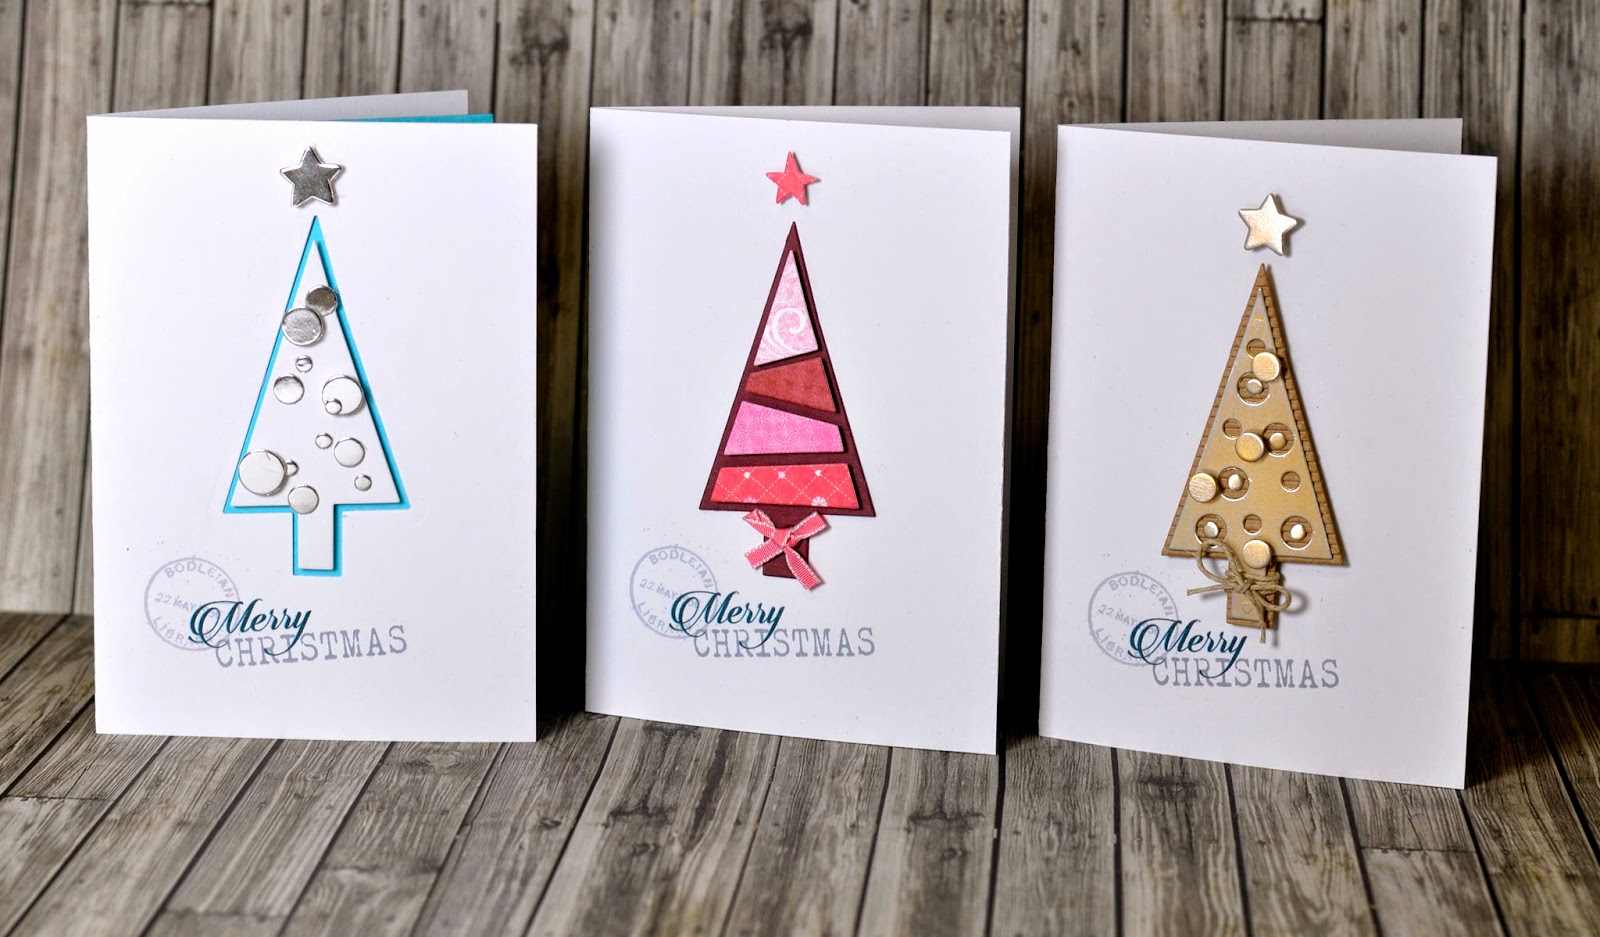
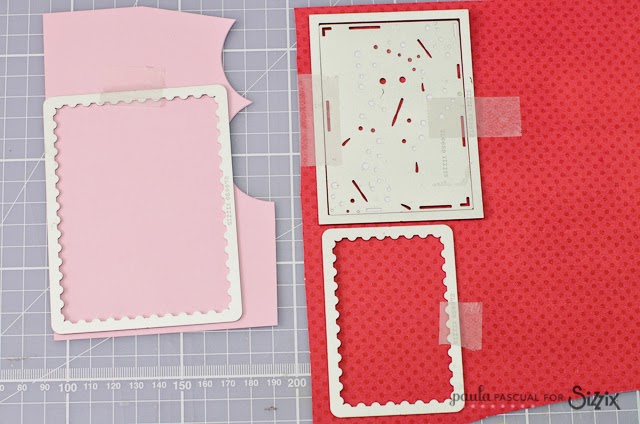
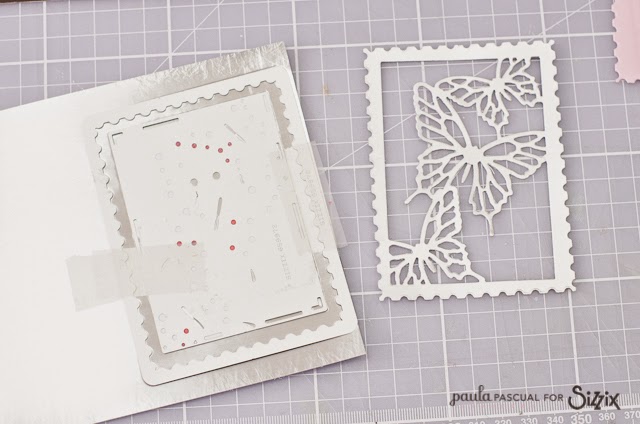
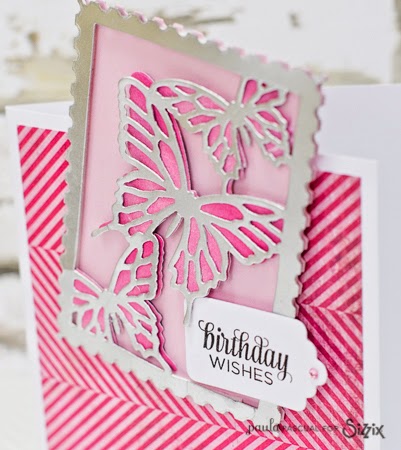
Hello Sizzix friends!!
I am so sorry that my post is going up later than usual this Sunday, but the trouble is it's raining so much here that the basement of our house is flooded and I had to deal with that for most of the day. We have a pump that is supposed to take the water out but it really was no big help since the power was cut for several hours. Ok, that was my day. I hope you had a better one so far!! :-)

Anyway, I have a page that I'd like to share with you as usual:


And I even took some close up shots. 
Unfortunately the colours are not great due to the abysmal lightning conditions....


It was nice to play with some great Sizzix dies and stamps to take my mind off things.


The framelits stamps are great because you see exactly where you are supposed to cut out your stamped image. It's really easy to get a nice clean cut.


For my title I combined one of the Sizzix thinlits dies with some letter stickers.


Finally a close up of some of the bunting pieces I cut out with a new Bigz die and some Tattered florals with some framelits leaves.

These are the Sizzix Products that I used:
Sizzix Big Shot Machine Only (Powder Blue & Teal)
Sizzix Framelits Die Set 12PK w/Stamps - Here & There
Sizzix Framelits Die Set 5PK w/Stamps - Simply Lovely 
Sizzix Framelits Die Set 5PK w/Stamps - English Garden 
Sizzix Thinlits Die Set 7PK - You & Me
Sizzix Bigz Die - Tattered Florals 
Sizzix Accessory - Susan's Garden Tool Kit
Sizzix Bigz Die - Pennants

In addition I used  Heidi Swapp 'Dreamy' collection and letter stickers and flowers från Papirdesign -------------------------------------------------------------------------------------------------------------------------

Hejsan Sizzix vänner!

Ledsen att mitt inlägg kommer mycket senare idag! Mitt problem är att det är hundraårsregn i södra Sverige i dag och min källare är totalt översvömmat. Jag har tömt hinkar etc hela dagen, och nu börjar det regna igen.....Vi har en länspump som egentligen ska ta hand om vattnet, men när jag kom ner i källaren tidigt i morse var det redan fullt av vatten där pga elavbrott som gjorde att pumpen inte fungerade!! Detta var min dag. Hoppas din varit bättre!! :-) 

Men i vilket fall som helst har jag en sida att dela med er idag: 

Några närbilder blev det också, men tyvärr blev färgåtergivningen inte så bra med de dåliga ljusförhållandena vi har.

Det var trevligt att underhålla mig en stund sen med underbara Sizzix dies och stämplar för att skingra tankarna lite.

 Framelits stämplarna er kanon sedan du ser exakt var du ska lägga din die för att få en perfekt utstansning. Enkelt!!

Jag använde en die fra Sizzix thinlits settet 'You & Me' för min titel tillsammans med några alfabetsstickers.

Slutligen en bild på mina banners som jag gjorde med en ny Bigz die och mina Tattered florals med några snygga framelits löv.


Dessa fina Sizzix produkterna använde jag:
Sizzix Big Shot Machine Only (Powder Blue & Teal)
Sizzix Framelits Die Set 12PK w/Stamps - Here & There
Sizzix Framelits Die Set 5PK w/Stamps - Simply Lovely 
Sizzix Framelits Die Set 5PK w/Stamps - English Garden 
Sizzix Thinlits Die Set 7PK - You & Me
Sizzix Bigz Die - Tattered Florals 
Sizzix Accessory - Susan's Garden Tool Kit
Sizzix Bigz Die - Pennants

I övrigt använde jag papper från Heidi Swapp 'Dreamy' collection and letter stickers and flowers från Papirdesign.


Butterflies card

$
0
0


I am really excited to be sharing my first project with my new collection of dies for Sizzix, Everyday Memories! It is my fourth release for Sizzix and I can not be happier about them.


Today I am sharing a card that I made using two sets of dies, Thinlits™ Die Set 8PK - Butterflies, Intricate 659971, and Thinlits™ Die Set 6PK - Butterfly Cards 659972.


As you may know I love butterflies, so I was really adament that this collection should fature a set of intricate single butterflies and one that cut an aperture with them on. the idea then came to make an optional outer frame that was 3 x 4" (perfect for pocket scrap booking).


You can die cut every element on their own or together to create different effects. Mixing and matching! I use low tack tape to secure dies in their place when I cant find my magnetic mat under layers of paper.


You can cut two (the inner aperture and the outer at the same time to create the effect on the right.


Other versions. As you can cut the the butterflies with the very thin edge, though it is very thin, or you can use it as a plain mat and layering. By cutting the outer postage stamp rectangle on its own, it creates a perfect under layer.


One of things I love to do is that elements of the collection mix and match perfectly, so of course the butterfly cards and the intricate ones match. this means that if you die cut the butterfly solid dies out of a contrasting paper and place them under it is a lovely detail.


I attached them with foam pads that come in a thin straight line, perfect for this project.


Finally I added it to the card, tilted over the edge. I stamp the message on a little Sentiment tag from the Sizzix Framelits Die Set 12PK - Tags, Sentiments 658612.


I hope you like the new collection!


A Birthday Book

$
0
0


Hi everyone
I hope you all had a great week, today i will show you a giftbox/ book for my grandson's 21 years birthday. The box/book should be a bos for a game and a gift certificate. I have used differents of the new sizzix dies
The box/book is 15x3x21 cm
Sizzix Dies I have used:
Sizzix Bigz Die Love Gears 659709
Sizzix Bigz Die/ w texture fades  Layered Butterfly 659578
Sizzix Bigz Die Artful Arrows 659433
Sizzix XL Alphabet  Die Block Talk lowercase 659442
Sizzix Framelits 6 dies set Enchanted 659702
Supply list:
Paper. Riddersholm design Tailgate Marked my street,bygone era,StudioLight-indutrial-, cardstock
ink. Black Distress ink
Viva ink gold-kopfer-, embossing powder -bronze- ultra thick from Ranger, Stencil Burlap TH 5007 tim Holtz Collection, old tape measure,buckle, recycled cardstock and metal corners
How to make:
The book cover is made of two pieces of cardstock 18x21 cm scor 3 cm into the short side glue the two spines(3x21cm) together so it be double cardstock in the spine. Inside the cover i made a box 14,5x2,5x20,5 cm. Cut out a cardstock 19,5x25,5cm scor 2,5 cm around and cut into all four corners and glue the corners. Glue the bottom into the cover.
I have decoratet the book using stencils and embossing powder bronze, some of the bigz die is cut out ind thick recycled cardstock, ink and put on bronze creme and glossy accent


Thanks for stopping by, wish you a lovely week
Pia
Hej alle
Jeg håber i alle har haft en dejlig uge. I dag vil jeg vise en gave bog som jeg har lavet til mit barnebarns 21 års fødselsdag hvor der skal ligge et spil og et gavekort. Jeg har brugt flere af de nye Sizzix dies som bare er så lækre.
 
Sizzix Dies som jeg har brugt:
Sizzix Bigz Die Love Gears 659709
Sizzix Bigz Die/ w texture fades  Layered Butterfly 659578
Sizzix Bigz Die Artful Arrows 659433
Sizzix XL Alphabet  Die Block Talk lowercase 659442
Sizzix Framelits 6 dies set Enchanted 659702
Andre materialer:
Papir. Riddersholm design Tailgate Marked my street,bygone era,StudioLight-indutrial-, karton
ink. Black Distress ink
Viva ink gold-bronce-, embossing powder -bronze- ultra thick from Ranger, Stencil Burlap TH 5007 Tim Holtz Collection, gammelt målebånd,spænde, genbrugs karton i pap og metal hjørner
Fremgangsmåde:
Bogomslaget er lavet af to stykker karton i18x21 cm scor 3 cm
ind på den korte side(3x21cm)dette er ryggen, lim begge rygge sammen så ryggen bliver dobbelt. indeni i omslaget skal være en boks på 14,5x2,5x20,5 cm. skær ud i karton 19,5x25,5cm scor 2,5 cm hele vejen rundt og klip lidt op i alle hjørner og lim boksen sammen. Lim den fast til indersiden af omslaget
jeg har dekoreret ved at bruge stencils og embossing powder bronze, nogle af Sizzix bigz die er skåret ud i genbrugs pap, sværtet og har fået bronze creme  på kanter og pyntet med glossy accent.
Tak fordi du kiggede forbi, jeg ønsker dig en dejlig uge
Pia
 

A birthday card by Olga

Today, tomorrow and always...

$
0
0


Other items:
Pion Design papers; Days of Winter
cardboard
Archival Ink Jet Black
glue
tape

Cut the patterned paper (size 10,5 cm × 16 cm) and emboss using Sizzix Textured Impressions Embossing Folders 2PK - Smile & Plus Set 659785 . Sew the edges and tape it on to the cardboard. Cut the flowers using Sizzix Thinlits Die Set 5PK - Estelle 659703 and "mesh" using Sizzix Thinlits Die Set 3PK - Overall Patterns 659758  . Glue the mesh and flower on to the backgroung. Finally ink the text and cut out using Sizzix Framelits Die Set 8PK w/Stamps - Hello 659464.

Happy crafting, Minna

*   *   *   *   *
Moi, tällainen nopeatekoinen kortti tällä kertaa:)
Muut tarvikkeet:
Pion Designin paperit; Days of Winter
kartonkia
Archival Ink muste Jet Black
liimaa
teippiä
Leikkaa kuviopaperi kokoon 10,5 cm × 16 cm ja embossaa käyttäen Sizzix Textured Impressions Embossing Folders 2PK - Smile & Plus Set 659785 . Ompele reunat ja kiinnitä kartonkiin. Leikkaa kukat  Sizzix Thinlits Die Set 5PK - Estelle 659703 ja "verkko"Sizzix Thinlits Die Set 3PK - Overall Patterns 659758  . Liimaa verkko ja kukat korttiin, lopuksi leimaa ja leikkaa teksti käyttäen settiä Sizzix Framelits Die Set 8PK w/Stamps - Hello 659464 ja kiinnitä korttiin.

Terveisin. Minna

Jump! Jump!

$
0
0


I'm trying to get some scrapbooking done since I scrapbook no less than four little ones (none of them mine). This week it is Alma that is the subject for the layout and I've used a variety of fun Sizzix products to put together this page.


The layout is simple (that is the way I roll) which leaves room for me to use a lot of patterns while still keeping things fairly clean.


I wanted to add something above the pictures but I didn't want it to take up too much room neither visually nor in terms of bulk. Therefore I decided to cut out the sentiment from the frame from Thinlits Die Set 6PK - I Heart This and use as a stencil attatching it to the layout using multiple post-it notes making sure I wouldn't accidentally smudge ink on the surrounding layout.


Once I was sure the stencilling was done I could safely remove the post-it notes revealing a subtle detail that doesn't take up too much room but still adds something to the mix.


For the title I used the very versatile Bigz XL Alphabet Die - Block Talk Lowercase to cut out a title that popped into my head while looking at the pictures. Guess it reveals that I was a teen-ager in the 90's...


To make room for the date I die cut a tab from the Thinlits Die Set 8PK - Basics and stamped the date which happened to also be Alma's 3rd birthday hence the "happy birthday". To add a little decoration to the tab I also die cut the star from the Thinlits Die Set 8PK - Basics.
 
Supply list:
Sizzix Big Shot Starter Kit (Powder Blue & Teal)
Sizzix Accessory - Magnetic Platform for Wafer-Thin Dies
Thinlits Die Set 8PK - Basics
Cardstock
Paper: Scenic Route, Jillibean Soup, Cosmo Cricket, Little Yellow Bicycle
Stapler
Date and text stamp
Ranger Distress Ink
Mini blending tool
Sewing maching and thread
 
---o---
 
Jeg forsøger at få lavet nogle scrapsider, da jeg har intet mindre end fire små (ingen af dem mine), som jeg scrapper sider til. I denne uge er det Alma, der er centrum for en side, hvor jeg har mixet forskellige fede Sizzix-produkter.
 
Siden er - som stort set alle mine projekter - ret enkelt, hvilket giver mig mulighed for at mixe flere forskellige farver og mønstre.
 
Jeg ville have noget dekoration over billederne, som ikke fyldte for meget, hverken visuelt eller i højden. Derfor besluttede jeg mig for at bruge teksten fra rammen fra Thinlits Die Set 6PK - I Heart This som stencil. Jeg monterede den på layoutet med et antal post-it notes for at sikre, at der ikke kom smuds på det omgivende layout.
 
Da jeg var sikker på, at det stencillerede motiv var færdigt, fjernede jeg post-it siderne, og nu havde jeg en fin dekoration, som bidrog til sidens hele uden at fylde for meget.
 
Til titlen brugte jeg det meget alsidige Bigz XL Alphabet Die - Block Talk Lowercase til at udstanse den titel, der poppede op i mit hoved, mens jeg arbejdede med billederne. Tror vist, at den afslører, at jeg var teen-ager i 90'erne...
 
Datoen fik plads på en tab fra Thinlits Die Set 8PK - Basics, og for at dekorere den lidt udstansede jeg en stjerne fra samme die-sæt og monterede henover tabben. Daoten er stemplet sammen med et lille "happy birthday", fordi billederne faktisk stammer fra Almas tredje fødselsdag.
 
Ingredienser
Sizzix Big Shot Starter Kit (Powder Blue & Teal)
Sizzix Accessory - Magnetic Platform for Wafer-Thin Dies
Thinlits Die Set 8PK - Basics
Karton
Papir: Scenic Route, Jillibean Soup, Cosmo Cricket, Little Yellow Bicycle
Hæftemaskine
Dato- og tekststempel
Ranger Distress Ink
Mini blending tool
Symaskine og tråd

116 Days....

$
0
0


.... 'til Christmas! you heard it here first folks! I know, I know, it's a bit early to be talking about Christmas although from conversations on my travels many of you have already made your cards or are about to start.

Believe me when I tell you I am the last person who needs reminding as I will turn 30 on Christmas Day...or was it 50, I can never remember!

This is the time of year when all the major Craft manufactures launch their festive ranges onto an unsuspecting public and we here at Sizzix are no different.

The range I want to talk about is Festive Arts designed by the prolific Ms. Potter. If you remember I introduced her woodland range to you last week. The range has a contemporary Nordic feel to it, and coincidentally I was demonstrating it among others in Norway a couple of weeks ago!

The set I used is a Thinlits Die Set called Christmas Trims #2 (659913) which is one of 6 sets in the range. I decided to make some simple mini card using the Christmas tree and robin/mistletoe dies. I started by die-cutting them from kraft card before die-cutting all the extra bits and bobs from green, red and gold card, trimming away the parts I needed with a craft knife and mounting them in place.

I attached rectangles of ivory corrugated card behind each assembled die-cut which are now ready to mount. I created a couple of small cards out of kraft card before cutting a couple of rectangles of patterned paper from Carta Bella's Merry & Bright 6 x 6 paper pad before gently sanding the edges to add a little definition. I attached both rectangles to their base cards using staples and stamped them using postage frank marks from one of my favourite Christmas stamp collections from the guys at Darkroom Door
Here are the finished cards, as you can see I replaced the adhesive pearl gem on the mistletoe with a wooden button threaded with natural twine. I love the way the dies dictate the style of card, a style which I am very happy to follow.


1-2-3 Cards ! By Karine

$
0
0

Hello!

Here we are today, back with come cards! Not one, not two but three different ones really easy to realize! We will work essentially with white cardstock and paper scraps.

Supply list:

Cardstock: American Crafts
Labels: Ephéméria
Embellishments: My Mind's Eye
Stamp: Craft Origine
Inks: Prima Chalk
Masking Tape
Stabilo Pen 68
Others: Charcoal

Dies:

658300: Sizzix Big Shot Starter Kit
656545: Sizzix Bigz Die-Flower 3D
658334: Sizzix Sizzlits Die-Flight of Fancy

The aim is to create three little cards size 10x15 cm with paper scraps, a little stash and above all colours!

My 3 cards are all different but they still match together
The backgrounds are all prepared the same way working with watercolour thanks to my Stabilo Pen68 felt-tip pens. Take a paintbrush to help the colour spread; splash, mix colours or play with tone-on-tone colours.

Once your backgrounds are dry, you can draw small triangles with charcoal and add volume by inserting butterfly shapes cut with your Big Shot. Colorize them with a contrasting colour.

Glue your embies with 3D foam adhesive or play with volume by creating a pretty flower thanks to the ide Flowers3D.

Add a text stamp “une pensée pour toi » on all your three cards and here you are!


Thank you,
See you next Thursday,

Karine


Bonjour !

Aujourd'hui c'est le retour des cartes, avec non pas une mais 3 modèles différents et très faciles à réaliser :) Nous travaillerons essentiellement des chutes de papiers et du cardstock blanc.

Matériel :

Cardstock : American Crafts
Etiquettes : Ephéméria
Embellissements : My Mind's Eye
Tampon : Craft Origine
Encres : Prima Chalk
Masking Tape
Stabilo Pen 68
Divers : Fusain

Dies utilisés :

658300: Sizzix Big Shot Starter Kit
656545: Sizzix Bigz Die-Flower 3D
658334: Sizzix Sizzlits Die-Flight of Fancy

L'idée est de créer 3 petites cartes au format 10x15cm avec des chutes de papiers, un minimum de matériel et surtout de la couleur !

Mes 3 cartes sont toutes différentes mais pourtant bien assorties :)
Les fonds sont tous faits de la même façon en travaillant l'aquarelle avec les feutres Stabilo Pen68. Aidez-vous d'un pinceau pour bien diffuser la couleur, éclaboussez, mixez les couleurs ou jouez le ton sur ton.

Une fois vos fonds secs vous pouvez dessiner au fusain des petits triangles, ajoutez du volume en intégrant des formes papillons découpées à la Big Shot. Colorisez ensuite avec une couleur qui contraste.

Montez vos décorations en 3D ou jouez sur le volume en créant une jolie fleur grâce au die Flowers3D.

Ajoutez un tampon texte "une pensée pour toi" sur vos 3 cartes et le tour est joué !

Merci !

A jeudi


Karine

Under cover coffee table

$
0
0


How are you this week? I'm recovering from looking after my gorgeous granddaughters - Oona decided that last week was the time to cut 2 new teeth - which explained the sleepless nights.
However in the middle of it all their dresses were altered and here they are, as promised-
 
Abi, on the left wasn't very well - but did manage to play her part walking down the aisle -
 

 and Eve enjoyed every moment of the day -


 So now back to work - and the coffee table -
 
 
I have used 
10" Dresden Plate Bigz L die - 660120 to cut the fabrics to go around the sides of the coffee table. I'm mixing the patterns and colours to create quite a random effect.
The plain grey fabric is going to cover the middle and I'm going to cover some buttons, to stud the top, using the same fabrics, and I will pad the sides and to give a softer finish.
Next week I hope to have the sides finished and maybe the buttons covered - I'm looking forward to seeing how this will work - and then I may need to cover other things!!!
I'll be in touch again next week - meanwhile enjoy the last few days of summer.
Angela


Scrapbooking Page: "Listening"

$
0
0

Hello! It's Annahere to share some ideas using Sizzix products.
I received the new dies the day we left for our summer vacation and could not wait to finally work with it. The Sizzix dies by Echo Park and Jillibean Soup are wonderful and I can’t stop creating! Today I would like to share with you my new layout, made with some these dies that you can use in very different ways. There is my elder nephew on the photo.

cafe creativo - sizzix big shot - scrapbooking layout (1)

I didn't use a patterned paper for the background. When I started scrapbooking, I loved to use patterned paper as my background paper…however over time I started loving white or solid color backgrounds mostly.
I chose a white paper as a background and I added a touch of watercolour effect thanks to color spray. I applied two stripes of patterned paper. This is a perfect way for me to not just end up using small pieces of the wonderful paper.

cafe creativo - sizzix big shot - scrapbooking layout (2)

With my Big Shot I cut some nice shapes with my favourite dies of the moment: Pennants and Tags design by Echo Park, Framelits Die Set w/Stamps – Noted and Hello design by Jillibean Soup!!!
Glue your picture, add the title and the page is done!

cafe creativo - sizzix big shot - scrapbooking layout (3)

I hope you enjoyed seeing how I used the dies and could take some inspiration from my page!
Thanks so much for visiting me today.
 
Items used:
 
1 photo (cm 10x15)
cardstock: white, kraft, turquoise, pink
patterned papers: We R Memory Keepers, American Crafts, Craft Asylum
brad: Prima
alphabet: Prima
ink pad: Ranger
color mist
sewing machine & thread
 
**************************************
Flag_of_Italy
Per le amiche italiane! :)

Ciao, sono Anna e sono qui per condividere alcune idee utilizzando i prodotti Sizzix.
Ho ricevuto il pacchetto con le nuove fustelle il giorno in cui siamo partiti per la nostre vacanze estive e vi dirò la verità, non vedevo l'ora di tornare per provarle! Le fustelle Sizzix disegnate da Echo Park e Jillibean Soup sono davvero meravigliose e non riesco proprio a smettere di usarle!
Oggi vorrei condividere con voi un layout, realizzato con alcune di queste fustelle, che sono davvero versatili ed è possibile utilizzarle in mille modi diversi. Sulla foto della pagina c'è mia nipote più grande.
Come vedete non ho usato una carta fantasia per lo sfondo. Quando ho iniziato a scrappare, mi piaceva usare le carta patterned come sfondo delle pagine... però con il tempo ho iniziato a prediligere gli sfondi tinta unita o bianchi. Credo lascino più spazio alla fantasia e alla creazione degli abbellimenti, senza parlare del fatto che in questo modo posso usare anche i più piccoli avanzi delle carte preferite!
Questa pagina dunque non fa eccezione, ho scelto un cartoncino bianco A4 come sfondo ed ho aggiunto un effetto acquerello grazie allo spray di colore giallo. Ho applicato solo due strisce di carta fantasia in alto ed in basso.
Con la mia amata Big Shot ho tagliato alcune forme con le fustelle preferite del momento: Bandierine e Tag design by Echo Park (tutte Bigz), Framelits con timbri “Noted” e “Hello” design Jillibean Soup!!!
Una volta incollata la foto, creare gli abbellimenti con le fustelle è facilissimo e molto divertente! Infine non resta che aggiungere il titolo e la pagina è bell'e che fatta!
Bene, spero vi sia stato d'aiuto vedere come ho usato le fustelle in questo semplice layout.
Grazie per la visita!
 
Materiali:
 
1 foto (cm 10x15)
cartoncino bianco, kraft, verde turchese, fucsia
carta fantasia: We R Memory Keepers, American Crafts, Craft Asylum
tag: Prima
alfabeto: Prima
inchiostro tampone: Ranger
colori a spray
macchina per cucire e filo


Loving Liberty fabrics and Sizzix dies

$
0
0


Hi to everyone! This last week we enjoyed some days in London with family. I can´t believe we are at home after spending hours and hours walking  through its streets and so much to see. 
So, time to spend far from my sewing days and finding new places to visit.
Although we knew the city for two times I was wishing to go to Liberty Shop. Love those beautiful fabrics and I wanted to have them on my hands.


As you can imagine , a lot of ideas come to my  head when I came in the Liberty world.


I could to buy some of the lovely fabrics and come back home with something to try  with Sizzix dies.....


Of course some of  the new collection dies like Nel Whatmore dies for quilting . Have  you see them ? Check them and you will love them.


I especially love this flower to sew some applique with my Liberty fabric. What´s your opinion ? 


Well, I have to think , lol. I hope you enjoy  next September  week. We are having our local festival  at the village and waiting to be with family and friends!
Love

Mercedes 
.......................................................... ***************************** ...................................................


¡Hola a todo el mundo ! Esta pasada semana disfrutamos algunos días en Londres con la familia. No me  puedo creer que ya estemos de vuelta en casa después de haber horas y horas por sus calles  con tantas cosas para ver.
Así que ha sido un tiempo para estar lejos de la costura y ver nuevos sitios para visitar.
Aunque ya conocía la ciudad  de dos viajes anteriores  estaba deseando ir a ver por primera vez la tienda de Liberty. Me encanta sus preciosas telas y quería tenerlas en mis manos.

Como puedes imaginarte  , un montón de ideas me vinieron a la cabeza cuando entré en el mundo Liberty.

Al final compré algo  y regresé a casa  con la intención de usar mis troqueles de Sizzix y coser un  nuevo proyecto.

Desde luego  con alguno de los nuevos troqueles de Nel Whatmore para quilting. ¿ Los has visto ?
Echa un vistazo que seguro te encantarán.

A mí especialmente me gusta uno  de una flor para hacer algo de aplicado con mi tela recién comprada. ¿ Qué te parece ?

Bueno, tengo que pensarlo. Espero que disfrutes esta próxima semana de septiembre. Nosotros estamos ahora mismo en nuestras fiestas locales que disfrutaremos con familia y amigos.
Cariños
Mercedes

"I'm blue" layout by Olga

I *Heart* This !

$
0
0


Hi, it's Bente I am here today to show you some fun cards that I made with some of my recently aquired dies.


Sizzix really has had some truly great releases recently that work perfectly for pocket scrapbooking and traditional scrapbooking and cards  alike.


For my 'Hello' card I combined dies from two different sets.


I think the instagram frame with  'I <3 This'  is really fun and I like that you can use the inner square from one and exchange it for a different coloured one. It makes a great background for some cute embellishments. :-)


 I used some pop dots to raise some of my bits and pieces and achieve an even cooler look.


 With these dies you can make nice cards for a variety of occations in no time at all!

The supplies I used are:
Sizzix Big Shot Starter kit 
Sizix Thinlits die set 7 pk - You & Me
Sizzix Thinlits die set 6 pk - I heart This

Besides these items I used papers from Crate 'Paper Heart' collection.
-------------------------------------------------------------------------------------

Hejan!
Här har jag ett par nya kort gjorda med mina nyaste dies.
Många av de senaste kollektionerna är perfekta både för pocket scrapbooking (typ: project life) och traditionell scrapbooking och kort.
För att göta mitt 'Hello' har jag kombinert två set av nya dies.

Jag är förtjust i den roliga instgram ramen och tycker att det är en trevlig detalj att du kan använde den inre kvadraten från en ram att matcha med en annan färg . Det blir en fin bakgrund att dekorera med både die cuts och annat pynt.

Jag höjde upp valda delar av motiven genom att använda limkuddar.
Som ni förstår kan man snabbt göra roliga kort till envar anledning med dessa fina dies.

Produkterna jag använde här var:
Sizzix Big Shot Starter kit 
Sizix Thinlits die set 7 pk - You & Me
Sizzix Thinlits die set 6 pk - I heart This

Och förutom dessa har jag använt Crate's 'Paper Heart' kollektion.

:-) :-) :-)


Summer mini album

$
0
0
Hi everybody!

Summer is almost gone, and today I want to show you a summer mini album I taught in a recent workshop in Sant Feliu the Guixols.


I always take my Big Shot machine to my workshops. It is very portable and I love the faces of my students when they use it for the first time, It is like magic!


In this workshop we use the positive and the negative space of the die cut piece to create some embellishments on the front and back covers of the mini album, so I showed them how to get the most of a die.


And here are my students, all happy with their albums. We had a lot of fun!

Happy Monday!

................................

¡Hola a todos!

Con el verano que ya toca a su final os quiero enseñar un miniálbum que enseñé hace poco en Sant Feliu de Guíxols.

Me suelo llevar mi Big Shot a los talleres, ya que es muy portátil y me encanta ver la cara de mis alumnas cuando troquelan por primera vez. ¡Es como magia!

En este mini utilizamos la parte positiva y negativa de un troquel para adornar la portada y contraportada del álbum y así aprovechar al máximo las posibilidades de un solo troquel.

¡Feliz lunes!

Smile

$
0
0


Hi everyone
I hope you all had a great week, today i will show you  a very quick and easy tag to make which can be used on a gift.
Items I have used:
Supply list:
Paper: Prima, StudioLigth-Chabby Chic-cardstock beige
Stamp: JuteRite-Smile-
Ribbon,pountura paint.-White- and flowers

Thanks for stopping by, see you next Tuesday
Pia
Hej alle
Jeg håber du har haft en dejlig uge. I dag vil jeg vise en let og hurtig tag du kan lave og som kan bruges til at hænge på en gavepakning.
Sizzix dies jeg har brugt:
Items I have used:
Andre materialer:
Papir: Prima, StudioLigth-Chabby Chic-cardstock beige
Stempler: JuteRite-Smile-
Bånd,pountura paint.-White-og blomster
Tak fordi du kiggede forbi, vi ses næste tirsdag
Pia
Viewing all 2033 articles
Browse latest View live