Quantcast
Channel: Crafting ideas from Sizzix UK
Viewing all 2033 articles
Browse latest View live

Here`s to you...

$
0
0

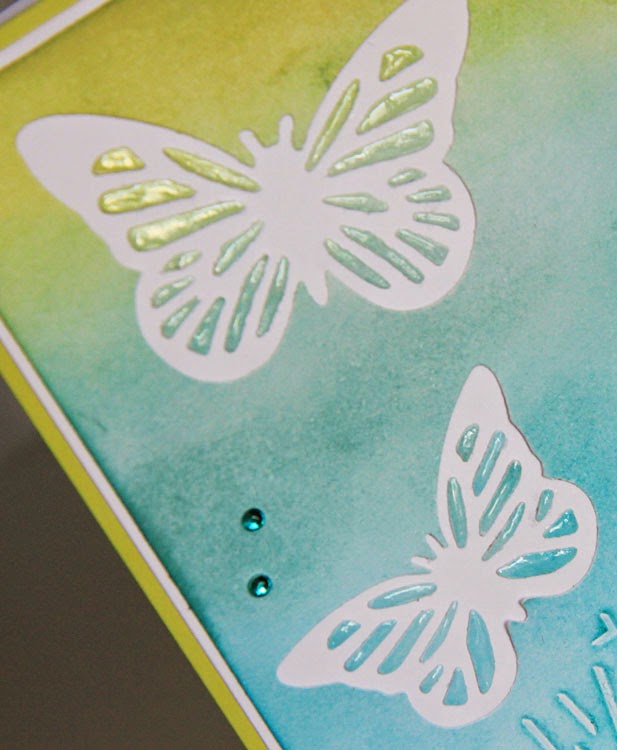
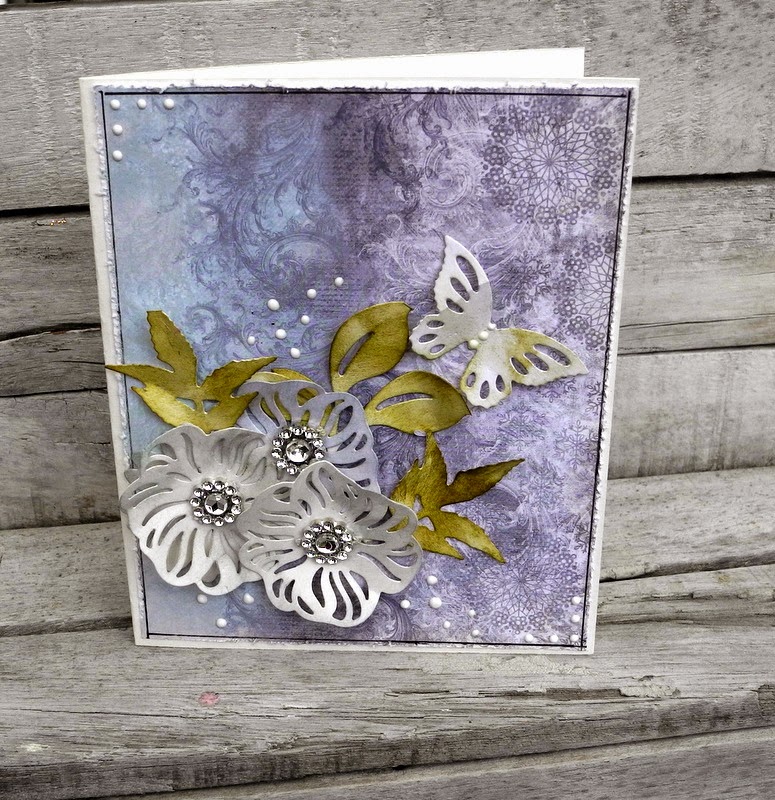
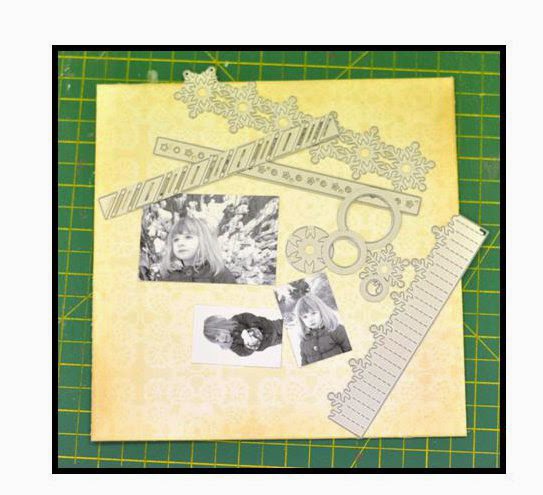
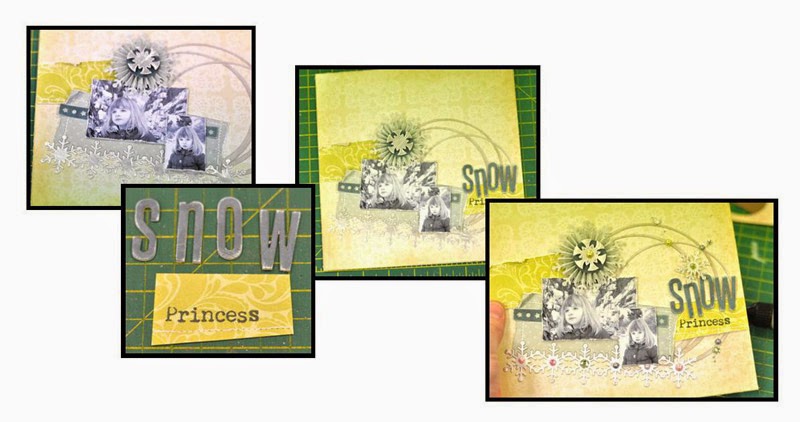
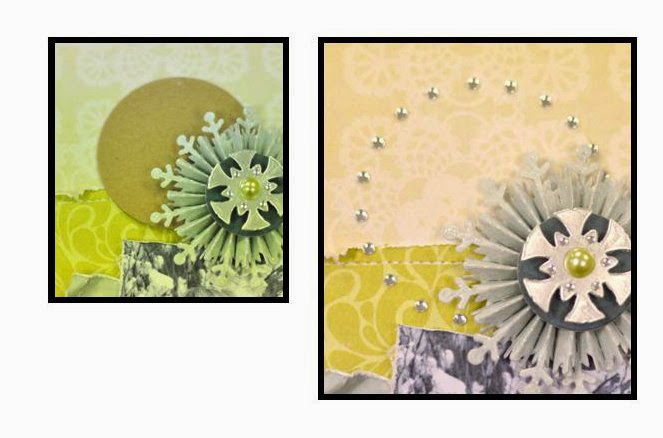
Hello to everyone:) Today is my turn to show you this simply card I made:)


Sizzix products:
Sizzix Big Shot Machine 657900
Sizzix Thinlits Die Set 3PK - Overall Patterns 659758 
Sizzix Framelits Die Set 8PK w/Stamps - Hello 659464
Sizzix Bigz Die - Floressa 659708

Other products:
white cardboard, Pion Design papers; Shoreline Treasures
Glimmer mists blue and craft
Archival Ink "Jet Black"
glue
tape
stencil "brick"
gesso

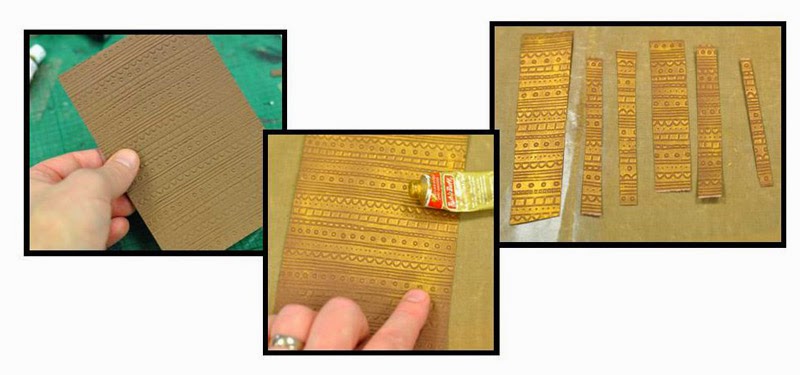
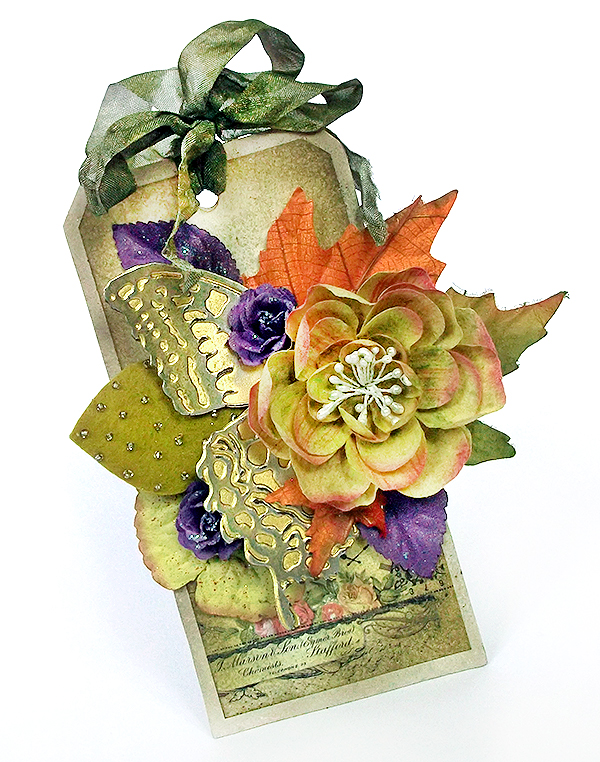
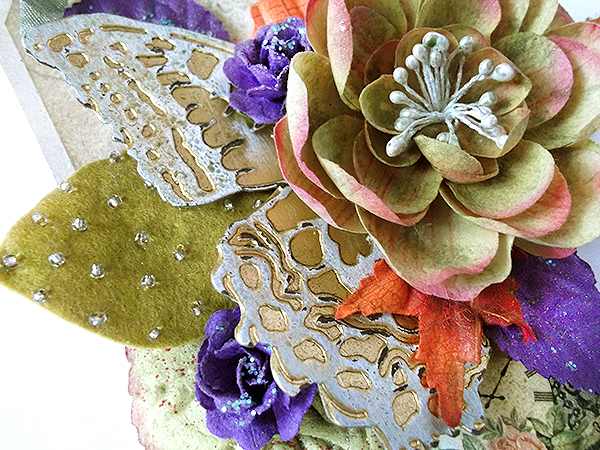
Cut the cardboar size 11 cm × 16,5 cm. Apply gesso on to the background and allow to dry. Make the bricks using stencil and craft mist, allow to dry. When dried make drops using blue mist, allow to dry.
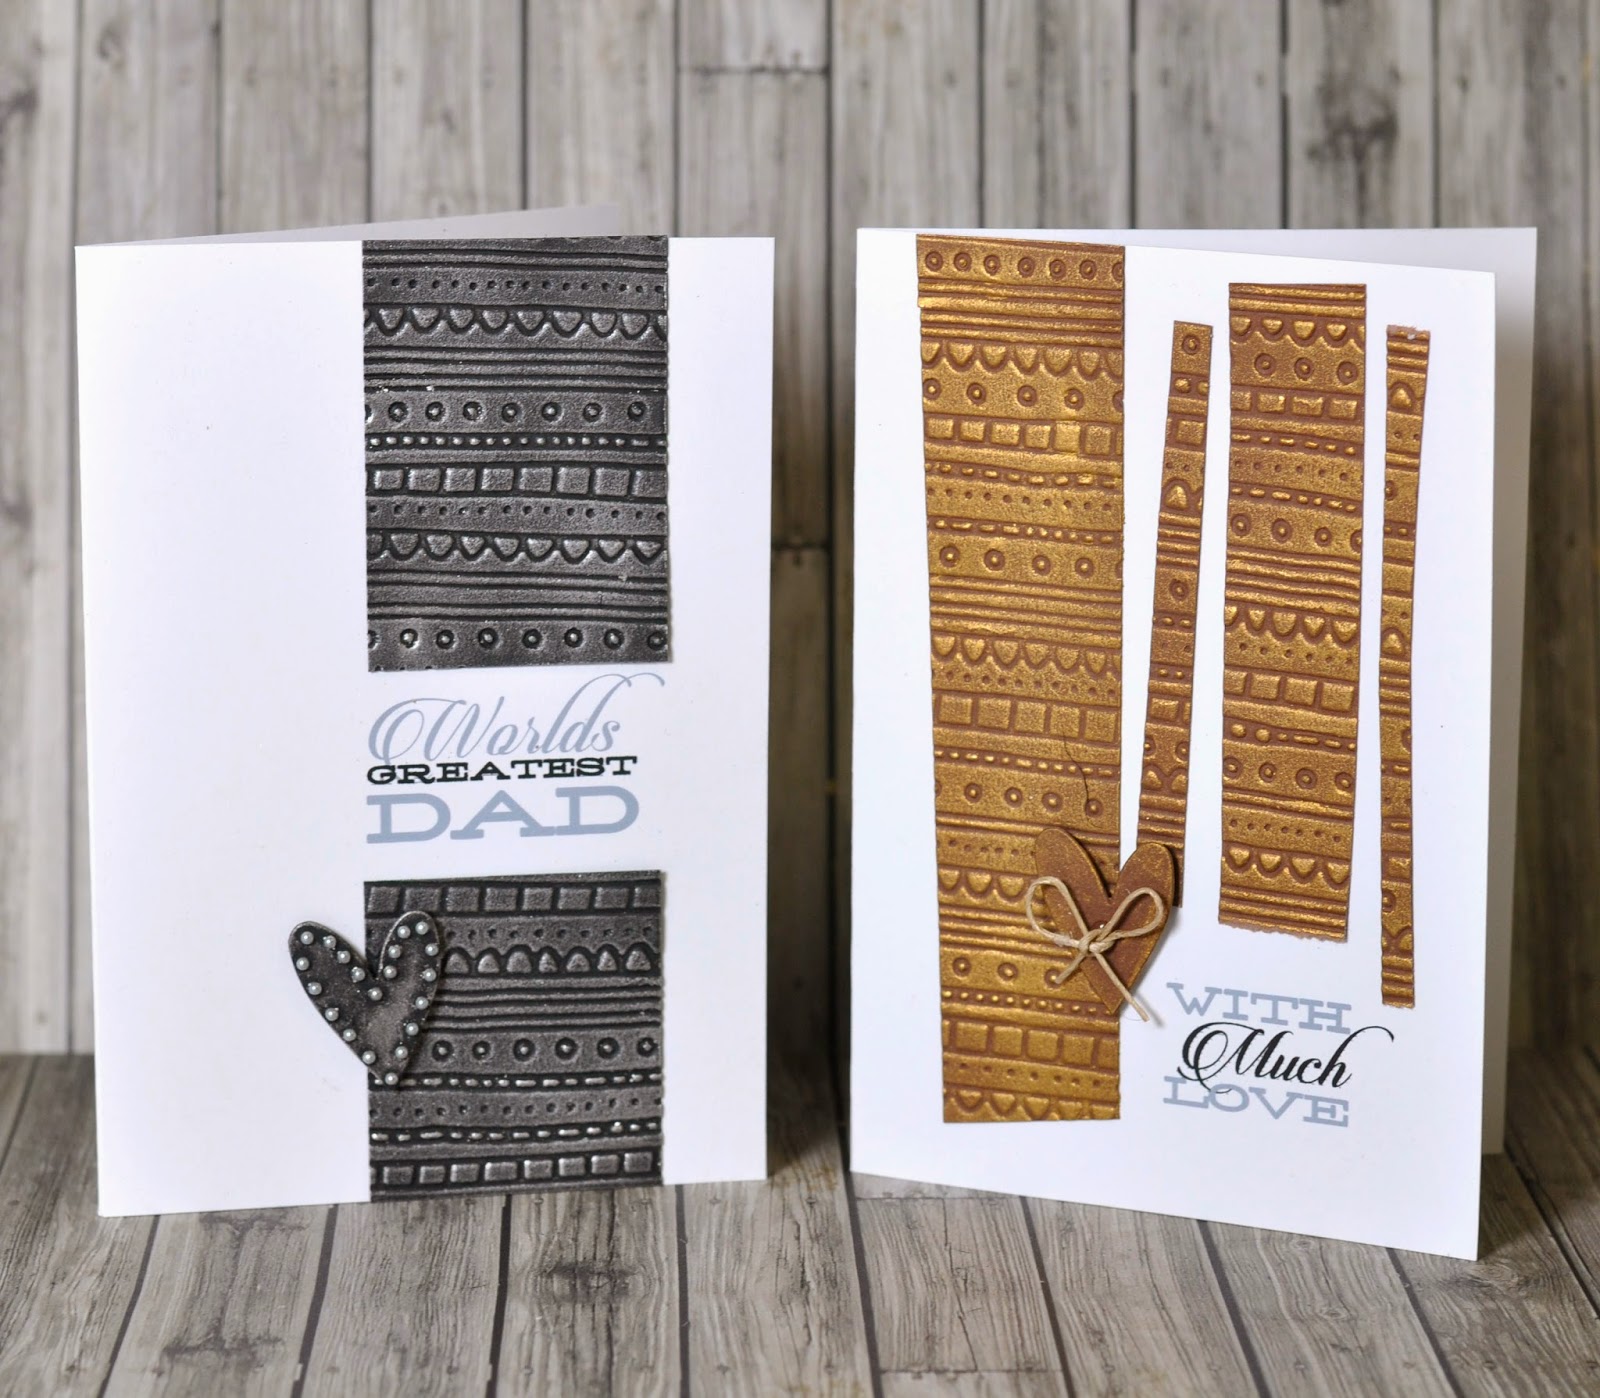
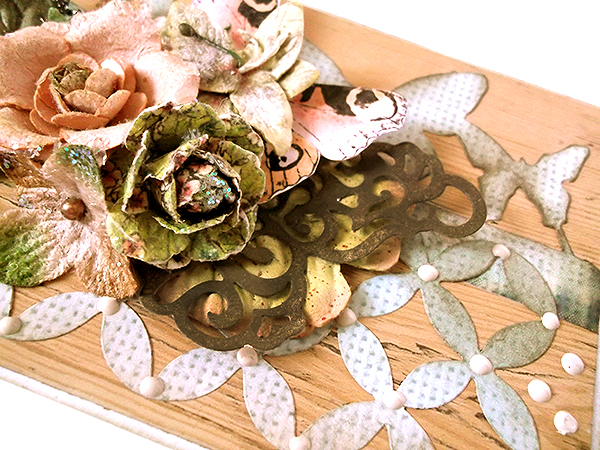
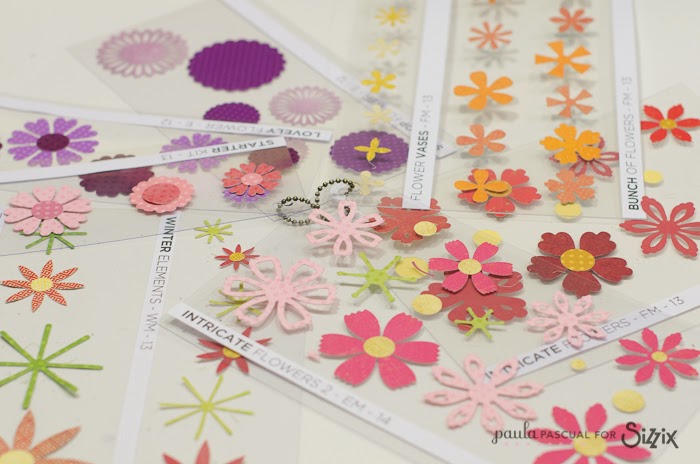
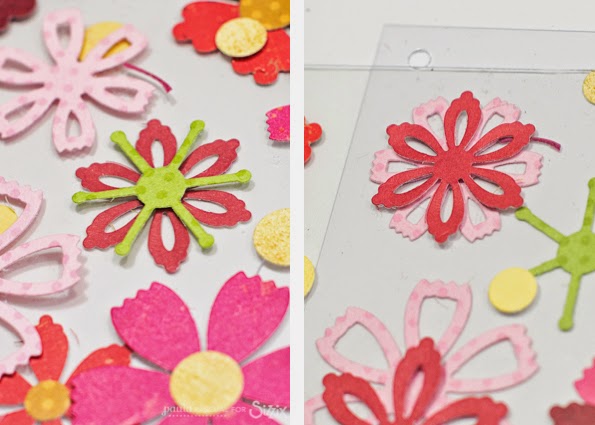
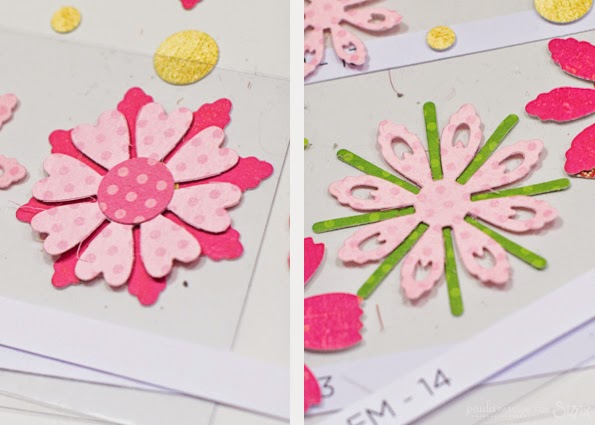
Cut the wire using Sizzix Thinlits Die Set 3PK - Overall Patterns 659758and take the piece of it, glue on to the card. Cut also the flowers using Sizzix Bigz Die - Floressa 659708, put them together and glue on to the card. Stamp the sentiment and heart and cut out using Sizzix Framelits Die Set 8PK w/Stamps - Hello 659464.

Happy crafting, Minna

*   *   *   *   *
 Moi:) Tänään minun vuoroni jälleen esitellä kortti-ideoita:)

Sizzix tuotteet:
Sizzix Big Shot Machine 657900
Sizzix Thinlits Die Set 3PK - Overall Patterns 659758 
Sizzix Framelits Die Set 8PK w/Stamps - Hello 659464
Sizzix Bigz Die - Floressa 659708

Muut tarvikkeet:
valkoinen kartonki, Pion Designin paperit; Shoreline Treasures
Glimmer mist; sininen ja kraft
Archival Ink muste musta
liimaa
teippiä
gesso
sabluuna "tiiliseinä"

Leikkaa kartonki kokoon 16,5 cm × 11 cm. Levitä gessoa siihen ja anna kuivua. Tee tiiliseinätausta käyttäen sabluunaa ja kraftin väristä suihketta. Kun kuivunut, lisää sinisellä suihkeella pisaroita.
Leikkaa verkko käyttäen stanssia Sizzix Thinlits Die Set 3PK - Overall Patterns 659758 ja ota siitä palanen, kiinnitä korttiin. Leikkaa myös kukat stanssilla Sizzix Bigz Die - Floressa 659708 , kokoa ne ja kiinnitä korttiin. Leimaa teksti ja sydän käyttäen settiä Sizzix Framelits Die Set 8PK w/Stamps - Hello 659464.

Mukavaa keskiviikkoa, Minna


Butterflies and debossing

$
0
0


This week I am back to making cards and I've come up with a birthday card combining butterflies and a debossed sentiment.
 
 
My first step was to use the "wishes" debossing folder from the ShadowPress Debossing Folders 6PK - Sentiments Set to deboss the larger part of my sentiment. After I had done that I used distress inks to add colours to the debossed paper.
 
 
The edges of the debossed word will take more colour that the surrounding area but this only helps to make the word stand out even more. Once I had coloured the entire paper and let it dry I stamped the rest of my sentiment.


I then wanted to add some butterflies to the card so I die cut them directly from my coloured and debossed paper using the Thinlits Die Set 2PK - Winged Beauties. Using the magnetic platform makes it easy to assure that the butterflies are die cut exactly where they should be.
I wouldn't say that it was easy putting back all the little pieces but I loved the look so it was worth the effort. I even added some glossy accent to these small pieces to give the butterflies some dimension. All that was left was then to add some bling and put the card together.
 
Supply list:
Sizzix Big Shot Starter Kit (Powder Blue & Teal)
Sizzix Accessory - Magnetic Platform for Wafer-Thin Dies
Cardstock
Distress Ink (Ranger)
Bling
Stamp (Papertrey Ink)
Glossy accent
 
---o---
 
I denne uge er jeg tilbage ved kortmageriet, og jeg har kombineret sommerfugle og en debosset tekst.
 
Jeg indledte med at bruge "wishes" folderen fra ShadowPress Debossing Folders 6PK - Sentiments Set til at debosse en del af mit korts tekst. Herefter brugte jeg forskellige Distress Inks til at tilføje farve til det debossede papir.
 
Det debossede ords kanter vil tage mere imod farven end det omkringliggende papir, men det er bare med til at få ordet til at stå tydligere frem. Da jeg havde farvet og tørret papiret, stemplede jeg resten af kortets tekst.
 
Som dekoration ville jeg have nogle sommerfugle, som jeg udstansede direkte i mit indfarvede papir med Thinlits Die Set 2PK - Winged Beauties. Her er det en god idé at bruge Magnetic Platform for Wafer-Thin Dies så du er sikker på, at sommerfuglene bliver dér, hvor de skal være.
Det var tilgengæld ikke spor nemt at få sat alle de små dele af vingerne på rette pladser, men det var arbejdet værd! Jeg valgte at lægge lidt glossy accent på de små dele for derved at give sommerfuglene mere dimension. Så var der kun tilbage at samle kortet og sætte lidt bling på.
 
Ingredienser:
Sizzix Big Shot Starter Kit (Powder Blue & Teal)
Sizzix Accessory - Magnetic Platform for Wafer-Thin Dies
Karton
Distress Ink (Ranger)
Bling
Stempler (Papertrey Ink)
Glossy accent

Just emboss!

$
0
0


The title sounds like an order, but I would never do such a thing. My very Britishness prevents it!

What I am trying to say is that embossing alone can carry a simple handmade card without any fancy die-cuts (although I slipped a couple of hearts into the second cards) The techniques I have used are so simple and achievable, even for a beginner. 

I know that many of you make batches of cards for charities or even to sell. When you are making batches of the same design, time is a very important factor and embossing is a great way to get where you want to go in a hurry!

There is a new range of Sizzix dies created by the very talented Stephanie Ackerman. They are ultra contemporary and will work equally well with textiles as they will with paper and card. This week however, I am focusing on the embossing folders in the collection which are quite possibly my favourites of the year so far, although Tim Holtz October collection is going to give them a run for their money.

I am using the Borders & Flowers Set for the following projects along with some Distress Inks and gilding wax.

You can use either stamps or die-cut letters for your card greetings, I however chose to print them directly onto the cards with my PC (Stereo and Candlescript for all you font fanatics!)

I cut a rectangle of white card and rounded off the corners before die-cutting 5 hexagons from the same card using my ever presents Hexagon Framelits die set. Next, I embossed everything using the flowers folder.


I wanted to add a splash of colour using some distress inks, namely: Mustard Seed, Ripe Persimmon and Broken china. I chose them for their ability to blend and create secondary colours as you can see below. I always start with the lightest colour and remember, less is more!


Here are the two cards, I hope you agree that they don't need anything else?


Next up, the borders folder. I created another couple of card blanks and cut two rectangles of black card before embossing in my Big Shot. I used some Treasure Pewter gilding wax to enhance the detail and create a metallic effect.


For the second card, I embossed a rectangle of dark brown card and used gold gilding wax before cutting it into random strips, this gives an almost tribal pattern look to proceedings. 


As I mentioned before, I added a couple of die-cut hearts, also from The Stephanie Ackerman collection. On the 'DAD' card I decorated the perimeter of the heart with 2mm adhesive pearls before applying the pewter wax and I decorated the brown heart with a length of twine tied into a bow.

 I love their simplicity. I hope that you do too?


One natural layout by Karine

$
0
0

Hello,

Here is a page with very natural shades and pictures of me during my last trip to Africa. I selected colours that will remind us of the African savannah and which will make these beautiful pictures of zebras stand out.

Supply list:

Paper: October Afternoon, Crate Paper
Cardstock: American Crafts
Alphabets: Jenni Bowlin Studio, 7Gypsies
Die-cuts: American Crafts
Stickers: American Crafts, My Mind's Eye
Spray ink: Studio Calico
Ink: Distress Vintage Photo
Masking Tape

Dies:

658300 :Sizzix Big Shot Starter Kit
659068: Sizzix Thinlits Die-Doily
659748: Sizzix Thinlits Die Set 3PK-Birthday#2

Let’s start by gluing my 2 pictures size 10x15 cm directly on my October Afternoon background paper.
Then I cut a nice doily out of beige cardstock. Once scooped-out, it will be shaded with brown ink (Distress Vintage Photo).
Once inked, it is partially inserted under ma second picture.

Then I added tone-on-tone embies, stickers, masking tape and die cuts.

I also used scraps from a Project Life Card die cut which matches perfectly to my page as a paper addition.
All the small paper touches mix to my background with subtlety.

A few drawings with charcoal and some work with ink will come as a completion.


I hope you liked my page.

Have a nice day,

Karine

Bonjour,

Une page cette fois-ci aux tons très naturels avec des photos de mon dernier voyage en Afrique. J'ai opté pour des couleurs rappelant la savane africaine et mettant en valeur ces beaux clichés de zèbres.

Matériel :

Papier : October Afternoon, Crate Paper
Cardstock : American Crafts
Alphabets : Jenni Bowlin Studio,7Gypsies
Die-cuts : American Crafts
Stickers : American Crafts, My Mind's Eye
Encre en spray : Studio Calico
Encre : Distress Vintage Photo
Masking Tape

Dies :

658300:Sizzix Big Shot Starter Kit
659068: Sizzix Thinlits Die-Doily
659748: Sizzix Thinlits Die Set 3PK-Birthday#2

J'ai commencé par coller mes deux photos au format 10x15cm directement sur mon fond de page October Afternoon.
J'ai ensuite découpé un joli napperon dans du cardstock beige. Une fois évidé, celui-ci sera ombré avec de l'encre marron Distress Vintage photo.
Une fois encré il est glissé partiellement sous ma seconde photo.

Ma page est complétée avec des embellissements ton sur ton, stickers, masking tape ou encore die cuts.

J'ai ensuite utilisé des chutes d'une découpe carte Project Life parfaitement assorties à ma page pour rajouter quelques touches de papiers.
Celles-ci se mixent en toute subtilité avec mon fond.

Quelques dessins au fusain et un travail à l'encre seront ajoutées en touche finale.

J'espère que ma page vous aura plu.

Très bonne journée à vous


Karine

Coffee Table challenge!

$
0
0

How are you enjoying our extended summer - I've just sat outside to enjoy the sun whilst having my lunch - I guess there probably won't be too many more days like today so I decided to make the most of it!
Meanwhile back in the workroom -
I've covered the sides of the table with 1" foam - cut into strips 1" deeper than the side - I've notched the foam where it goes around a corner - I used a wide double sided tape to fix the it to the table.
Meanwhile I had extended the strip of patchwork that I had started last week so that it was a bit longer that the circumference of the table (just as a reminder I used the 10" Dresden plate die http://www.sizzix.co.uk/product/660120/sizzix-bigz-xl-die-10-dresden-plate with my Big Shot http://www.sizzix.co.uk/product/657900/sizzix-big-shot-machine-only-powder-blue-teal)
 
I turned the table right way up and stretched the fabric up over the foam and onto the inside edge of the coffee table side and stapled in place - it is a little tricky and you may need an extra pair of hands to get started - 

and the corners are sort of pleated together like this -

and so it looks like this -
 
I'm going to try taping the staples in further with a small hammer later - for today this is what it looks like -
 
Next week I'm going to cover the buttons and make the padded top - that should be a lot easier than all this stapling - so until next week - enjoy the extended summer.


Angela

Autumn greetings

$
0
0


Hello Sizzix UK friends! Today I want to share with you some ideas for autumn greeting cards. This upcoming season is full of warm colors and wonderful textures. That's why I decided to use browns, greens and some orange or salmon hues with an emboss twist and a "butterfly effect". 

For my first card I decided to use one of the special background with wooden texture that I receive from very special person - Pete Hughes (thanks a lot, Pete!). I was always under impresion how perfectly he use such patterns. This time, on my 1st layer I put 2 different diecuts: an oldie, but still absolutely fantastic On the Edge Die - Butterflight and one of the Frameworks designs (absolutely love each of them!) - Frameworks Die - Courtyard.


On my second card, in a tag shape, I used large, embossed butterfly as a main decoration. I cut out and emboss it using Bigz Die w/Texture Fades - Layered Butterfly and another interesting paper from Pete - the golden one. It is similar to metallic foil, that' why looks like embossed metal sheet. Amazing, huh?


Sizzix supplies used:
658300 Sizzix Big Shot Starter Kit (Powder Blue & Teal)


Thank you for visit us today! 
Have a lovely, creative weekend! 
~~ Karola ~~ 


****************************


Witajcie polskojęzyczni fani Sizzix! Dziś chciałabym podzielić się z Wami kilkoma pomysłami na jesienne kartki. Nadchodząca jesień pełna jest ciepłych kolorów i cudownych tekstur. Właśnie dlatego postanowiłam wykorzystać kolory z palety brązów, zieleni, pomarańczy oraz kolory łososiowego wraz z elementami wytłaczanymi oraz motywem motyli.

Jako tło w mojej pierwszej kartce wykorzystałam specjalny gruby i sztywny papier z motywem i teksturą drewna, który otrzymałam od wyjątkowej osoby - jednego z projektantów Sizzix - Pete'a Hughes'a. Zawsze jestem pod wrażeniem z jaką łatwością i perfekcją wykorzystuje on podobne motywy. Tym razem jako pierwszą warstwę w mojej kartce połączyłam wycinanki z 2 różnych wykrojników: nieco starszego, ale wciąż fantastycznego On the Edge Die - Butterflight oraz jednego z wykrojników Frameworks (absolutnie uwielbiam wszystkie wzory z tej serii!) - Frameworks Die - Courtyard.

W przypadku drugiej kartki w kształcie taga, wykorzystałam dużego, embossowanego motyla jako główną dekorację. Wycięłam i wytłoczyłam go za pomocą zestawu wykrojnika oraz foldera do embossingu Bigz Die w/Texture Fades - Layered Butterfly w kolejnym ciekawym tle od Pete'a - tym razem złotym. Tło jest podobne w kolorze i strukturze do metalicznej folii, dlatego tak wspaniale imituje wytłaczaną cienką blachę. Niesamowite, prawda?


Wykorzystane produkty Sizzix:


Dziękuję za dzisiejsze odwiedziny na naszym blogu!
Życzę Wam cudownego, kreatywnego weekendu!


~~ Karola ~~


A fabric cover for my planner

$
0
0

 Hi everyone ! New school year and new planner ! Starting a new year is always full of good ideas and this time I want to plan  everything in a nice planner that came some days ago to my home , at last !
I have used  again one my loved  hexagons dies and  I love  it !!


Supplies


658317


658318


657900


15"x10" White fabric for the top
15"x 10" batting
15"x10" lining fabric
4.5"x 10" white fabric ( two pieces )  for the flaps
4.5"x 10" lining fabric ( two pieces )for the flaps
Scraps for the hexagons
2 pieces of pompom ribbon , 11" long
a cute charm ( mine it is a bird cage )


This project is very easy. Just cut the hexagons , sew them doing a flower and applique to the white fabric as I did with my wool bag . I sew by hand.
Lay the batting in the wrong side and do some quilting around the flower .


Sew   the flaps  now. White and lining fabric ,right side together,  just in one long side  and let free.


Lay both flaps on the lining and pin. Now do the same with the quilted top. Always right side together.
Pin the pompom ribbon  on the out borders. Sew around and let something open.


 Now just  turn out  through the  little open  side .


Finish by hand with hidden stitches and press .
Now sew the charm.


This is my second fabric cover tuto. You can see the first one here . The flaps are sew in different way here.
Now I can enjoy a lovely  cover and  keep my new  planner from Mr. Wonderful really great all year long.


Hope you have a wonderful weekend!!!
Love
Mercedes


................................................................................*********************** ..................................................................


¡ Hola a todo el mundo ! ¡Nuevo curso , nueva agenda! Empezarlo siempre trae buenas ideas y esta vez quiero tenerlo todo bien organizado con una bonita agenda que llegó hace unos días a casa ¡ al fin !
He usado de nuevo mis queridos troqueles de hexágonos y me encanta.

Materiales

658317


658318


657900

38cm x 25.5 cm de tela blanca para el top
38cm x 25.5 cm de guata
38cm x 25.5 cm de tela para  el forro
11.5 cm x 25.5 cm de tela blanca ( dos piezas ) para las solapas
11.5 cm x 25.5 cm de tela para el forro ( dos piezas ) para las solapas
Restos de telas para los hexágonos.
2 trozos de cinta de pompones de 28 cm cada una
Un adorno metálico ( el mío es de una jaulita de pájaro )


Este proyecto es muy fácil . Sólo tienes que cortar los hexágonos , montarlos  , como hice en la bolsa para las lanas , y coserlos haciendo  una flor. Aplícalos a la tela blanca. Yo los cosí a mano.
Coloca la guata por el revés y haz algo de acolchado alrededor de la flor.

Cose las solapas ahora. La tela blanca y la de forro por el lado del revés de cada una ,solo por un lado , dejando tres libres.

Pon las solapas en los extremos con los lados no cosidos hacia afuera y sujeta con alfileres. Has lo mismo con el top colocando también el lado derecho con el dercho. Sujeta con alfileres las tiras de pompones en los extremos y cose alrededor dejando una  pequeña parte  sin coser.
Ahora sól tienes que dar la vuelta por el pequeño hueco  abierto.
Termina a mano con puntadas escondidas y plancha.
Por ultimo cose el adorno.

Éste es mi segundo tuto para hacer una  funda. Puedes ver el primero aquí.  Las solapas están cosidas de diferente manera.
Ya puedo disfrutar de una bonita funda para mi nueva agenda de Mr. Wonderful durante todo el año. 


Que tengas un maravilloso fin de semana
Cariños
Mercedes 

Project with new dies

$
0
0


Hello all!

Some time ago I recevied a new parcel with wonderful Sizzix dies! I was really impressed by the sets containing dies and stamps - wonderful design and highest quality! I usualy use titles made of alphabet stickers so this time I really enjoyed playing with alphabet dies.
And here is my new layout with my kids on the photo.


The products I used:

Sizzix Framelits Die Set 5PK w/Stamps - Simply Lovely

Sizzix Framelits Die Set 8PK w/Stamps - Hello


Christmas(cards) in September.

$
0
0

Hi Sizzix UK friends!!

I can't believe that half of September has already gone...! Ok, so let's face it; if you want an early start on those Christmas cards,NOW's the time to start!
Sizzix has really done a great job of helping us make gorgeous cards for this season as they have some really beautiful new dies out.

I made a couple of Christmas card in traditional colours and they were so easy to do. These dies have been designed by the talented Debi Potter and I think they are really beautiful.


And here is a close up of each card on its own:


I backed the design with some red cardstock to add to the festive feel and also added some pretty pearls to the design.

Ok, so that was my first seasonal cards of the year and I can see many more in the future :-)

Thanks for looking!

I used these lovely dies:

Papers and pearls are by Papirdesign.

----------------------------------------------------------------------------

Hej alla Sizzix vänner!

Kan ni fatta att snart har halva september gått!? Om man vil komma igång tidigt med julkorten så är det NU det ska ske :-)
Sizzix ger oss god hjälp på traven med de nya snygga diesen de kommit ut med. Med de nya diesen som Debi Potter har designat är det en baggis att göra vackra julkort. Dessa är riktigt snygga!!

Här är ett par bilder lite närmare inpå varje kort.

Jag backade motiven med röd cardstock för att öka julkänslan och jag lade till några vita halvpärlor också.
Ok det var årets första julkort, men så kul som det var kan jag se att många fler kommer att göras i god tid innan jul :-)

Tack för att ni tittar inom!

Dessa produkterna använde jag:
 Big Shot machine only (Powder Blue and Teal)
Sizzix Thinlits die - Merry Christmas

Papper och pärlor är från Papirdesign.


A crafty way to keep track of flower dies

$
0
0


I am not sure about you, but I do love and have loads of flower dies. So many that sometimes it is hard to keep track of all of them. For this reason, I came up with an easy reference swatch book that allows be to look through the different flower dies as well as allowing me to check whether some of them look good together even though they are from different sets.


This is the finished swatch book. Here is how I made it.


I die cut all my flowers using different scraps of paper. I printed (as my handwriting is atrocious) the name of each set for easy reference. I attached the name of the set onto thick acetate and then glue the flowers on the acetate. Each set is on a separate acetate.


Using a Cropadile, I made a single hole on the top left corner of all the acetates, and linked them all with a ball chain, which is easy to open to add more or rearrange order.


Here is some of the pages of my swatch book.


This is how it works, by layering different pages I can find out how some of them will work together.


Some of the possibilities were a complete surprise how well they look together.


One of my favorite combinations was this one above, using the Intricate flowers 1 and Intricate Flowers 2. Even though they have similar names I did not designed them to work together at all. But they work really nicely so I am very happy.
 

To make a simple card, I stamped a message on the same paper and die cut it using one of the Sentiment Tag dies. As I wanted it a little bit shorter I place the die purposely over the edge of the paper, one of the beauties of the Framelits I know exactly how it is going to look once die cut.


And that is the finished card. The flower is the central point and I would have only come up with this combo because my new flower reference booklet.


"Clean and Simple card"

$
0
0


Hi everyone
I hope you all had a great week,today i will show you a card  "clean and simple"
 
Items I have used:
Sizzix Thinlits Die Set 5PK - Estelle 659703
Sizzix Thinlits Die Set 2PK - Winged Beauties 659707
Supply list:
Paper: Craft & you design-frozen-6x6 paper pad
Ink: Peeled Paint, Forest Moss and Weathered Wood distress ink/ ranger
Ponture paint_white-, brads
How to make:
Make a cardbase 12,5x15,5 cm, cut out a patterned paper 12x15 cm, distress the edged. Die cut using Esttelle and Winged Beauties ink using distress ink and some water, decorate using brads and ponture paint

Thanks for stopping by, see you next Tuesday
Pia
Hej alle
Jeg håber du har haft en skøn uge. I dag vil jeg vise et kort som for mig er " clean and simple"
Sizzix dies jeg har brugt:
Andre materialer:
Papir: Craft & You design-frozen-6x6 paper pad
Ink: Peeled Paint, Forest Moss og Weathered Wood distress ink/ ranger
Ponture paint_white-, brads
Fremgangs måde:
Lav en kort base på 12,5x15,5 cm, skær mønstret pair ud i 12x15 cm, distress kanterne og lim til kortbasen. Udstans Esttelle og Winged Beauties ink de udstansede figurer ved at bruge  distress ink og lidt vand, dekorer med brads og ponture paint
Tak fordi du kigge forbi , håber vi ses igen næste tirsdag
Pia

Mixed media card

$
0
0

Hello to everyone:) Today I want to show you this mixed miedia card I made using some wonderful Sizzix products.


Sizzix products:
Sizzix Big Shot Machine 657900
Sizzix Thinlits Die Set 3PK - Overall Patterns 659758 
Sizzix Textured Impressions Embossing Folders 2PK - Houndstooth & Dots Set 659745
Sizzix Thinlits Die Set 9PK - Rondeaux 659706

Other products:
white cardboard, Pion Design papers; Days of Winter
Heidi Swapp color shines; black,mustard and peach
Glimmer Mist; Bell bottom jeans
gesso primer and super heavy gesso, Prima Marketing mask; Turkish Grunge
sentiment stamp "Birthday wishes"

 How to do:
Cut the cardboard size 16,5 cm × 11,5 cm and apply the gesso primer on to it, allow to dry. Spray some glimmer mist "Bell bottom jeans" randomly and allow to dry.
Make the grunge background using super heavy gesso and mask. When dried, spray  Heidi Swapp mists mustard and peach, allow to dry and add some black spots with black mist.
Cut the gears using Sizzix Thinlits Die Set 9PK - Rondeaux 659706, and pieces of papers using Sizzix Thinlits Die Set 3PK - Overall Patterns 659758 . Spray a one piece with Heidi Swapp "mustard" mist. Emboss also the other piece with Sizzix Textured Impressions Embossing Folders 2PK - Houndstooth & Dots Set 659745.
Finally place all together like below and stamp the sentiment.

Happy crafting, Minna

*    *    *    *

Moi, tänään tällainen mixed media kortti:)

Sizzix tuotteet:
Sizzix Big Shot Machine 657900
Sizzix Thinlits Die Set 3PK - Overall Patterns 659758 
Sizzix Textured Impressions Embossing Folders 2PK - Houndstooth & Dots Set 659745
Sizzix Thinlits Die Set 9PK - Rondeaux 659706

Muut tarvikkeet:
valkoinen kartonki, Pion Design paperit; Days of Winter
Heidi Swapp suihkeet;  black,mustard ja peach
Glimmer Mist;  Bell bottom jeans
gesso primer ja super heavy gesso, Prima sabluuna; Turkish Grunge
tekstileimasin "Synttärionnittelut"

Leikkaa kartonki 16,5 cm × 11,5 cm ja levitä gesso primer sille, anna kuivua. Suihkuta sinistä (Bell blue jeans) glimmer mistiä, anna kuivua. Tee taustakuvio käyttäen super heavy gessoa ja maskia. Kun tausta on kuiva suihkuta sinne tänne Heidi Swapin suihkeit peach ja mustard, anna kuivua ja lisää mustia pisaroita.
Leikkaa rattaat käyttäen stansseja Sizzix Thinlits Die Set 9PK - Rondeaux 659706 ja muutama suikale käyttäen stanssia setistä Sizzix Thinlits Die Set 3PK - Overall Patterns 659758. Värjää yksi pala keltaisella suihkeella. Kohokuvio myös toinen pala paperia kohokuviontikansiolla setistä Sizzix Textured Impressions Embossing Folders 2PK - Houndstooth & Dots Set 659745.
Lopuksi kokoa kortti kuten kuvassa ja leimaa teksti.

Mukavaa keskiviikkoa, Minna


A little bit of crazy

$
0
0


Today I've gon crazy with colours, embossing and sequins but once in a while I think we all need a little bit of crazy.


I die cut the frame from the Thinlits Die Set 6PK - I Heart This and added some patterned paper behind the opening in the frame. The frame says "I {heart} this" and that didn't really fit with my card so I cut a fish tail banner for my main sentiment and added above the "I {heart} this".


Next up I stamped three different flowers from Framelits Die Set 5PK w/Stamps - English Garden in VersaMark and heat embossed them using different colours of embossing powder. I scattered the flowers in two corner of the frame and layered them on top of one another using foam adhesive.


The final touches to this playful card was some sequins, a smaller sentiment and a hand drawn line running around the entire background.
 
Supply list:
Sizzix Big Shot Starter Kit (Powder Blue & Teal)
Sizzix Accessory - Magnetic Platform for Wafer-Thin Dies
Thinlits Die Set 6PK - I Heart This
Framelits Die Set 5PK w/Stamps - English Garden
Cardstock
Patterned Paper (My Mind's Eye, Simple Stories)
VersaMark
Embossing powder (WOW)
Embossing tool
Stamps (Simon Says Stamp)
Sequins

 
---o---
 
I dag har jeg et lidt tosset og farvestrålende kort til jer - nogle gange har man bare brug for lidt fis og ballade.
 
Jeg udstansede rammen fra Thinlits Die Set 6PK - I Heart This, og satte noget mønstret papir inde i rammen. Da die'en udstanser sætningen "I {heart} this", hvilket ikke passede til mit korts tema, valgte jeg at skære et banner ud, hvor jeg stemplede kortets primære hilsen på. Jeg satte dette banner henover "I {heart} this" delen af rammen.
 
Næste skridt var at stemple tre forskellige blomster fra Framelits Die Set 5PK w/Stamps - English Garden med VersaMark og derefter varmeembosse dem i forskellige farver af embossingpulver. Jeg spredte blomsterne i to hjørner af rammen.
 
De sidste skridt til at gøre dette legefulde kort færdigt var at tilføje pailetter, en mindre hilsen og en håndtegnet linje hele vejen rundt langs kortets baggrund.
 
Ingredienser:
Sizzix Big Shot Starter Kit (Powder Blue & Teal)
Sizzix Accessory - Magnetic Platform for Wafer-Thin Dies
Thinlits Die Set 6PK - I Heart This
Framelits Die Set 5PK w/Stamps - English Garden
Karton
Mønstret papier (My Mind's Eye, Simple Stories)
VersaMark
Embossingpulver (WOW)
Embossing tool
Stempler (Simon Says Stamp)
Pailetter

Scraptastic!

$
0
0


I know I don't often feature Scrapbook layouts on this blog mainly due to time constraints, but I do love scrapbooking, especially as it is responsible for so many great products to play with and innumerable cool techniques to learn, all of which filters into my other crafty interests.

I was going to make a card with the magnificent Thinlits Die Set Winter Borders and Rosette designed by my good buddy Paula Pascual. this is one set from Paula's new Everyday Collection released this month, I implore you to check it out (if you love delicate butterflies then look no further!!!)

When I say I was going to make a card, I promised Barbara at a show in Manchester that I would do just that, however I couldn't resist doing a little layout, I hope you will forgive me?

Below you will see the die set mentioned previously, an 8" x 8" square of card (all the card is from the My Mind's Eye Lost & Found 3 Collection) and three photo's of my daughter Poppy taken in the heavy snow we had in the UK a couple of years back.

At this point I have no idea what I am going to do!


OK! I now have a rough plan/idea so I'm going to start by die cutting a circle from Kraft card using the largest Circle Framelits die. I have combined both sets of Circle Framelits and between them I have every size I need ( 657551 and 658604). After die-cutting the first circle I place the die which is the next sized down onto the die-cut circle slightly offset. I repeat this twice more until I have three thin kraft card rings. Next, I use a brayer to apply a thin layer of gesso.

I cut a rectangle of the pale blue dotty paper and trimmed away one edge using the snowflake border die. I applied some rows of faux stitching using a pattern makers wheel and a white gel pen before attaching all the separate elements to the layout together with a die-cut silver snowflake border.
From the same dotty card I cut two halves of the snowflake rosette and proceeded to lighten the tips by dry brushing with gesso. Next, I concertina folded the two halves before attaching end to end to form a crown before folding in toward the centre to create the rosette. I usually secure this at the rear with a piece of scrap card attached with a hot glue gun to get a solid bond. I next die-cut a deep blue circle, a silver snowflake and a deep blue border strip whose edges I gently sanded to add a little contrast.

I attached all the elements to the layout together with the photos and a rectangle of green patterned card which has been lightly distressed. I covered a piece of mount board with the deep blue card and used the Block Talk Lowercase Alphabet Die to cut the letters and printed the word 'Princess' onto the green card using my PC. I have a set of similar alphabet stamps which would work equally as well. After attaching the words to my layout I started to add a little bling in the form of assorted adhesive pearls and gems.

Finally, I die cut a circle from card and used it as a template around which I attached a row of clear adhesive gems using my trusty tweezers before removing the card circle.


Here is the finished article, lots of fun to do as always, I think the green really lifts it especially as I could use pearl gems of a similar colour. I love the way the circles give it a sense of movement. 

So many photos...so little time!


A love layout by Karine

$
0
0

Hi there!

Today let’s go for romanticism and colour to illustrate a nice picture taken by my friend Valérie from the Jolis Moments.

Supply list:

Papers: Jenni Bowlin Studio, Webster's Pages
Cardstock: American Crafts
Alphabets: American Crafts
Labels: Ephéméria
Stickers: American Crafts, My Mind's Eye, October Afternoon
Felt-tip pens: Stabilo Pen68
Spray ink: Tattered Angels
Masking Tape

Dies:

658300 :Sizzix Big Shot Starter Kit
656545: Sizzix Bigz Die-Flower 3D
659752: Sizzix thinlits Die Set 3PK-Love

A simple page built with lots of cascading little details.

Here I used a Project Life card from the set “Life made simple-Amour” which is just perfect for my theme.
Cut out of white cardstock, it will be colorized with a turquoise blue spray ink.

The 3D pretty flower will be reworked the same way. While my dies dry, I had fun cutting out nice flower bouquets in a Webster’s Pages paper.

The various elements are glued to my background. I made some splashes with my Stabilo Pen68 felt-tip pens to add texture.

Add mini text stickers as a finishing touch.


My page is now done!

See you next Thursday!


Karine

Bonjour !

Aujourd'hui du romantisme et de la couleur pour illustrer une jolie photo prise par mon amie Valérie des Jolis Moments.

Matériel :

Papiers : Jenni Bowlin Studio, Webster's Pages
Cardstock : American Crafts
Alphabets : American Crafts
Etiquettes : Ephéméria
Stickers : American Crafts, My Mind's Eye, October Afternoon
Feutres : Stabilo Pen68
Encre en spray : Tattered Angels
Masking Tape

Dies :

658300:Sizzix Big Shot Starter Kit
656545: Sizzix Bigz Die-Flower 3D
659752: Sizzix thinlits Die Set 3PK-Love

Une page toute simple composée en cascade avec plein de petits détails.

J'ai utilisé ici une carte Project Life des sets “Life made simple-Amour” juste parfaite pour ma thématique.
Découpée dans du papier blanc, celle-ci sera colorée avec une encre en spray turquoise.

La jolie fleur toute en relief sera travaillée de la même façon. Pendant que mes découpes sèchent je me suis amusée à découper des jolis bouquets de fleurs dans un imprimé Webster's Pages.

Les différents éléments sont ensuite collés à mon fond, les éclaboussures faites aux feutres Stabilo Pen68 ajoutent un peu de texture.

Complétez avec des mini stickers textes.

Ma page est maintenant terminée !

A jeudi !


Karine

Any one for coffee?

$
0
0

 Yes that's right - the coffee table is finished and it's time to sit back and relax - and at least in North Wales it's a lovely mild afternoon with a pale blue sky - just right to sit back and enjoy.
 
 
To create the top I had a piece of hardboard cut to the inset size of the table. I marked a grid onto the hardboard and drilled holes for the thread for the buttons.
I covered the hardboard with 1" foam and then covered that with grey wool fabric, smoothing it out across the foam.
Using the Big Shot and Bigz die http://www.sizzix.co.uk/product/658315/sizzix-bigz-die-circles-1-1-2 I cut 18 circles to use to cover buttons for the top.

It made covering the buttons even easier - especially as I used a 'self cover button tool'
Insert the fabric and the button top into the soft rubber holder, place the back over the button and press in with the rigid plastic tool - so easy -

I then stitched the buttons through the foam and the hardboard - tying the threads at the back to give some tension.
The edges of the grey fabric were laced together to hold in place.
It's then really simple to place the top into the top of the table - and now it's an attractive unique piece of furniture.

Now to plan some projects for Christmas!!!
Until next week have fun.
Angela

Owl sweet Owl

$
0
0

Hello everyone! Anna here to share some fun owls with you using the Sizzix Owl Bag Bigz XL Die by Lori Whitlock.
I’ll be showing a cute owl gift basket. It's a really cute bag and I think this would look great in a Halloween theme or Christmas too.

cafe creativo - big shot sizzix - owl - gufo set cucito (1)
 
Since the die cut out more materials, I wanted to try use felt to create a sewing kit. A simple little stitching project for a beginner stitcher, or gift for a beginner!
 
cafe creativo - big shot sizzix - owl - gufo set cucito (2)
 
cafe creativo - big shot sizzix - owl - gufo set cucito (3)
 
Owl Bag
 
Items used:

cardstocks
patterned papers
ink pad
ribbon
twine
foam board tape
 
Die-cut an Owl Bag and its embellishments out of patterned papers. Emboss one scallop piece. Fold along the crease lines to assemble, layering materials and adhere (Instructions: Download PDF). Embellish with ribbon bow and twine.
 
cafe creativo - big shot sizzix - owl - gufo set cucito (4)
 
Owl sewing kit
 
Items used:

felt and thin felt
fabric
ribbon
twine
sewing machine and thread
 
Die-cut two Owl shape and its embellishments out of felt. To make the front: layering materials and sew or glue. To make the back: fold in middle a felt rectangle and sew. The felt pages are for needles and stuff. With your scissors in place, check the position of your Scissor Pocket. Sew front and back together in the bottom side. Embellish with ribbon bow and twine. If you want add a button to close.
 
I love how customizable this is, and you can use scrap that you already have. You can also use the owl shape on a card front or scrapbook page.
 
Thanks for stopping by. I hope you enjoyed my little project, perhaps it will provide some inspiration for one of you.
 
**************************************
Flag_of_Italy
Per le amiche italiane! :)

Ciao a tutti! Annaè qui per condividere alcuni simpatici Gufetti realizzati grazie alla fustella “Sizzix Owl Bag Bigz XL Die” disegnata da Lori Whitlock.
Con questa fustella ho realizzato due cosine, perchè è sempre bello guardare le fustelle con occhi diversi: una simpatica scatolina regalo (scopo per cui è nata la fustella) e un kit cucito in feltro, il tutto a forma di gufo!
La scatolina è molto carina e credo che potrà essere usata da molte di voi per creare bomboniere o declinarla in tema Halloween o Natale. Vi ricordo, che essendo una fustella di tipo XL, necessita dei cutting pad più lunghi.
Poi, come vi dicevo, dal momento che la fustella di tipo Bigz taglia diversi materiali, ho voluto provare ad usare anche il feltro e la stoffa per creare un Kit da Cucito. Un piccolo semplice progetto di cucito, adatto anche ad una principiante od un regalo per una aspirante sartina! ;)
Per fare entrambi i progetti ho scelto di usare colori simili, così da farvi vedere le differenze tra i materiali e le potenzialità della fustella. Inoltre il kit cucito può essere riposto dentro la scatolina gufo, se la si vuole regalare, un'accoppiata perfetta! :)
Anche se dalle foto si intuisce, vi spiego comunque come ho fatto...
 
Scatolina gufetto
 
Materiali:

cartoncini
carta fantasia
inchiostro (per sporcare i bordi)
nastro
cordoncino
biadesivo spessorato
 
Fustellare una scatolina gufo e i suoi abbellimenti da carta fantasia. Embossare una delle strisce scallop per dare maggior varietà. Piegare lungo le linee di cordonatura per assemblare la scatolina e incollare. Sovraporre e incollare i vari pezzi sul fronte della scatola (istruzioni complete qui: Download PDF). Infine abbellire con un fiocco e due fiorellini.
 
Gufetto set cucito
 
Materiali:

feltro e pannolenci
stoffa fantasia
nastro
cordoncino
macchina da cucire e filo
 
Fustellare due forme grandi di Gufo con feltro spesso e le sue decorazioni con feltro sottile. Per fare il fronte: sovraporre e fissare i vari pezzi con cuciture o colla a caldo. Cucire parzialmente la sagoma gufo più piccola su quella grande, in modo da creare una taschina utile per riporre qualche materiale da cucito. Per fare il retro: piegare a metà un piccolo rettangolo di feltro e cucire. Le pagine di feltro così create, serviranno per riporre aghi e spille. Sistemando le forbicine, controllare la posizione dove fissare il nastro che le terrà ferme. Cucire il fronte con il retro lungo il lembo inferiore, creando così un libro-gufo di feltro. Abbellire il fronte con un fiocco e due fiorellini tagliati con la fustella. Se si desidera, aggiungere un bottone come chiusura.
 
Con questa fustella potete creare lavori come questi, personalizzati a piacere. Inoltre non è necessario avere tanti materiali, basta utilizzare gli avanzi, soprattutto per i dettagli.
Altri usi: provate ad utilizzare la sagoma del Gufo su di una card, un mini album o una pagina scrap ecc. ;)

Grazie per la visita. Spero vi sia piaciuto il mio progettino, forse potrà fornire qualche ispirazione a uno di voi ;)
Ci vediamo sempre qui fra due settimane.

Romantic framed card

$
0
0


Hello everyone! Today is again my turn for sharing a Sizzix inspiration! This time it will be a card (again!). I'm in cardmaking mood recently, so I trying some new tools, dies, techniques, colors or tricks. My today's card is very feminine, sweet and romantic. 

Besides the (obvious) flowers, I wanted to keep my style, so I created a few 3D layers. I used fantastic dies from Framelits Die Set 6PK - Enchanted, starting from cut out the card shape and then a few next layers. I have not used all the dies from this set, but I encourage you to try out all the decorative frames in one project, I bet it will be a real layered masterpiece! In addition to the use dies in frames shapes, I decided to use one of my favorite and most versatile (in my humble opinion) motifs - butterflies. I just love the butterflies from the Thinlits Die Set 2PK - Winged Beauties, they are so beautiful and delicate - perfect match for projects in the romantic style!


Below you can see the close-up on an additional butterfly wing, this time from the Thinlits Die Set 2PK - Heavenly. Absolutely fantastic dies, that already had the opportunity to recommend to you earlier. On both sides of my card you can see the banner elements, glued horizontally. I cut them with a Bigz Die - Pennants. Definitely this is one of the most versatile sets - with its help you can create not only hanging banners but also just such a small decorative elements. 


Sizzix supplies used:


Thank you for visit us today! 
Have a lovely, creative weekend! 
~~ Karola ~~ 


****************************

Witajcie! Dziś znów moja kolej na inspiracje Sizzix, tym razem będzie to kartka (znów!). Jestem w kartkowym nastroju ostatnio, zatem staram się spróbować różnych nowych technik, rozwiązań, trików, kolorów i oczywiście narzędzi, a szczególnie - wykrojników. Moja dzisiejsza kartka jest bardzo kobieca, słodka i romantyczna. 

Postanowiłam, jak zwykle, stworzyć kilka przestrzennych warstw i tutaj pomocą posłużyły mi wykrojniki z zestawu: Framelits Die Set 6PK - Enchanted. Zaczęłam od największego, którym wycięłam fantazyjny kształt kartki oraz wzorzyste tło, następnie skorzystałam z kilku mniejszych wzorów z tego zestawu, aby stworzyć kolejne, "piętrowe" warstwy w mojej kartce. Nie wykorzystałam wszystkich wykrojników jakie kryje ten zestaw, ale Was gorąco do tego zachęcam, jestem pewna, że powstaną prawdziwe przestrzenne i warstwowe arcydzieła! Kolejne wykrojniki, które wykorzystałam to jedne z moich ulubionych, ponieważ ze zdecydowanie (w mojej skromnej opinii) najbardziej uniwersalnymi motywami - motylami. Thinlits Die Set 2PK - Winged Beauties - Fantastyczny zestaw, który już wcześniej miałam okazję Wam polecać. Po obu stronach kartki przykleiłam chorągiewki, które mogą być zarówno elementami wiszącej dekoracji, jak i takimi właśnie, niewielkimi elementami dekoracyjnymi, kiedy przykleimy je poziomo. Wytniecie je za pomocą wykrojnika Bigz Die - Pennants. Na koniec, do mojej warstwowej, kwiecistej i romantycznej kompozycji dodałam niewielki ale znaczący element - dodatkowe skrzydełko, wycięte wykrojnikiem z zestawu: Thinlits Die Set 2PK - Heavenly. I to wszystko - prawda, że nieskomplikowane?


Wykorzystane produkty Sizzix:


Dziękuję za dzisiejsze odwiedziny na naszym blogu!
Życzę Wam cudownego, kreatywnego weekendu!


~~ Karola ~~

My vintage sewing machine cover

$
0
0


Hi everyone ! Do you remember I was working in a new project and I needed to finish  and I showed you here last summer ? Ok, finally it´s finished  and I looooooove it.
It´s incredible how tattered dies can be use  and how easy they are to enjoy in a quilting project.

I planned this cover for my loved Bernina some time ago. But as you know , some time projects have to wait for new ones. And this one waited  and waited and waited until at last I came back to it on summer.

Here it is the front of the cover with the lovely bird that I adore by Tim Holtz, so cute!!


And here it is the back. I can change the view when I want !!


My sewing accesories sewn before, like the very big  pincushion with the tuto , match perfectly as  it is my desire
If you want to see a video about how I did this quilting go to my post  Quilting leaves in my blog.


This cover has the size for a Bernina Aurora 440.  You must to take the size of your own machine.

SUPPLY LIST:


SIZZIX BIGZ DIE - TATTERED FLORALS


SIZZIX BIGZ DIE - TATTERED LEAVES
SIZZIX BIGZ DIE - CAGED BIRD
Fabrics from your selection for the bird, leaves and flowers
White fabric for the three pannels:
       21"x 12"- 2 pieces 
       45.5 " x 9"- 1  long piece 
Batting ( Same pieces and sizes than the  white fabric )
Fusible web
Quilting thread matched with the fabrics
58 " bias 
piping or cord if you do it (two bias of 44" with piping)


First I started ironing  fusible web on the wrong side of the fabrics.
Then I cut with my old Big shot a lot of flowers, leaves and a bird.


Here it is how I  appliqued the flowers using my 20 foot and matching thread color with fabric.
I added the batting before as it is usual.


After quilting leaves I sew the three parts of the cover  and added a pipped edge around the cover. 
I did by myself  with a bought bias and some  cotton cord.
Finally I sew more bias at the botton of the cover and finished with hidden stitched by hand.


I have to say this is the most lovely machine cover for my Aurora!!


Hope you have a wonderful weekend!!!
Love
Mercedes


..................................................................************* ..................................................................


¡Hola a todo el mundo ! ¿ Recuedas que estaba trabajando en un proyecto que tenía que acabar y que te conté aquí durante el verano ? Pues ya está terminado y me encanta.
Es incredible cómo me han servido los troqueles de las hojas, flores y pájaro que tanto me gusta de Tim Holtz.
La verdad es que ha tenido que esperar  porque como ya sabes , a veces otros proyectos caen en las manos.

En las fotos primeras  fotos puedes ver la parte delantera, con el pajarito , y la trasera. Cuando me canse puedo darle la vuelta y tener otra vista.

Mis accesorios de costura que he cosido antes, como el gran acerico que ya mostré en un tuto, coordina fenomenal , tal y como yo deseaba.
Si quieres ver cómo hice el acolchado sólo tienes que ir al artículo Acolchando en forma de hojas de mi blog y ver el vídeo que hice.

Esta funda tiene la medida para mi Bernina Aurora 440. Tú tienes que tomar la tuya de tu máquina .

Materiales :


SIZZIX BIGZ DIE - TATTERED FLORALS


Telas de tu elección para las hojas, flores y pájaro.
Tela blanca para el fondo de los tres paneles:
   53cm x 30cm - 2 piezas
   108 cm x 23cm- 1 pieza

Guata ( las mismas cantidades y medidas que la tela blanca ) 
Entretela de pegar con plancha
Hilo de acolchar del mismo color que las telas
Bies 147 cm 

Bies con cordón o cordón  y biés si lo quieres hacer tú ( 2 trozos de 112cm ya montado )


Primero empecé planchando  la entretela  por el revés sobre las telas que iba a  recortar .Después corté las flores, hojas y pájaro.
Las appliqué con un festón como ves en la foto con el mismo color de hilo que la tela. Antes coloqué la guata debajo como es habitual antes de empezar a aplicar y acolchar.
Hice el acolchado en forma de  hojas y cosí las tres partes colocando el biés con cordón por el borde lateral. Después añadí el biés inferior y lo rematé a mano.
Tengo que decir que es la funda más preciosa para mi Bernima.¡Me encanta !


Que tengas un maravilloso fin de semana
Cariños
Mercedes 


Happy mail, Snailmail, Penpals.

$
0
0


Hi, it's me Bente here today to show you a little of a fun 'new' thing I discovered from my eldest daughter. Yup, I'm sure you have heard about it before ; SNAILMAIL. 
Admit it, for most of you it has an oldfashioned ring to it and you probably have not sent one for years. For the young people (and even slightly older :-) ) there is something cool and fun about snailmail. There are several clubs where you can connect with likeminded to correspond with eachother. -This is much like the old penpal-clubs I remember from my highschool days.

 Here is the set I prepared and we are sending it off  to DD's friend Hillevi who's in London:


As you see we have not written the letter yet at this point, -maybe because we did not want it published all over the internet,...LOL!  Of course it looks alot cooler with the text in place, but at least the base for the letter is there. 
One thing not to miss when you send a snailmail is the ever popular 'tuck in' -the little something that you add to the envelope to make it all more interesting. I have made a few 'bagatelles' with my Sizzix dies to tuck in as well as added some old book pages, doilies and some pretty flair buttons.

I started by cutting down the 12X12 paper to a good letter size. I misted it and added a strip of paper where I wanted the name to go. Hillevi is really into movies and all that stuff so I thought the filmstrip die was a good one to grab and the chipboards for the name was made with a Bigz alphabet. Then I added some black chalk to make them stand out more.
Take a look at those dainty little butterflies, die cut from an old book page. Those belong to one of Paula Pascual's new die sets. They are so precious!


Below is the birthday baner I made to tuck in and I will present it in a small vellum envelope. You can also see the cute frame made with one of the new awesome cool thinlits sets. I added a couple of those cut from different papers. The 'smile' and the couple cut from red cardtock in the main photo are also from one of the new thinlits sets.
These are all rather nice little 'gifts' for those who don't own a Big Shot machine (or other,... gasp!)


I actually made some decorative chipboard decorations using my frameworks dies.  The fact that you can cut 'almost anything' with them is one of the many easons to love the Bigz dies. These chippies have been painted with gesso and then  misted with Prima's new Color Bloom mists and I think they look really nice. Especially considering they were made from an empty box of dishwasher tablets :-D I think they have certainly come up in the world :-)


Another cute little something that I made is a small sign for her to hang somewhere in her room. I imagine it dangling from a key for a cupboard or a wardrobe.


I diecut the quote and backed it with different coloured papers. Then I added a red frame all around before glueing it to a piece of thin cardboard. I used a heavy embroidery needle to add the red and white bakers twine.

Gorgeous Sizzix products that I have used:


The papers I have used are from  Prima Marketing ledger paper pad.  Buttons are by Lemoncraft.

Thanks for dropping by! Maybe you'll jump on the snailmail train yourself soon! :-)

Hugs!
Viewing all 2033 articles
Browse latest View live