Quantcast
Channel: Crafting ideas from Sizzix UK
Viewing all 2033 articles
Browse latest View live

Starting my Christmas projects

$
0
0
Hi everybody! November is officially here, so it means that it is already time to start with my Christmas projects! 
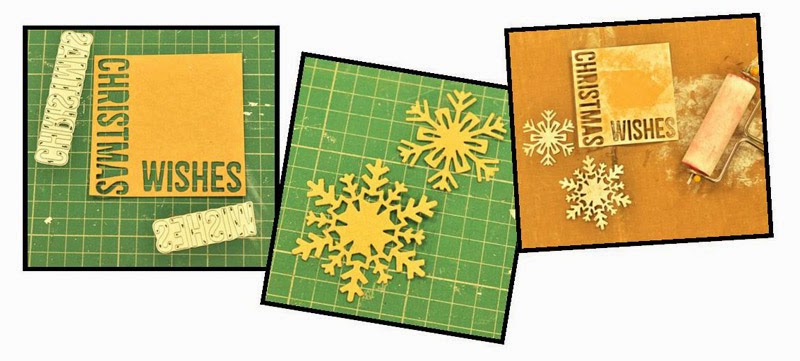
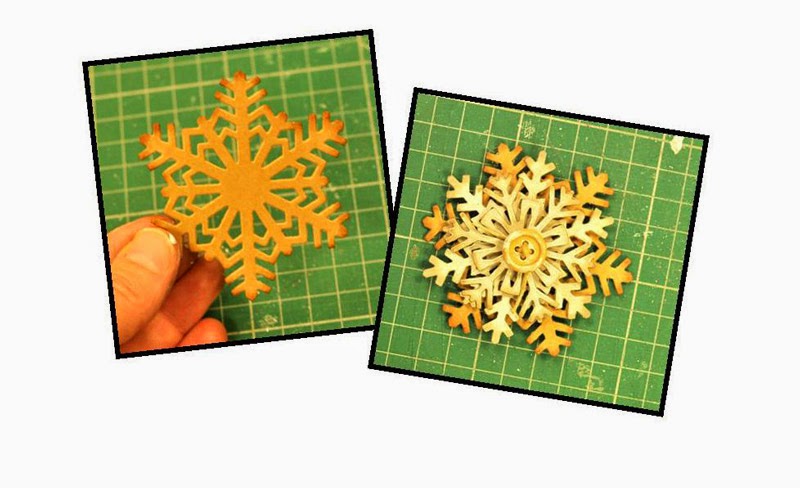
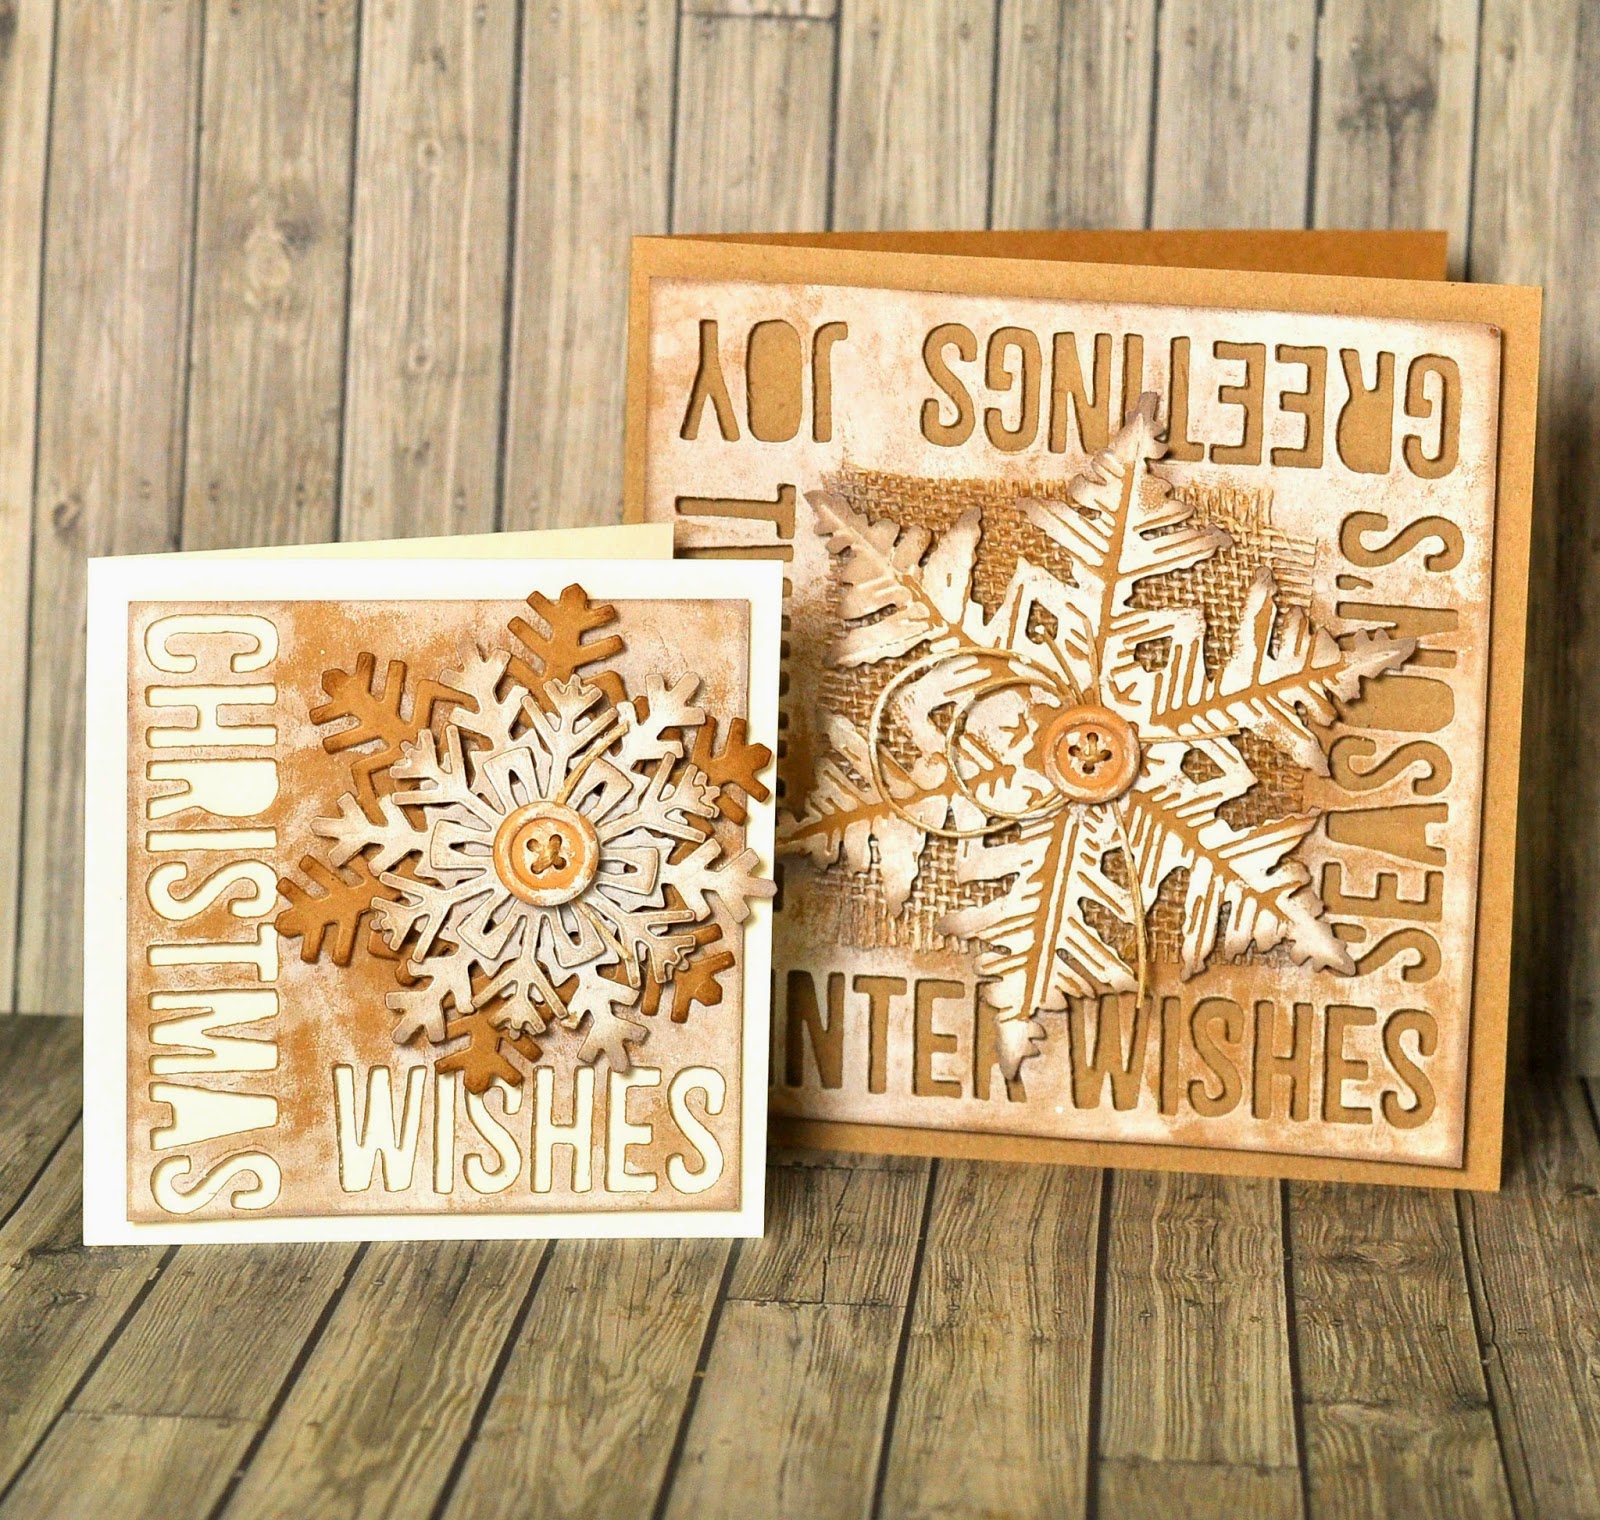
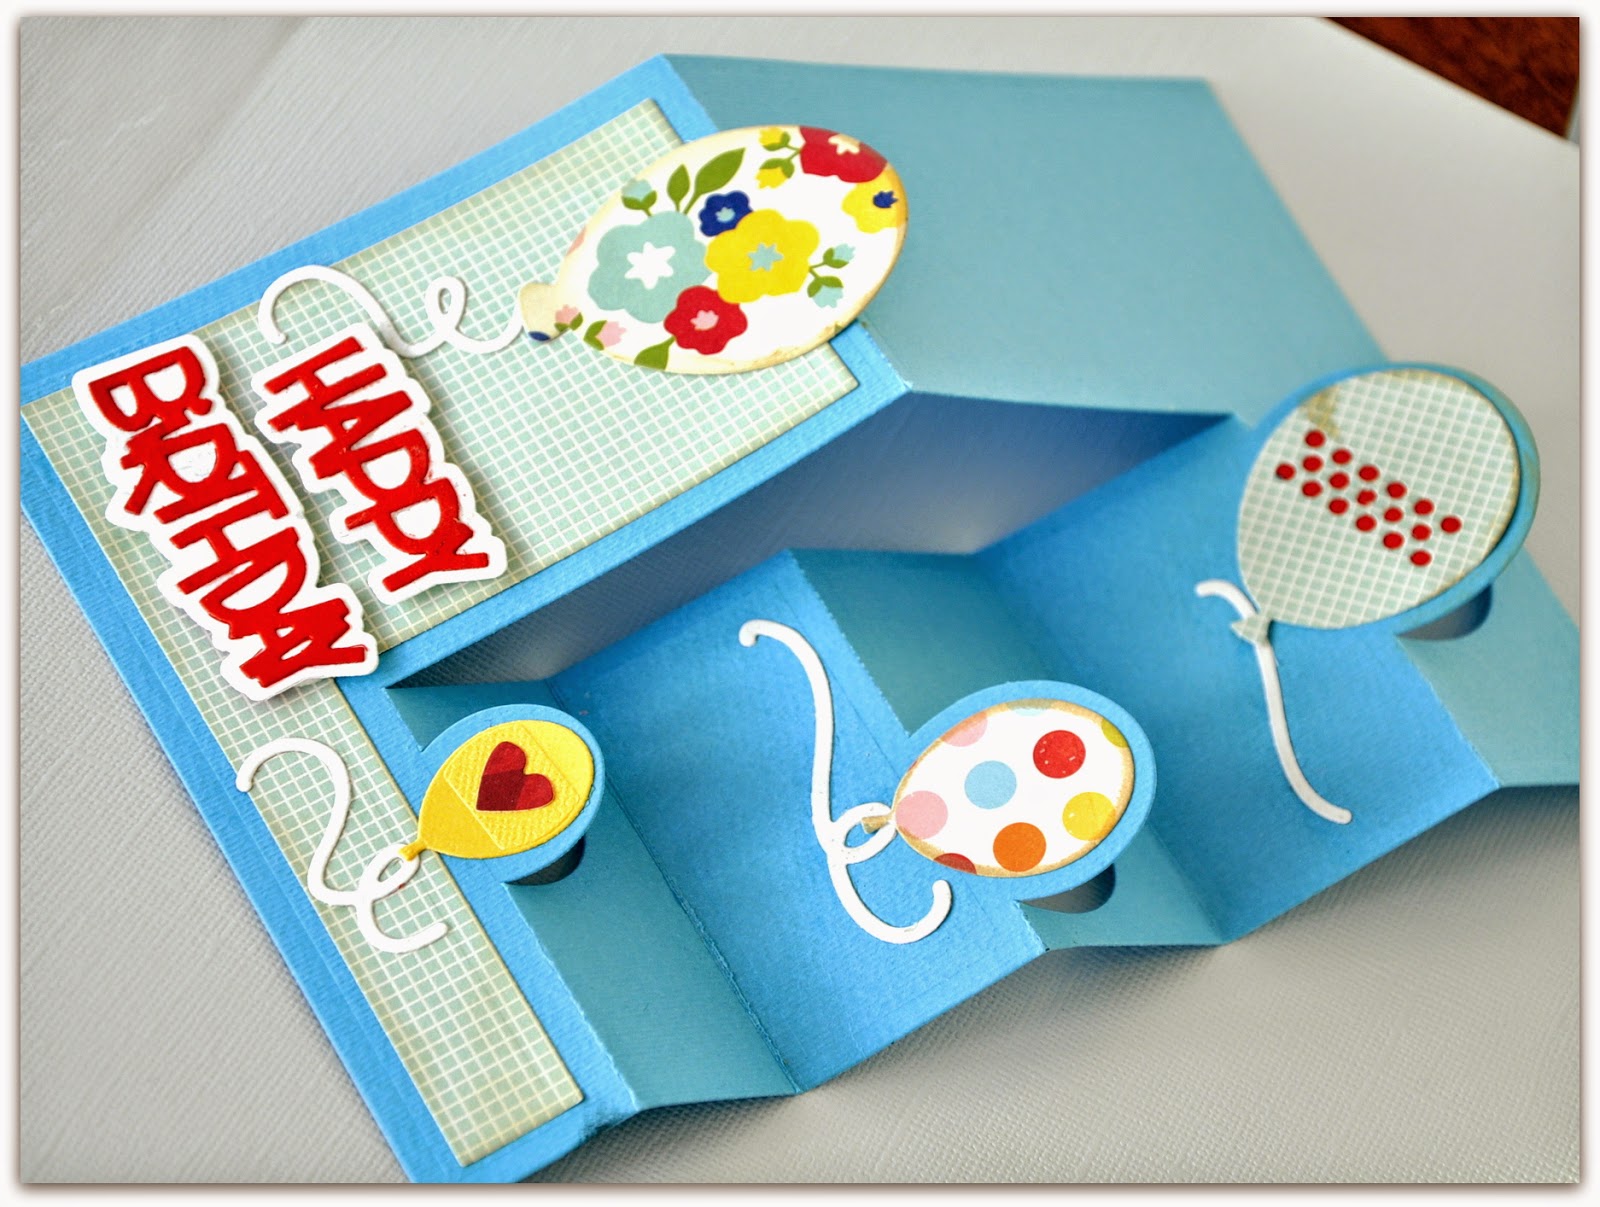
Today I'm showing you a vintage card but with a clean design.


  • Adhesives

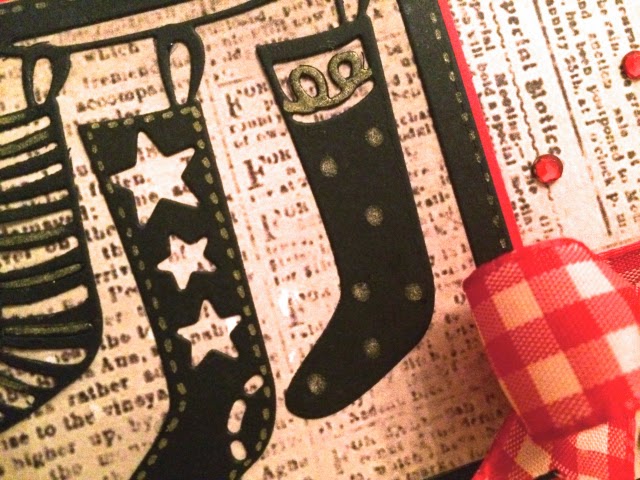
I love this socks die by Deby Potter, I think it can be used in so many ways for Christmas projects: Gift wrapping, cards, tags, Layouts... But today I made a card with it. I wanted a great impact, so I have die cutted it in black cardstock, and have combined it with red and some vintage newspaper pattern paper.


And you, Have you already started with your Christmas projects?

Elena
............................

Hola a todos! Oficialmente ya es noviembre, así que ya puedo empezar con mis projectos Navideños :)

Hoy os quiero enseñar una tarjeta vintage pero con un diseño limpio. Me encantan estos calcetines diseñados por Deby Potter, me parece que se pueden utilizar para muchísimos proyectos navideños: Paquetes, regalos, tags, páginas... pero hoy los he utilizado en una tarjeta.

Quería que fueran el punto de atención, así que los he troquelado en negro, como si fueran una sombra y los he combinado con cartulina roja y un papel que simula un antiguo periódico.

Y vosotros, ¿ya habéis comenzado con vuestros proyectos navideños?

Elena

White on White by Lilith

$
0
0
Subtle details are my favourite. For this layout I decided to work with dies and an embossing folder. Combining both and going with a white on white look was just the effect I was going for. I cut out the doily shape from some white cardstockusing the doily shape from the Sizzix Thinlits Die Set 2PK - Doily& Doily Border and also embossed some cardstock with dots (with the Sizzix Textured Impressions Embossing Folders 2PK - Houndstooth & Dots Set ). I then cut out a scalloped circle from the embossed cardstock. These two pieces I then layered one on top of the other. The rest of the layout was built up around these two pieces


SUPPLIES:


Other: Patterned Paper Studio Calico, ;Embellishments Crate Paper NOTES & THINGS 12 x 12 Chipboard Stickers, Studio Calico Wood veneer stars ;Mists: Mr Huey's Mint Julep, 

Christmas decoration

$
0
0


Hi everyone
Today I will show you a decoration for Christmas
Items I have used:
Sizzix Bigz Die Wreath, Banner, Holly & Poinsettia 659997
Sizzix Bigz Die Tattered Poinsettia 658261
Sizzix  Bigz Die tattered Pinecone 657492, but it's an old one so you can use
Sizzix Thinlits Die set 4 PK Holiday greens 658759
Supply list:
Paper: Craft & You Design's - Christmas Story collection-
Ink: Vintage Photo /Rangers
Brads, ribbon

Thanks for stopping by, wish you a great week
Pia


Hej alle
I dag vil jeg vise en dekoration som kan bruges til jul.
Sizzix dies jeg har brugt:
Sizzix Bigz Die Wreath, Banner, Holly & Poinsettia 659997
Sizzix Bigz Die Tattered Poinsettia 658261
Sizzix  Bigz Die tattered Pinecone 657492, men det er en ældre en så du kan i stedet bruge
Sizzix Thinlits Die set 4 PK Holiday greens 658759
Andre materialer:
Papir: Craft & You Design's - Christmas Story collection-
Ink: Vintage Photo /Rangers
Brads, bånd
Tak fordi du kiggede forbi, ønsker dig en skøn uge
Pia


Butterfly tag

$
0
0

Hello my crafting friends:) Here is a  one tag I made to show you. I really like the recycling and the backgroung of this card is made using a piece of old cardboard box.


Sizzix products:
Sizzix Big Shot Machine 657900
Sizzix Thinlits Die Set 8PK - Butterflies, Intricate 659971
Sizzix Framelits Die Set 8PK w/Stamps - Hello 659464

Other products:
Pion Design papers; Siri`s Kitchen, seam binding ribbon, "sewing" stamp, black ink, glue, tape,  cardboard brown.

Cut the tag out from brown cardboard, f.e. old box. Size is approximately 15 cm × 9,5 cm. Cut also the patterned paper at same size and tape it on to the tag.
Cut the butterflies (three different sizes) using set Sizzix Thinlits Die Set 8PK - Butterflies, Intricate 659971 and glue them on to the tag. Stamp the sentiment and cut out using stamp and die included set Sizzix Framelits Die Set 8PK w/Stamps - Hello 659464 . Finally glue the ribbon bow and stamp the edges.

Happy crafting,Minna

*    *    *    *    *
Moi, jälleen tein tällaisen tagin vaikka kirjanmerkiksi:) Ja koska tykkään kierrätyksestä, tausta on leikattu pahvilaatikosta.

Sizzix tuotteet:
Sizzix Big Shot Machine 657900
Sizzix Thinlits Die Set 8PK - Butterflies, Intricate 659971
Sizzix Framelits Die Set 8PK w/Stamps - Hello 659464

Muut tarvikkeet:
Pion Designin papereita; Siri´s Kitchen,saumanauhaa, "ommel" leimasin, muste, liimaa, teippiä, pahvia

Leikkaa tagi pahvista esim. laatikosta, koko n. 15 cm × 9,5 cm. Leikkaa myös kuviopaperi ja teippaa se tagiin.Leikkaa perhoset setillä Sizzix Thinlits Die Set 8PK - Butterflies, Intricate 659971, kolmea eri kokoa ja liimaa tagiin. Leimaa ja leikkaa teksti stanssilla setistä Sizzix Framelits Die Set 8PK w/Stamps - Hello 659464. Liimaa lopuksi rusetti ja leimaa reunat.

Mukavaa keskiviikkoa, Minna


Birthday balloons

$
0
0

 
After some weeks of Christmas projects I thought I'd show a fairly maschuline birthday card using a combination of Triplits Die Set 10PK - Balloons and Thinlits Die Set 10PK - Phrase Cards.


I think balloons are some of the most instantly happy things - you cannot think of balloons without thinking of birthdays, parties and happy smiling faces. So hopefully the recipient of this card will smile as well.
 
 
In order to tone down the busy patterned paper under my main focus I added some vellum behind the frame. This gave me a ground to build on.
 
 
I used another of the dies from the Thinlits Die Set 10PK - Phrase Cards to add a second "happy" to my frame - you can never have too many happies afterall.
 
Supply list:
Sizzix Big Shot Starter Kit (Powder Blue & Teal)
Sizzix Accessory - Magnetic Platform for Wafer-Thin Dies
Triplits Die Set 10PK - Balloons
Thinlits Die Set 10PK - Phrase Cards
Cardstock (Papertrey Ink, Bazzill)
Stamp (Simon Says Stamp)
Baker's twine (Lawn Fawn)
Vellum
VersaMark
Embossing powder (Ranger)
Glossy accent

---o---

Efter et par uger, hvor jeg har vist juleprojekter, besluttede jeg mig i denne uge for at lave et relativt maskulint fødselsdagskort, hvor jeg kombinerede Triplits Die Set 10PK - Balloons og Thinlits Die Set 10PK - Phrase Cards.

Jeg synes, at balloner er noget af det mest festlige: Man kommer umiddelbart til at tænke på fødselsdage, fest og glade, smilende mennesker. Så nu håber jeg, at modtageren af dette kort kommer til at smile, når han får kortet.

Jeg brugte lidt vellum til at nedtone det travle mønstrede papir, hvilket giver mig en lidt mere rolig baggrund til min lille ballon-scene.

For at understrege glæden udstansede jeg endnu et "happy", som jeg monterede over det "happy", der er en del af rammen.

Ingredienser:
Sizzix Big Shot Starter Kit (Powder Blue & Teal)
Sizzix Accessory - Magnetic Platform for Wafer-Thin Dies
Triplits Die Set 10PK - Balloons
Thinlits Die Set 10PK - Phrase Cards
Karton (Papertrey Ink, Bazzill)
Stempel (Simon Says Stamp)
Baker's twine (Lawn Fawn)
Vellum
VersaMark
Embossingpulver (Ranger)
Glossy accent

New card by Karine

$
0
0

Hi there!

Here I am today with a postcard that’s already travelling towards its recipient! Seasonal patterns and colours to say Thanks

Supply list:

Papers: American Crafts, October Afternoon
Corrugated cardboard: Toga
Cardstock: American Crafts
Label: 4heures37
Glitter adhesives: Pause Créative
Masking Tape
Enamel dots: Ephéméria
Stamps: Craft Origine, Cat's life Press
Ink: Black Versafine

Dies:

658300 : Sizzix Big Shot Starter Kit
660060:  Sizzix Thinlits Die Set 17PK-Labels
659573:  Sizzix Sizzlits Decorative Strip Die-Spring Greenery
660021:  Sizzix Framelits Die Set 7PK-circles-scallop

Are you up for an autumn card sprinkled with dies and details?

Start by cutting dies with various shapes (circles, labels, foliage) out of pattern papers and/or cardstock that fit with autumn colours.

I focused on the scalloped circle die to realise this card (circles-scallop die). All the accents will be superimposed at its center. Play with contrast and colours for a more efficient result. I stamped and cut a pretty bird and inserted it on my card.

Add glitter adhesives and masking tape strips.

This lay-out could also fit for a mini book cover, don’t you think?


Have a nice day,

Karine

Bonjour !

De retour avec une petite carte qui a déjà pris la route cette semaine ! Des couleurs et des motifs de saison pour juste dire merci :)

Matériel :

Papiers : American Crafts, October Afternoon
Carton ondulé : Toga
Cardstock : American Crafts
Etiquette : 4heures37
Adhésifs paillettes : Pause Créative
Masking Tape
Pastilles colorées : Ephéméria
Tampons : Craft Origine, Cat's life Press
Encre : Versafine noire

Dies utilisés :

658300 : Sizzix Big Shot Starter Kit
660060 Sizzix Thinlits Die Set 17PK-Labels
659573:  Sizzix Sizzlits Decorative Strip Die-Spring Greenery
660021:  Sizzix Framelits Die Set 7PK-circles-scallop

Une petite carte d'Automne parsemée de découpes et de détails ça vous dit ?

Commencez par découper diverses formes ( ronds, étiquettes,feuillages) dans des chutes de papiers imprimés et/ou cardstock en respectant un combo de saison.

Je me suis concentrée pour réaliser cette carte sur la découpe ronde et festonnée réalisée grâce au die “ circles-scallop”. Tous les éléments décoratifs se supperposent au centre. Jouez sur le contraste et les couleurs pour plus de résultat. Un joli oiseau imprimé et découpé vient compléter ma carte.

Rajoutez des adhésifs pailletés, des morceaux de Masking Tape.

Une mise en page qui pourrait être reproduite en une couverture de mini album vous ne trouvez pas ?

Très bonne journée à vous

Karine

Christmas Krafting!!

$
0
0


I know what your all thinking, "C'mon Pete, get your spell check sorted!" 

Actually, the spelling of 'Krafting' is deliberate as I am using kraft card pretty much exclusively to create these projects. Incidentally, where does the kraft in kraft card come from? someone was asking in the office the other day and I had no idea! (answers on a post card as they say)

As you are reading this I will be at the NEC in Birmingham teaching mini workshops at the Hobbycrafts show and I hope to see some of you there.

For the following projects I will be using dies from the Tim Holtz Alterations Christmas range, Follow the links below to view the products:
I also used plenty of kraft card and gesso!

I took a 9 x 9 cm square of kraft card and used two of the dies from the Holiday Words Framelits set to die-cut the legend 'Christmas Wishes'. Next, I die-cut a medium and a small snowflake (paper snowflakes set) from kraft card. I took a small blob of white acrylic gesso and spread it onto my crafting mat using a brayer. The trick is not to use too much gesso, as always, you can always add more. I then used my brayer to apply the gesso to the snowflakes after which there isn't much left on the roller which is a good time to apply some to my die-cut square in a random fashion.


I next die-cut a large snowflake from the same Thinlits set and inked the edges using Walnut Stain Distress Ink. This is a very strong colour so gently does it! At the same time I inked the tips of the other snowflakes and the edges of the square. I used adhesive foam pads to layer the snowflakes and attached a threaded wooden button to the centre which I lightly distressed by adding a little gesso with my fingertips.

After mounting the layered snowflakes onto the square I attached it to the centre of a 10 x 10 cm ivory base card. This is my favourite kind of card, maximum impact for minimum effort!


I enjoyed making this card so much that I created created another similar card so it wouldn't feel lonely. I die-cut the words around the edge of a 12 x 12 cm square of kraft card before die-cutting and embossing the layered snowflake (the embossing folder comes with the die).
 Next I applied the gesso and Distress Ink before attaching a wooden button threaded with twine which I twisted into a loop before adding a touch of gesso and attaching to the centre of the snowflake with a glue gun.

I cut a 7cm square of hessian (Burlap) and applied a little gesso and ink  before mounting everything onto a 13 x 13cm kraft base card.


I think they make a lovely couple, I hope you agree?


I wanted to have a bit more fun with the kraft card/gesso combination so I decided to create a couple more projects...... tune in next week for part 2!


Layer cake quicky

$
0
0

Where has this week gone? Well I was in Dublin at the Knitting and Stitching Show at the weekend - so I think that has made the time seem to disappear. I was demonstrating the Big Shot and Bigz dies for Abakhanhttp://www.abakhan.co.uk/ , and teaching a workshop using the Butterfly die - http://www.sizzix.co.uk/product/658629/sizzix-bigz-die-butterfly-4 to decorate a needle case.
So now I'm back and trying to complete the Downton Abbey quilt - my idea of completing it with a plain background just doesn't work - so I am going to have to piece together some more 'whirligigs' to make a small lap quilt - but as I've only made that decision today I can't show you the results this week - but I can let you know that you can cut 28 half hexagons from a fat quarter, with die http://www.sizzix.co.uk/product/658880/sizzix-bigz-die-5-half-hex - but you have to lay the fabric all the same way - R.S or W.S up - and do not fan fold
Each fat quarter will make 4 complete 'whirligigs'.
So far I have used 288 half hexagons and my top measures approx. 52" at the widest point and 42" at the narrowest - just to give you an idea of size.
Sooooo - Downton is delayed again - and it could be a couple of weeks before I can finish it - but in the meantime I have something else to show you -
Do you remember this from a couple of weeks ago?
 
 
I said I would let you know  how big a quilt top I could make out of this Layer cake pack of fabrics.
Now I'm pleased to be able to give you the answer and show the started top -


Using this die http://www.sizzix.co.uk/product/657622/sizzix-bigz-l-die-triangles-isosceles-right-4-1-2-h-assembled I can make a top approx. 40"/1m square. Obviously if you use a smaller die the size you can make will be reduced.
What can  you look forward to next week - well it won't be Downton or this small quilt - but it will be a quick make for Christmas.
In the meantime enjoy your sewing.
Angela


A baby bunting

$
0
0


Hi everyone! This week was specially creative because I had to do a gift for a friend of mine who was a mummy to a beautiful and loved baby girl waited for long time.
It was difficult to choose her name but finally Sara was the perfect name for the parents.
So , I decided I wanted to do a nice and cute bunting.


As I  have done before, I cut out fabric from more than one die by Sizzix.
This time I have used an  alphabet  die and  one of the new flowers dies.


657892


Before  using the Big Shot I ironed some fusible web to the fabrics for letters , flowers and leaves.
The last ones ( flowers and leaves) are double side with fabric.
I stitched some decorative stitches around the flowers after I cut out.


I cut six triangles for top fabrics and six more for the backing.Ironed each letter and  I used the applique or blanket stitch on my machine for letters on the top of the triangles .Turned the triangle pieces to face right sides together and sew all around, then turn .

I chose a beautiful petal ribbon and a bias on it like you see in the pics and finished by hand.


My backing  is a nice white fabric  with embroidered stars.


Some details ......... with flowers  and leaves sewed and some buttons.


I´m very happy with my first bunting sewed. I want to do a new one for my teenager daughter with other style.

Hope you  have a wonderful week.
 See you next Saturday!!
Love
Mercedes

..................................................***************..................................................


¡Hola a todo el mundo !Esta  semana ha sido especialmente creativa porque tenía  que hacer un regalo para una amiga que ha sido sido mamá de una preciosa  y esperada niña.
Fue difícil hasta que decidieron el nombre pero finalmente Sara fue el que más convenció. Por esto decidí hacerles un bonito banderín con su nombre y tenerlo para decorar su dormitorio.

Como ya he hecho otras veces, he usado varios troqueles de Sizzix, Uno ha sido para las letras y otro para las flores y  hojas, uno de los últimos  diseñado por Stephanie Ackerman.


657892


Antes de usar la troqueladora Big Shot, planché  entretela de doble cara sobre el revés de las telas para las letras, hojas y flores. En estas últimas volví a planchar tela , de tal manera que se quedaron dobles. Entonces corté todas las telitas con los troqueles .
Bordé con puntada decorativa alrededor de las hojas  y las hojas ,usando la máquina de coser.

Corté seis triángulos para la parte de  delante y otros seis para las traseras. Planché las letras sobre cuatro de ello y las dejé pegadas. Hice una puntada alrededor de cada una. Luego coloqué el triángulo de la parte trasera y cosí por el revés. Di la vuelta y planché. Para unir todos los triángulos elegí un bonita cinta con pétalos y sobre ella un biés que cosí a máquina. Echa un vistazo a las fotos.
Luego acabé a mano por el revés.
Los detalles y la tela para la trasera , una bonita batista blanca con estrellas bordadas, puedes verlos también en las fotos. 

Para ser el primer banderín , estoy muy contenta cómo ha quedado y ya estoy pensando en hacer otro para mi hija adolescente ,pero claro, con otro estilo.
Espero que tengáis una semana estupenda.
Nos vemos el próximo sábado.
Cariños.
Mercedes


A photo frame by Olga

'Happy Birthday' Step Up Card.

$
0
0


Hi there!
I would like to show you a recent card I made using one of the new framelits dies.
I have never made a card like that before and was eager to try it when the die arrived in my mailbox.

Here is a picture of it:


It was really easy to make. I started by diecutting the large cardbase. It comes out with all the marks  and creases that you need. So you can trust the card will not be crooked and turn out equally nice each and every time. There are actually different sets of step up cards, but as you see I decided upon the birthday one.


At first I made all the bends of the card following the pre made creases.
Then I glued down the smaller die cut pieces that serve to embellish the card.
I inked around the edges with a light coloured inkpad.


Maybe this shot gives you a better idea of how the card is put together.
I know I will probably make quite a few more step up cards as they are pretty quick to make once you've made the first one. And they can also be varied with different kinds of embellishments.
You should give them a try .-)

Thanks for dropping by today!!

Sizzix products I have used:
Sizzix Big Shot Machine Only (Powder Blue & Teal)
Sizzix Framelits Die Set 23PK - Card, Balloons Step-Ups


                                               --------------oooo-------------------

Hej där!
I dag vill jag gärna visa er ett kort som jag gjort med ett av de nya  framelits setten.
Jag har inte provat att göra ett sådant trapp-kort innan så jag var mycket nyfiken på det när jag fick diesen i lådan :-)

Såhär blev det:
Det var ganska enkelt att göra. Jag startade med att göra den stora basen för kortet. Den stansas klar med alla veck etc som behövs. På så sätt vet du att alla korten blir likadana och inget blir snett. det finns olika sett men jag har valt ett som är speciellt för födelsedagar.

Först bockade jag till alla kortets veck. Det gick lätt eftersom det mesta arbetet gjorts redan av diesen. Sedan limmade jag dit tect, ballonger etc för att pynta kortet. Innan jag limmade fast dom så inkade jag runt kanten med en ljus stämpeldyna.

Denna bilden ger kanske en bättre ide om hur kortet kommer till.
Jag kommer helt säkert att göra fler trappkort med tanke på hur lätt det är när man väl provat.
Man kan variera korten också genom att använda andra utstansade motiv och pynt.
Varför inte prova!!? :-)

Tack för att du kikade förbi idag!

Sizzix producter jag har använt:
Sizzix Big Shot Machine Only (Powder Blue & Teal)
Sizzix Framelits Die Set 23PK - Card, Balloons Step-Ups


Hexagon Cushion

$
0
0


When I began making the hexagons last week the main aim was just to have a go at English paper piecing and see how it went, but with the idea of making the 'Let It Snow' cushion from Issue 14 of Love Patchwork and Quilting magazine if it went well. I used smaller hexagons (Hexagons, 1in Sides #2 die for the fabric and Hexagons, 3/4in Sides die for the papers) than those used for the cushion in the magazine but it didn't affect the overall design, it just meant making more.


All but of a handful of the hexies I made (approximately 80) were joined together to form a circular-ish piece which then became the feature-piece on the front of the cushion.


I don't like having raw edges anywhere if possible, even on the inside of a cushion cover so opted to bind the edges. I used the same white Essex linen for the binding as for the main part of the cushion so that the hexies would stand out and be the main focus.

I really enjoyed piecing the hexagons for this and might try something a bit bigger next time.


Christmas floating card

$
0
0


Hello! We are now close to Christmas so it is really time to make our Christmas cards. Perfect timing for the Christmas Challenge!


Using the free downloadable papers from Sizzix - click here to download - I made a floating Christmas card.


After I downloaded the paper (click here for the link) I printed them in white textured paper. I trimmed the stripy blue paper to fit inside of a white square card. I checked which size of circle would fit for the printed blue snowflake. I took the next one up from the same set of Framelits 658604 Sizzix Framelits Die Set 8PK - Circles #2 and die cut the centre of the card.


I also die cut the blue circle and then I die cut a snowflake from the 659978 Sizzix Thinlits Die Set 9PK - Winter Borders & Rosette.  Then I took a white thread and glued verticlly top and bottom of the circle aperture.


Once dried, I placed the blue circle and attached it to the thread. I then place an identically size circle die cut from the printed snowflake paper.


To cover the back of the aperture, I placed the exact same die that I used for the aperture on top of it, with the blade edge upwards and two pieces of really low tack tape facing upwards as well. Then I placed the paper already trimmed to size facing upwards. Yes, should be placed front upwards, I made a mistake for the photos, it really should be front up, otherwise it wont work.


Once that the piece of paper is centered on all edges, press down and the low tack tape will hold the die in the exact place. Then die cut using your Big Shot and glue down.


Finally I added a strip from the printed papers to create a vertical line between the top and the bottom.


I hope you enjoy this little tutorial!

Happy crafting!


Christmas week 1 with Lilith

$
0
0

Welcome to the second day of the Christmas Challenge week. Creating Christmas cards is always one of my favourite crafting activities. 

The card I created today is created using the digital festive papers (download available here: Sizzix free festive papers). I printed two of the paper designs onto some white cardstock as well as the paper die cut elements. 


The base is a piece of  4"*6"white card stock . I then layered a smaller piece using the blue striped paper.
Then I trimmed a piece of the star design which I cut in a banner shape. Then I added some white twine which I tied in a ribbon. I also cut out some of the hearts which I layered on top of the banner. The final touch is a snowflake which I cut using theSizzix Bigz Die - Snowflakes #3 . I then added some stickles to add a bit glitter. 


Such a simple but very festive card. Have fun creating Christmas cards. 

Supplies:
Free festive papers ,Sizzix Bigz Die - Snowflakes #3, Stickles, twine, 


Merry Christmas

$
0
0


Hi there

Today I would like to show you  a Christmas card I made using one of the new Framelits dies. It was really easy to make. I have used the Free Festive paper download

Items I have used to the blue card:
Supply list:
Brads, pountura paint- blue-
 
Items used to the red card:
659978 Sizzix Thinlits 9 dies -Winter, Border &Rosette
659994 Sizzix Bigz Die Snowflake #3
659930 Sizzix Triplite 16 dies-Tags-
Supply list.
Paper. free Festive paper download
Ink: Rangers Fired Brink, Archival ink -Watering can-
Stamp:
tim Holtz Collection -Mini Holidays CMS 177
ribbon, button and Pounture paint
 Thanks for stopping by, wish you a great week
Pia
Hej alle
I dag vil jeg vise et kort med en af de lækre nye Sizzix framelits die Det er så nemt at lave et step kort med denne die. Jeg har brugt det skønne Free Festive paper download 
Sizzix dies jeg har brugt til det blå kort:
Andre materialer:
Papir: Free Festive paper downloads
Brads, pountura paint- blue-
Sizzix dies jeg har brugt til det røde kort:
Andre materialer.
Ink: Rangers Fired Brink, Archival ink -Watering can-
Stempler:
Tim Holtz Collection -Mini Holidays CMS 177
Bånd, knap og Pounture paint
Tak fordi du kiggede forbi, jeg ønsker dig en dejlig uge
Pia

Merry Christmas....

$
0
0


Hello to everyone:) Here is my card for this week`s  Christmas Challenge, themed by cardmaking. I have used wonderful free festive papers which you can download HERE.


Sizzix products:
Sizzix Big Shot Machine 657900
Sizzix Triplits Die Set 9PK - Ornaments 659929

Other products:
Papers; free festive papers, tape, glue, baker twine

Cut the background paper (blue striped) size  12 cm × 16 cm. Cut also the other patterned paper size 9 cm × 12 cm and sew this on to the white cardboard sized little bit bigger and then tape on to the background. Cut the ornaments using dies included set Sizzix Triplits Die Set 9PK - Ornaments 659929 . Make them ready with baker twines and glue on to the card like above. Sew the card on to the white cardboard and fold the twines between these two papers before sewing the edge:) Finally cut the sentimetn out included free festive papers.

Happy crafting, Minna

*    *    *    *
Moi, tässä korttini Sizzixin jouluhaasteeseen jossa tällä viikolla teemana kortit.

Sizzix tuotteet:
Sizzix Big Shot Machine 657900
Sizzix Triplits Die Set 9PK - Ornaments 659929

Muut tarvikkeet:
Paperit; ilmaiset tulostettavat joulu/talviaiheiset paperit, jotka voit ladata TÄÄLTÄ .
liimaa, teippiä, leipurinnyöriä

Leikkaa taustapaperi koko 12 cm × 16 cm kuten myös toinen kuviopaperi kokoa 9 cm × 12 cm. Ompele tämä valkoiseen hieman isompaan kartonkiin ja teippaa taustapaperiin.Leikkaa ornamentit stansseilla Sizzix Triplits Die Set 9PK - Ornaments 659929  ja kokoa ne naruja myöten valmiiksi ja liimaa taustaan kuten kuvassa. Ompele kortti valkoiselle kartongille ja taita narut näiden papereiden/kartonkien väliin ennenkuin ompelet yläreunan. Lopuksi leikkaa teksti tulostetuista papereista.

Mukavaa keskiviikkoa, Minna

Set of Christmas Phrase cards

$
0
0


This week we have the pleasure of showing you multiple ways to use the Free Festive Paper Download to create your own Christmas cards. I often find myself drawn towards wintery colours for my Christmas crafting so these new papers are just up my alley.


I decided to create a set of three cards that are to a large degree alike but different enough for it to still be fun to create all three of them in one sitting.
 
 
I build the focus for the cards up by diecutting pieces from Thinlits Die Set 9PK - Christmas Phrase Cards. Since I used the blue striped paper for the bottom part of my focus piece, I decided to line the diecut with the words with some vellum to tone the patterned paper down a bit.
 
 
On each card I highlighted one of the words by diecutting it in a patterned paper using one of the word dies that are included in Thinlits Die Set 9PK - Christmas Phrase Cards. To give the word some added height I diecut it twice and glued the two diecuts together before I adhered them to the card.
 
 
Using a small die from Triplits Die Set 15PK - Tags I diecut silver foil ornaments to dress each card with. Because the words have different lenghts, I needed to move the ornaments around to fit them in on each card. So this also makes each card stand out from the other two.
 
 
By creating a set of cards like this, you can easily get a lot of your Christmas cards done in time to send them out to friends and family.

 
Supply list:
Sizzix Big Shot Starter Kit (Powder Blue & Teal)
Sizzix Accessory - Magnetic Platform for Wafer-Thin Dies
Free Festive Paper Download
Thinlits Die Set 9PK - Christmas Phrase Cards
Triplits Die Set 15PK - Tags
Silver foil cardstock
Kraft cardstock (Bazzill)
Vellum (Panduro Hobby) 
Baker's twine (Lawn Fawn)
 
---o---
 
I denne uge har vi fornøjelse af at vise dig forskellige måder, du kan bruge Free Festive Paper Download til at lave dine julekort. Jeg er ofte tiltrukket af vinterfarver, når jeg skal lave mine julekort, så disse papirer er helt perfekte til mine kort.
 
I besluttede mig for at lave et sæt af tre kort, som designmæssigt er ens, men som har lidt forskelle, der gør, at det stadig var sjovt at lave de her tre kort på én gang.
 
Jeg byggede mit primære fokus op med udstansninger fra Thinlits Die Set 9PK - Christmas Phrase Cards. Da jeg brugte det blå stribede papir som det nederste led, besluttede jeg mig for at sætte vellum bagpå ord-udstansningen. Dette toner det mønstrede papir lidt ned, og lader de andre dele af mit motiv stå tydligere frem.
 
På hvert af de tre kort fremhævede jeg ét af ordene ved at udstanse det i et andet mønstret papir. For at give ordene yderligere dimension, udstansede jeg to eksemplarer af hvert ord, limede dem ovenpå hinanden og limede dem derefter på kortet.
 
Med en lille die fra Triplits Die Set 15PK - Tags udstansede jeg små juleophæng i sølvfoliekarton. Dette ophæng sidder forskellige steder på hvert kort, fordi de fremhævede ord har forskellige længder og placeringer. Men det betyder jo bare, at hvert kort får sit eget udseende.
 
Ved at lave kort i sæt som dette, gør det nemt og hurtigt at få lavet julekortene klar til at sende ud til familie og venner.
 
Ingredienser:
Sizzix Big Shot Starter Kit (Powder Blue & Teal)
Sizzix Accessory - Magnetic Platform for Wafer-Thin Dies
Baker's twine (Lawn Fawn)

Christmas Krafting (Part 2)

$
0
0


I'm back with part two of my kraft card/Sizzix Extravaganza. If you remember, I created two cards last week to add to my display at the Hobbycrafts show in Birmingham. In truth, I started with one card and another one quickly followed at which point I was having so much fun..... you know the story!!

To complete my little vignette I decided to design a couple of Christmas packaging ideas using dies from the new Tim Holtz Christmas range.

Here is a list of the dies that I used, all of which are designed by Tim, and you can see each set by clicking on the links.


I started by die-cutting a pillow box from craft card before using one of the Holiday Words dies to create the aperture cut. I applied a little acrylic gesso to my craft sheet before spreading with my brayer, it's important not to have too much gesso on the roller when you apply it to the gift box as we are looking for a random effect rather than a total white-out! Before assembling the boxI attached a rectangle of clear acetate film to the inside of the box behind the aperture word. At this point you can insert your gift (diamonds are always a safe bet in my experience!)


It's time to create our pine cone. I die- cut the pine cone together with some Christmas foliage from kraft card. the pine cone starts off as a spiral of card and the first thing I wanted to do was apply the gesso as above. I used a scrap piece of card as a mask and once complete I applied a little Walnut Stain Distress Ink to the edges. As I said last week, Walnut Stain is a very dark dye so be very careful!!

The next task is to flip the pine cone over and grip the edge between a pair of straight tweezers. Start to roll the tweezers towards the centre until you have gathered up all the separate 'petals' and secure with a glue gun 

Apply a little gesso to the foliage and ink the tips. Once they are dry you can gently curl the edges to add a little more dimension. Cut a strip of hessian/burlap and wrap it around the pillow box secured with a length of knotted raffia.
Use a glue gun to attach the foliage followed by the pine cone. For the finishing touches, add a couple of frosted berries and a raffia bow. The berries can be found in many good craft shops or garden centres this time of year. 
The end result is so effective and those berries set it off perfectly.


I wanted to add just one more thing to give a little visual balance once all the projects were placed together. The box I used has a 7.5 cm square base and is 15 cm tall. I started by wrapping it in parcel paper before adding a band of hessian followed by a length of knotted raffia. Next, I die-cut a small tag and aperture cut the word believe before following up with a little gesso.

I Die-cut three of the four snowflakes from the magnificent Stacked Snowflakes die before applying a little gesso and Walnut Stain ink to the tips of each die-cut. I layered the snowflakes together using adhesive foam pads before adding a sparky crystal to the centre.
I attached the tag with a length of raffia before adding the assembled snowflake with a glue gun.... Simple!!!


Here is the gang all together at last, I think I may use this style/theme for my own Christmas cards/gifts this year because it is a quick and easy style but is also very effective.


I would like to take this opportunity to say a big thank you to everyone who stopped by the Sizzix workshop area at the Hobbycrafts show in Birmingham last week. The classes were very well attended and we had lots of fun getting messy using inks and gesso to bring the wonderful die-cuts and embossing folders to life. Everyone did a great job and even though  it was four days hard work it never seemed like a chore, I can't wait for the next one! In total, and including my own we made 297 cards and I'm sure I can say without fear of contradiction that they all turned out fabulous!

Below is a picture of me back at Sizzix Central with some of the 27 cards which I made.


Christmas Week 1 with Karine

$
0
0


 Hello,

The end-of-the-year celebrations are coming closer now and it’s time to prepare greetings cards! All this week, the entire Sizzix team will show you how to create pretty and easy cards to inspire you again and again…

You can download the wonderful papers and die cuts offered by Sizzix by clicking here: http://www.sizzix.co.uk/free-festive-papers-2014-downloads

Here is a card with my favourite winter colour combo:

Supply List:

Papers: Sizzix downloadables
Cardstock, glitter paper: American Crafts
Coloured dots: Ephéméria
Glitter adhesive: Pause Créative
Label: Freckled Fawn
Others: gold leaf, pin

Dies:

658300 : Sizzix Big Shot Starter Kit
659426 : Sizziz Sizzlits Decorative Strip Die-Bow-Tied
658759 : Sizzix Thinlits Die Set 4PK-holiday-greens
660042 : Sizzix Texture Fades Embossing Folder 2PK-greetings-greens-set

Start by printing the nice snowflake pattern paper – you can download it here :)

I have printed this pretty snowflake pattern paper on a white cardstock.

Emboss a white cardstock with the Season Greetings folder. Cut a nice foliage pattern out of glitter paper.
Add a small bow knotted with glitter adhesive from Pause Creative. Assemble the whole in the lower right corner and you’re nearly done with your card!

Add some volume by inserting a pin and some colourful dots!

I hope you liked my card!


Have a lovely day,

Karine

Bonjour,

Les fêtes arrivent à grand pas, il est temps de commencer à préparer ses cartes de voeux ! Toute l'équipe Sizzix vous propose cette semaine de belles cartes faciles à réaliser pour toujours plus vous inspirer :)

Je vous propose de vite télécharger les superbes papiers et découpes offertes par Sizzix en cliquant ici http://www.sizzix.co.uk/free-festive-papers-2014-downloads

Voici une carte dans mon combo hivernal préféré :)

Matériel :

Papiers : Sizzix à télécharger
Cardstock, papier paillettes : American Crafts
Pastilles couleur : Ephéméria
Adhésif paillettes : Pause Créative
Etiquette :Freckled Fawn
Divers : feuille dorée, épingle

Dies :

658300 : Sizzix Big Shot Starter Kit
659426 : Sizziz Sizzlits Decorative Strip Die-Bow-Tied
658759 : Sizzix Thinlits Die Set 4PK-holiday-greens
660042 : Sizzix Texture Fades Embossing Folder 2PK-greetings-greens-set

Commencez par imprimer le superbe imprimé flocon en le téléchargeant ici

J'ai imprimé ce joli papier flocons sur un cardstock blanc.

Embossez ensuite toujours sur un cardstock blanc la plaque Seasons Greetings. Découpez un joli feuillage dans un papier pailleté.
Ajoutez un petit noeud relié par un adhésif pailléte Pause Créative, assemblez le tout dans l'angle bas droit et votre carte est pratiquement terminé !

Rajoutez un peu de volume en fixant une aiguille et des petites pastilles assorties !

J'espère que ma carte vous aura plu !

Bonne journée

Karine

Quick Scandi Christmas block

$
0
0

How are you - I hope you're enjoying the build up to Christmas and that you have a lot more fun and enjoyment than stress.
Last year I thought it would be nice to start a family tradition - a quilt for Christmas eve - when the grandchildren can snuggle up under the quilt, in their Christmas pyjamas, and  enjoy watching a film together.
So we are only 6 weeks away from Christmas and I'm just starting the blocks for the quilt! Well that is progress, and even though I might not get it finished for this Christmas, I am moving in the right direction.
So I have chosen these lovely Scandi style fabrics, and plan to keep the design quite simple -
 

 I just love these colours and designs.
I have used the following dies for my star block -
 1 square in red with white stars.
With the Big Shot and die 657520 http://www.sizzix.co.uk/product/657520/sizzix-bigz-l-die-half-square-triangles-5-finished-square , and red with cream heart outlines, I cut
 8 half-square triangles.
 4 x 4 1/2" squares.
To begin I stitched 2 half square triangles to each side of the quarter square triangle -
and then I stitched these to opposite sides of the 8 1/2" square -

and then I joined the 41/2" squares to each end of two of  the pieced triangles -
 To complete the block these were stitched to  opposite sides of the centre square -
So that is my quick make for Christmas - it is a 16" finished block - so it could be a cushion or a table centre. I am still hoping that I can make a quilt for Christmas - and so I plan to use the same design for all of the quilt blocks, and mix and match the various fabrics I have from the range.
Will it be finished for this Christmas? - I have no idea, but, for the first time ever, I have the beginnings of a quilt for Christmas - I feel quite warm and cosy inside!
That's all for now - have fun.
Angela


Viewing all 2033 articles
Browse latest View live