Quantcast
Channel: Crafting ideas from Sizzix UK
Viewing all 2033 articles
Browse latest View live

Oh Christmas tree!

$
0
0


I hope you all had a wonderful Christmas, relaxed and with lots of love (because love is the most important thing at Christmas, isn't it?)

Way back in July I made a Christmas quilt that has now been published in an Italian magazine called Cucito Creativo. Want to see what I made?

I used squares and half square triangles for the tree, and kept things in a traditional red and green colour scheme - with red as the background (because white is never a good colour for my family, and I'm sure ours isn't the only slightly messy household. Christmas involves lots of eating and chocolates and things - a white background wouldn't have held up well here!)


...I appliqued stars onto the points of the tree and quilted really simply, just following the lines of the squares.


As with most of the projects I make for Sizzix, this now lives with head office so it can be used as a sample at shows and so on. I rather miss it, so maybe next year I'll make another one for me.


Thinking about Valentine...

$
0
0
Hi everybody! Did you have a nice Christmas? I hope you had a wonderful time with your family. Now, as the Holiday season is almost over, I'm already thinking about Valentine. Do you like to craft for Valentine's Day?

Today I want to show you a gift tag that I made using the brand new Jumbo Tattered Florals Bigz XL Die from Tim Holtz. I love this new die! You can make a lot of flowers with only one die and in a very big size.


Supply list:

I have used some coffee filters to make this flower. I love all the dimension that you get layering and scrunching them. it is so easy to do and the results are very realistic. Then, you only have to apply some Distress Stains to color the filters.

You can find this die and all the other ones from this awesome range since January 2014 in stores.

Happy Monday and Happy new year!!
.................................
¡Hola a todos! ¿Habéis pasado unas felices fiestas? Espero que lo hayáis pasado muy bien en compañía de vuestra familia. Ahora que la Navidad prácticamente ha pasado, aunque aún nos queda Reyes, ya estoy pensando en San Valentín. Aunque no lo celebremos mucho aquí siempre es bueno tener un detallito con ese alguien a quien quieres. ¿Vosotros hacéis algo para San Valentín?

Hoy os quiero enseñar una etiqueta para regalo hecha usando el nuevo troquel Jumbo Tattered Florals de Tim Holtz. Me encanta este nuevo troquel, puedes hacer un montón de flores distintas con él y además tiene un tamaño bastante grande.

Para hacer estas flores he usado filtros de café. Me encanta la dimensión que adquieren cuando poner muchas capas y los arrugas y, además de muy fácil, queda muy realista. Después solo hay que darles un poco de color con Distress Stains y quedan así de bonitas.

Podéis encontrar este troquel y todos los restantes de su gama a partir de enero en las tiendas.

¡Feliz lunes y feliz año nuevo!

Happy New Year!

$
0
0


Hi everyone...hope you all had a great week....today is the last the of the year and I have a "Happy New Year" card to show you. I have used the new Tim Holtz Jumbo Tattered Flower on this card.This product will be available in your local store in January 2014.


Supply list:

Papers: Pion Design - Flower Frames, Bazzill cardstock, vellum, Manila Tag # 5
Inks: Distress ink Pad - Walnut Stain, Pumice Stone
Stamps: Stampers Anonymous Tim Holtz Collection
Other: Fabric, cheesecloth, Tissue Wrap, Melissa Frances - Button, Seam Binding ribbon, Perfect Pearls - Confetti White
 

How to do:

Cut out a card in patterned paper 17x30cm. Fold it to a card and distress the edges with Distress ink Pad - Walnut Stain. fold and sew the card as a pocket.
Distress the tag with Distress ink Pad - Pumice Stone and Perfect Pearls - Confetti White.
Stamp some stamps in the background of the tag. Add a quote and a bow.
Die cut branch in white cardstock with  Sizzix Bigz Die - Garden Greens
and gentle distress it with Distress ink Pad - Pumice Stone.
Die cut flowers in fabric, Tissue Wrap, vellum and cardstock with  Sizzix Bigz XL Die - Jumbo Tattered Florals and Sizzix Bigz Die - Tattered Florals
Glue the flower together and add a big button in the middle. Glue the branch and flower to the card.


Thanks for stopping by and wish you all
A HAPPY NEW YEAR!!!
Anne Kristine

♥♥♥♥♥♥
Hei alle sammen... håper dere har hatt en fin uke...i dag er det den siste dagen i dette året og jeg har et "Godt Nyttår" kort å vise dere. På dette kortet har jeg brukt den nye flotte Tim Holtz Jumbo Tattered Flower . 
Produktene er å finne i butikkene i Januar 2014.

Materialer:

Papir: Pion Design - Flower Frames, Bazzill kartong, vellum, Manila Tag # 5
Inks: Distress ink Pad - Walnut Stain, Pumice Stone
Stempler: Stampers Anonymous Tim Holtz Collection
Annet: Tekstil, osteklut, Tissue Wrap, Melissa Frances - knapp, Seam Binding bånd, Perfect Pearls - Confetti White
 
Beskrivelse:
Skjær ut selve kortet som måler 17x30 cm. Fold kortet og distress kantene med  Distress ink Pad - Walnut Stain. Fold kortet og sy det sammen som en lomme.
Distress tag'en med Distress ink Pad - Pumice Stone og Perfect Pearls - Confetti White.
Stemple diverse stempler på bakgrunnen av tag'en. Lim et sitat og en sløyfe på tag'en.
Stans ut grenen med  Sizzix Bigz Die - Garden Greens
og distress forsiktig med Distress ink Pad - Pumice Stone.
Stans ut blomster i tekstil, Tissue Wrap, vellum og kartong med  Sizzix Bigz XL Die - Jumbo Tattered Florals og Sizzix Bigz Die - Tattered Florals
Lim sammen blomsten og sett fast en knapp i midten. Lim grenen og blomsten til selve kortet.
  
Takk for at du stikker innom her og ønsker dere alle 
ET RIKTIG GODT NYTTÅR!!!
 Anne Kristine

A Happy New Year Hat

$
0
0


Hi everyone.
I hope you all had a Merry Christmas and enjoyed the Holidays. Today I will show you a New Year hat decoratet using the beautiful Sizzix Bigz  XL Die-Jumbo Tattered Florals . In January you can find these Sizzix dies in Stores
Items used:
Suplly list:
Paper: Old music paper, paperpad 6x6 Studio Light, Foamies glitter sheet.
Chees cloth, gauze, felt  and fabric
Ink.Archival ink Coffee
Distress embossing Ultra Thick platinium,metalic flowers, Tim Holtz idea-ology Adage Ticket and Buckles, flowers, brads and hats


 I die cut the Jumbo Tattered Florals using fabric, cheese cloth, music papergauze and felt
I die  cut Garden Greens using foamies glitter sheet.
 
Thank's for stopping by
Wish you all A Happy New Year
Hej alle
Jeg håber I har nydt juledagene og fejret en dejlig juleaften. I dag vil jeg vise hvordan jeg har dekoret  nytårs hatte, den ene med nodepapir og så har jeg brugt den nye Sizzix Bigz XL Die Jumbo Tattered Florals som kommer i butikkerne til Januar 2014
Dies jeg har brugt:
Andre materialer:
Papir: gammelt nodepapir, paperpad 6x6 Studio Light, Foamies glitter sheet.
Ostelærred, gaze, filt  og stof
Ink.Archival ink Coffee
Distress embossing Ultra Thick platinium,metal blomster, Tim Holtz idea-ology Adage Ticket og Buckles, blomster,bånd, brads og hatte
Tak fordi du kiggede forbi
Ønsker jer alle et rigtig GODT NYTÅR

Happy New Trends!

$
0
0

With the new year only hours away I am trying desperately to get organised and I suspect I am not the only crafter who is trying to think of ways to make their lives more organised in 2014! I am such a hoarder and I have bits and pieces everywhere. I had a new 'work' hand bag for Christmas and was so ashamed when I went about transferring the contents out of my old one...literally a portable craft room without even realising it! I have obviously been speed tidying and craft items have been thrown in, from PVA to washi tape, buttons and brads, craft knife blades to a length of ribbon which was so stained from living in the bottom of my bag it is fit for nothing!

Needless to say my new 'work' bag will be a craft free zone...for a week or so at least!

I love the Sizzix transparent plastic storage envelopes and have decided these are the way forwards, not just for storing Thinlits but also for those other bits and pieces such as ribbon ends, buttons, printed sentiments or even acrylic stamps.


I always find this time of year very exciting, everyone is full of optimism and very few people are not considering some form of self improvement, I will be joining the millions of people aiming to eat less and exercise more, (just as soon as the mountain of chocolate is eaten and Christmas television is well and truly over!)

Every year I look back at the craft projects that I have created and despite being really happy with them at the time, I am always looking at new ways of doing things and what exciting products will be available for me to incorporate into future projects. I love clean, modern design and find inspiration from many different places, I noticed some years back that most craft trends can be linked with what is shown in fashion and home decor.

With this in mind I am really excited to see more Tribal inspired products because I love geometric prints and bold colours....


I have collected these images from Pinterest which I use all of the time to look for inspiration, it is an amazing resource for any crafter. I am going to have a good sort out this afternoon based on this trend and anything that I feel will be useful will be stored in an easy to reach location ready for my 2014 projects! 

Dies which I will be keeping close to hand will be:

Sizzix Sizzlits Decorative Strip Die - Chevron Border


Sizzix Sizzlits Decorative Strip Die - Label Trellis


Sizzix Thinlits Die - Moroccan Card Front


With love and luck to you all for the coming year, Debi x


Only For You

$
0
0


Hi All!

In my country we are celebrate a New Year. It is one of the biggest holiday in Russia. And I wish you all a Happy New Year, Health and Joy!

Today I would like to show you a card with coloring image. And Sizzix dies help me to create my card more beautiful and more interesting. 

Items:

I cut the butterflies two times from different papers and glue them together to make the shadow.


Have a nice day!


Всем привет!

Всех поздравляю с наступившим уже Новым Годом! Желаю вам всем счастья, радости и здоровья!!!
И сегодня я хочу показать яркую и позитивную открыточку с раскрашенным штампом. Ее можно подарить по любому поводу, т.к. надпись универсальная, и картинка тоже. Мне кажется такая открытка подойдет любой девушке/женщине.

Для создания открытки я использовала следующие материалs Sizzix:

Всем хорошего первого дня года!

It's a wrap!

$
0
0


'It's a wrap!' as they say in Hollywood. That's it for 2013, and it's time to usher in the next one. I have been working with the new Sizzix collections for the last month, so I know that's there is plenty to excite die cutting fans in 2014.

The title of this blog is also a play on words as it refers to the visual pun on the card. I adore brown paper gift wrap, it's so iconic and I love it teamed with string and Kraft card tags....Classic!

I used one of my favourite alphabet dies, namely the Block Talk Bigz XL by Tim Holtz which is an investment you won't regret, trust me! (never trust anyone who says 'Trust me'..... except for me of course!)

I started out by attaching gold glitter card to a piece of chipboard and die cutting my numbers ( I made this card last year and I have been keeping it till today, hence 2013). Next, I took a rectangle of brown paper, scrunched it in a ball and inked the edges before curling the ends of two strips of red card to look like ribbon.


I took the red card strips and attached them to the centre of the base card before mounting the brown paper.


Finally, I attached the numbers using thin strips of 3D foam pads. Simple!


Happy New Year!

Many thanks to those of you who follow my blog, I love writing it every week as it keeps me on my creative toes, I look forward to sharing any new ideas, tips and great die cutting inspiration with you all in 2014.


Wedding Album

$
0
0

Hello!

First of all, let me wish you all the best for this New Year!

Today I’ll show you a wedding mini book cover with soft and natural shades.

Supply list:

Binding folder
Cloth leaves: Prima
Brad: Studio Calico, Pink Paislee
Alphabets: American Crafts
Wood accents: Studio Calico

Die:

658332 : Sizzix Sizzlits Die -Ampersands & Banner

This mini book cover is really a simple one but it is elegant as well, don’t you think?

I had fun decorating my page with my “&” as the central element. For a tone-on-tone effect, it is cut out of beige cardstock with my Big Shot.

I added little details all around it, using superimposition. Pretty brads come as a completion and add some volume and femininity to my creation.


See you next Thursday for a new creation!


Karine

Bonjour !

Tout d'abord je vous souhaite à tous et à toutes une très bonne année 2014 !

Aujourd'hui une couverture de mini album dans les tons doux et naturels pour un album de mariage.

Matériel :

Classeur
Feuilles en tissu : Prima
Brads : Studio Calico, Pink Paislee
Alphabets : American Crafts
Embellissements bois : Studio Calico

Die utilisé :

658332 : Sizzix Sizzlits Die -Ampersands & Banner

Une couverture d'album toute simple mais ô combien élégante vous ne trouvez pas ?

Je me suis amusée à décorer ma page tout autour de mon "&". Celui-ci est la base de ma décoration, il est découpé à la Big Shot dans du cardstock beige pour rester ton sur ton.

Tous les petits détails s'articulent tout autour en se chevauchant. De jolis brads tout en volume et féminité viennent compléter l'ensemble.

A jeudi prochain pour une nouvelle création !


Karine

Winter Warmers

$
0
0


Happy New Year.
I hope you all enjoyed Christmas and the New Year - it's really nice to have some time off work and relax with friends and family - but it does seem to pass so quickly, and now back to work!
To start the year I thought I'd make something really easy - which could even be the beginning of Christmas presents - now that's organisation! ( don't worry it won't last for long!!)


I think mug warmers are fun - and useful. (but do remember to put them on your mug before filling it with your hot drink!)
I've made these using the Big Shot and the 2" finished square Bigz die, http://www.sizzix.co.uk/product/657607/sizzix-bigz-die-square-2-finished-2-1-2-unfinished
cutting 4 squares of fabric 1 and 6 squares of fabric 2, and 5 squares of wadding, for each mug warmer.
For the top one I layered the wadding between 2 layers of fabric and then zig-zag stitched using die round the raw edges.
For the second warmer I cut 1" binding strips - using 1" strip die http://www.sizzix.co.uk/product/657632/sizzix-bigz-xl-25-die-strips-1-wide
to create bindings for each square.
I placed the squares on point and pinned them together so that they fitted around my mug. To complete each one I stitched the corners together where they overlapped and added Velcro to the overlapping point end points.
Now this is really useful for me as I'm always making a drink and then go to do something before I've finished it and come to it when it's cold! With my mug warmer that may not happen quite so often.
I might even make a set using Christmas fabric ready for next year - but then again I'm sure there is something else I should be making first ( and that's apart from my resolution to sort and move my sewing room - no I haven't started it yet but I'll let you know how it progresses)
So that's all for now - I'm going to put my feet up for a few minutes with a nice cup of tea and test out the mug warmers.
Angela
 

Stocking and Befana for Epiphany

$
0
0

Hi Everyone! This is Anna.
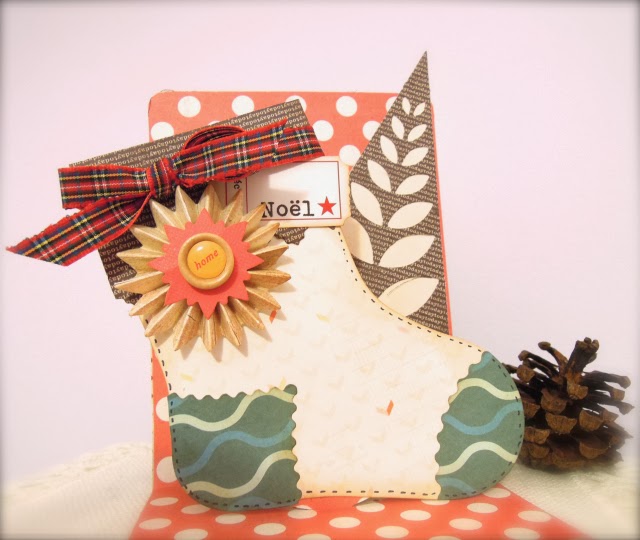
”La Befana“ is the name of the witch who ancient legend says bears gifts to children on January 6th, the Day of the Magi, also known as the Feast of the Epiphany. It is a belief upheld until this day in Italy, and La Befana is embraced in the hearts and minds of Italian children and their families.
On the eve of Jan. 6, La Befana flies down chimneys or through keyholes throughout Italy. While she looks like an old witch, she is actually kind and only punishes bad boys and girls by leaving coal in their stockings. For kids who have been good, she fills up their stockings with candy, fruit, nuts and small gifts.
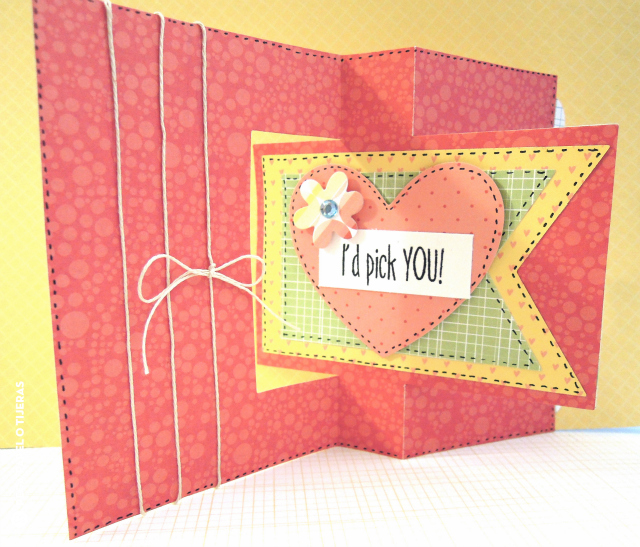
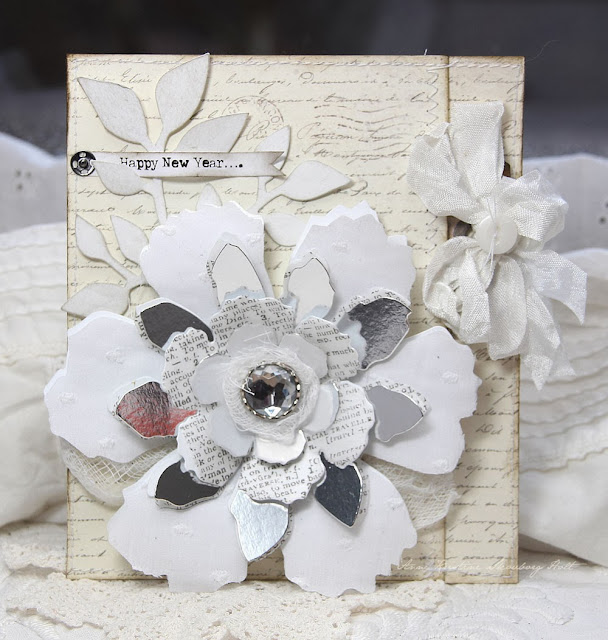
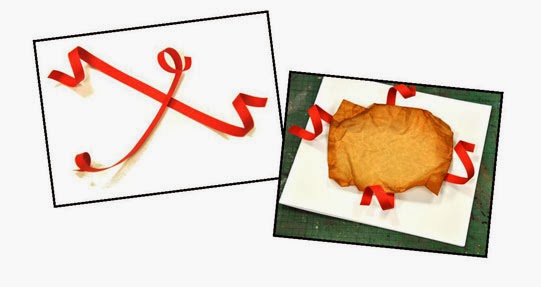
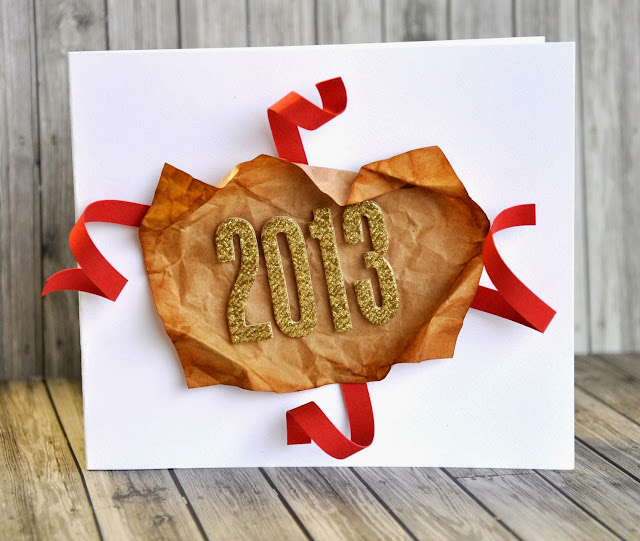
I made this stocking card for Befana day... This is fun and easy to create!
 
Sizzix Big Shot - christmas stocking (1)
 
Sizzix Big Shot - christmas stocking (2)
 
Items used:
white cardstock
patterned papers
glitter paper
distress ink
white thin felt
rustic twine
lace trim
snowflake embellishment
glue, hot glue
 
How to make:
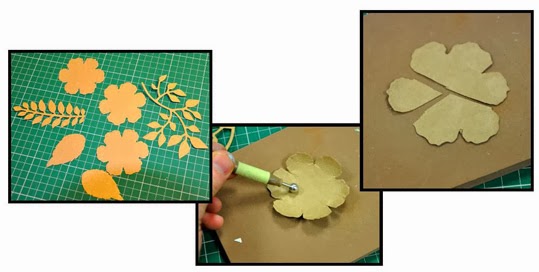
1. Cut different parts of the Stocking Gift Holder by Brenda Walton from different materials.Cut out the different shapes to make the rosette .
2. Attach the front of stocking above the back and lightly ink the edges. Assemble the felt topper of stocking and add the lace trim. Glue toe and heel. Attach the rosette above the topper of stocking.
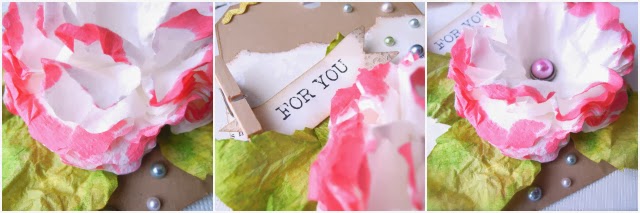
3. Print or stamp the sentiment in the white cardstock and adhere. Apply a snowflake embellishment and insert a tag into the stocking gift holder.
4. Lastly make a loop with a piece of rustic twine so you can hang the stocking.
 
“La Befana” has always held a special place in my heart as well as my cultural history. And how cool is it to have a Christmas witch?!
For the next La Befana celebration, make sure to keep these stocking cards hung by the chimney in hopes that La Befana will soon be there! ;)
Well, I hope you enjoyed it!!
Thanks for stopping by! I will be back Friday with another project!

**************************************
Flag_of_Italy Per le amiche italiane! :)

Ciao! Ecco il primo appuntamento con Anna del Nuovo Anno.
Si avvicina il giorno della Befana, la strega che un'antica leggenda dice porti doni ai bambini la notte del 6 gennaio, giorno dei Re Magi. Una tradizione tutta italiana, come saprete! La Befana vola giù dai camini o attraverso i buchi della serratura... e tutti i bambini sperano di non ricevere il carbone ;)
Per festeggiare il giorno dell'Epifania ho fatto alcune di queste calze di carta da regalare, non solo ai bambini... Un piccolo pensiero o segnaposto per la giornata "che tutte le feste porta via"!
Mi sono divertita molto a realizzarle ed ho infilato dentro piccoli torroncini o dolcetti. Se vi ricordate, avevo già realizzato delle calze in pile con questa fustella, le trovate qui.
La Befana ha sempre avuto un posto speciale nel mio cuore di bambina e mi piace che si continui a festeggiarla.
 
Materiali:
cartoncino bianco
patterned papers
carta glitter
inchiostro distress
feltro bianco sottile
spago
pizzo
fiocco di neve per abbellimento
colla, colla a caldo
 
Procedimento:
1. Tagliare le diverse parti della fustella Stocking Gift Holder by Brenda Walton da diversi materiali. Tagliare anche le diverse forme per realizzare la coccardina.
2. Incollare il fronte della calza sopra il retro, sporcare leggermente i bordi con l'inchiostro. Montare la parte superiore della calza (che io ho tagliato usando il feltro) e aggiungere il pizzo tutt'intorno. Incollare punta e tallone e disegnare le cuciture con un pennarello. Fissare la coccarda nella parte superiore della calza.
3. Stampare o timbrare il “sentiment” sul cartoncino bianco e incollare la striscia sotto la coccarda. Aggiungere un fiocco di neve metallico o altro abbellimento. Inserire una gift card o un mini regalino nella calza.
4. Infine piegare a metà un pezzo di spago e incollarlo, in modo da poter appendere la calza.
 
Per la prossima festa della Befana, quindi appendete alla porta una di queste calze non si sa mai che vi lasci qualcosina ;)
Buon divertimento con la vostra Big Shot!
Grazie per essere passati di qui e vi auguro di passare una meravigliosa Epifania!

Masculine page with girly Sizzlits? - 1964

$
0
0

Hi and all the best for the New Year!
I started 2014 as always - super busy, preparing samples for CHA and trying to work on new projects for the coming year. I always have tons of ideas and plans - and usually not enough time to do half of them :) Life is life - you just have to smile and try harder, right?

Today I'm sharing with you one of my favorite projects from the last days - mixed media scrapbooking page about one of my uncles - I loved this old photo from the fist sight and I just had to do something with it - of course! As I'm obsessed with layering last days pieces of my favorite Sizzix cut-outs were very helpful!


As you can see I went for more "grungy" look this time and I'm so very happy with the final result! A lot of Archival Ink, Neutral 7 Dots Studio paper (9th Wave) and a lot of Stamping and layering was just what I needed!


You can see 2 Sizzix Sizzlits Dies used on this project: they look pretty girly in the first moment...but hey, some cutting, ink and right layering and they are perfect match for this project! 
- 658506 - Sizzix Sizzlits Die - Vintage Doily
- 658502 - Sizzix Sizzlits Die - Flower, Daisy 

So maybe it is time to have a second look at your stash and it is possible you will find a lot of inspiring, sometimes surprising designs!
Sending best wishes
Finn

A Gift Box by Gerry van Gent

$
0
0

Hello Sizzix friends!
Happy New Year!
Sending you all the best wishes for 2014! 
Let this be a healthy, happy and a very creative year!

Today I want to share with you a small gift box I created using
Eileen Hull's Candy Jars Dies which is one of my favourites.

For front/back sides of the box I used as a base corrugated cardboard
which I die cut together with the pattern paper.
Once the pattern paper was adhered I distressed the edges with sand paper.
Gift Box (front)
657900 Sizzix Big Shot Machine
657727 Sizzix ScoreBoards Die XL Candy Jars


I added plastic lattice  to both windows and then decorated with
different cut-outs.
Gift Box (back)

This is how the side of the box looks like.
To make the sides more steady I added modelling paste.
Gift Box (side)

Gift Box

OTHER PRODUCTS I USED:
Prima Marketing - pattern papers, flowers, stickers and a metal pin.

Thank you for visiting today!
Gerry

still hexing along

$
0
0


Today it's the first day back to school for my kids, and I'll be the first to admit it was tricky dragging any of us out of bed to get ready! The Christmas break seemed to fly by and school came round far to quickly.
But on the plus side, back to school means back to work and I'm looking forward to getting a few things finished.
over Christmas I did a bit more work on my hexagons quilt, which I'm now considering making into some large cushions instead. I'm going to fill out the edges of this piece and square it up and make a really large floor cushion, because I spend a far amount of time sitting on the floor and it's a little uncomfortable!


I used the 1" and 1.25" hexagon dies to cut papers and fabrics for this small cushion project that I'm just finishing up as well. All of the fabrics came from my scraps, including the wadding and the backing. I find it so satisfying to make something entirely from scraps, and I'm hoping to make more scrappy quilts this year because of that sense of satisfaction.


I had to show you the reverse of my hexagons, don't you just love how tidy they look? That's all because of the hexagon dies cutting nice and precisely and absolutely nothing to do with my sewing!


Hopefully next week I'll be able to show you a more finished hexagon piece, if I get the big shot into action and cut some more fabrics!!!

Have a great week, and if you have children back to school this week, or if you're returning to work after a Christmas break then good luck! I'll be thinking of you!


My Sizzix top 10 of 2013

$
0
0
Happy new year! It's time to make new resolutions and starting again with new energy. When the new year comes I like to look back and see what I liked or not from the past year. I thought It will be interesting to make my particular Sizzix top 10 and list the items that I have like the most and that you can still purchase before the new releases come. I'm so excited about all the new collections, and I can't wait to create with them! But first, my top 10 from 2013 would be....


¡Feliz 2014 a todo el mundo! Cada principio de año me gusta mirar hacia atrás y hacer balance del año anterior. Adí qwue he pensado que sería divertido hacer un Top 10 de mis favoritos de este año. Aquí van los 10 productos de Sizzix que más me han gustado, y que todavía podéis adquirir antes que vengan las nuevas colecciones, que están al caer :)

Y vosotros, ¿Tenéis favoritos del 2013?

¡Feliz lunes y feliz año!


Just for you....

$
0
0

Hi everyone...hope you all had a great week....today I have a card to show you.


Supply list:
657900 Sizzix Big Shot machine
659573 Sizzix Sizzlits Decorative Strip Die - Spring Greenery
657824 Sizzix Sizzlits Decorative Strip Die - Tattered Flower Garland
658572 Sizzix Movers & Shapers Die - Postage Stamp Frame
657007 Sizzix Movers & Shapers Accessory - Base Tray, L
657216 Sizzix Movers & Shapers Magnetic Die Set 2PK - Mini Tickets Set
658568 Sizzix Movers & Shapers Magnetic Die Set 3PK - Sized Rectangles
658727 Sizzix Texture Fades Embossing Folders 2PK - Iron Gate & Starry Night Set
658437 Sizzix Accessory - Susan's Garden Tool Kit

Papers: Pion Design - Grandma's school book, chipboard
Stamps: Stampers Anonymous Tim Holtz collection, Hero Arts
Inks: Archival Ink - Jet Black, Distress ink Pad - Walnut Stain
Other: Cheesecloth, pearl

How to do:
Cut out and fold a card to 15x15cm, Cut out a panel to 14,7x14,7cm and glue it to the main card.
Die cut a rectangle with Sizzix Movers & Shapers Magnetic Die Set 3PK - Sized Rectangles
Cut out a panel from Sizzix packaging and emboss it with Sizzix Texture Fades Embossing Folders 2PK - Iron Gate & Starry Night Set
Glue patterned paper to chipboard and die cut the frame with Sizzix Movers & Shapers Die - Postage Stamp Frame.
Die cut flower and leaves from Sizzix Sizzlits Decorative Strip Die - Tattered Flower Garland
and  Sizzix Sizzlits Decorative Strip Die - Spring Greenery
Distress the edges with Distress ink Pad- Walnut Stain

Inside the card:
Die cut the frame in chipboard with Sizzix Movers & Shapers Magnetic Die Set 2PK - Mini Tickets Set .Stamp a quote on patterned paper and glue it under the frame.


Glue the embossed panel to the main card and glue the frame over the embossed panel.
Glue leaves and cheesecloth to the card.


Add more leaves and the flower in the front.


Thanks for stopping by!
Anne Kristine

♥♥♥♥♥♥

Hei alle sammen...håper dere har hatt en fin uke...i dag har jeg et kort å vise dere.

Materialer:
657900 Sizzix Big Shot machine
659573 Sizzix Sizzlits Decorative Strip Die - Spring Greenery
657824 Sizzix Sizzlits Decorative Strip Die - Tattered Flower Garland
658572 Sizzix Movers & Shapers Die - Postage Stamp Frame
657007 Sizzix Movers & Shapers Accessory - Base Tray, L
657216 Sizzix Movers & Shapers Magnetic Die Set 2PK - Mini Tickets Set
658568 Sizzix Movers & Shapers Magnetic Die Set 3PK - Sized Rectangles
658727 Sizzix Texture Fades Embossing Folders 2PK - Iron Gate & Starry Night Set
658437 Sizzix Accessory - Susan's Garden Tool Kit

Papir: Pion Design - Grandma's school book, chipboard
Stempler: Stampers Anonymous Tim Holtz collection, Hero Arts
Inks: Archival Ink - Jet Black, Distress ink Pad - Walnut Stain
Annet: Osteklut, perle

Beskrivelse:
Skjær ut et kort og fold det til 15x15cm, skjær ut et panel i mønsterark i str 14,7x14,7cm. Lim panel til selve kortet. Stans ut en rektangel i kortet med Sizzix Movers & Shapers Magnetic Die Set 3PK - Sized Rectangles
Skjær eller klipp ut et panel fra f.eks. Sizzix emballasje og emboss panelet med Sizzix Texture Fades Embossing Folders 2PK - Iron Gate & Starry Night Set
Lim mønsterark på chipboard og stans ut rammen med Sizzix Movers & Shapers Die - Postage Stamp Frame.
Stans ut blomster og blader med Sizzix Sizzlits Decorative Strip Die - Tattered Flower Garland
og  Sizzix Sizzlits Decorative Strip Die - Spring Greenery
Distress kantene med Distress ink Pad- Walnut Stain
Lim det embosset panel til kortet og lim rammen over.  Lim blader og osteklut i front på kortet og legg til et par blader i tillegg til blomsten.

Innsiden av kortet:
Stans ut en ramme med  Sizzix Movers & Shapers Magnetic Die Set 2PK - Mini Tickets Set .
Stemple tekst på et mønsterark og lim dette under rammen. Limes på innsiden av kortet sammen med noen blader på hver side.


Takk for at du stikker innom her.
Anne Kristine

Happy Birthday

$
0
0


Hi everyone
I hope you all had a great week. Today I will show you a Pop'n Cute card using Tim Holtz Jumbo Tattered Florals and some other Sizzix Tim Holtz die


Items used:
 Sizzix Pop 'n Cuts XL Die Set - Card, Horizontal A2 w/Circle Label, 3-D (Pop-Up 657802
 Sizzix Bigz XL Die - Jumbo Tattered Florals 659441
Sizzix Sizzlits Decorative Strip Die - Spring Greenery69573
Sizzix Sizzlits Decorative Strip Die - Brick Wall 658240
Sizzix Sizzlits Decorative Strip Die - Tattered Flower Garland 657824
 Sizzix Bigz Die - Victorian Carolers  658764
Supply list:
Paper:Prima's A4 paperpad-Finnebear- and cardstock
Ink: Distress ink -Vintage Photo-
Stamp: Justrite -Happy Birthday_
Stencil Tim Holtz Burlap TH 5007 and brads,

 
Thanks for stopping by, see you next Tuesday
Wish you a lovely week
Pia
Hej alle Sizzix fan
Jeg håber du har haft en dejlig uge. I dag vil jeg vise et Pop'n Cute kort hvor jeg har brugt flere af de nye Tim Holtz die.
Sizzix Die jeg har brugt:
 Sizzix Pop 'n Cuts XL Die Set - Card, Horizontal A2 w/Circle Label, 3-D (Pop-Up 657802
 Sizzix Bigz XL Die - Jumbo Tattered Florals 659441
Sizzix Sizzlits Decorative Strip Die - Spring Greenery69573
Sizzix Sizzlits Decorative Strip Die - Brick Wall 658240
Sizzix Sizzlits Decorative Strip Die - Tattered Flower Garland 657824
 Sizzix Bigz Die - Victorian Carolers  658764
Andre materialer:
Papir:Prima's A4 paperpad-Finnebear- and cardstock
Ink: Distress ink -Vintage Photo-
Stempler: Justrite -Happy Birthday_
Stencil Tim Holtz Burlap TH 5007 and brads,

Tak fordi du kigge forbi, vi ses næst tirsdag
Ønsker dig en dejlig uge
Pia


Wafer Thin for the New Year!

$
0
0

I cannot believe we are already at the end of the first week of the new year! Christmas is once again just a distant memory and I am left once again wondering what all the panic was about!

Well I thought this week I would join the nation in their obsession with all things thinner, no I shan't be sharing my dieting tips because frankly I am sure eating chocolate when crafting reaps better results, what I will be sharing with you is a few projects that are made using some of the Sizzix Framelit or Thinlit dies, these wafer thin dies are perfect for paper and thin card if you are in pursuit of intricate designs.


This cute Frame idea was created using Framelits Die Set - Frame Square w/Ornate Edges.
I have created the text using my PC & printer which was simple to cut out with the smallest rectangular Framelit in the set. I think that the ornate frame looks so effective when cut with metallic card and embellished with self-adhesive gems.


As you can see I have created more interest by layering each element with the use of foam pads, this really creates a three dimensional effect.

 This simple card could be used for many occasions and can be adapted to suit your colour preferences. I have chosen colours as far away from a Christmas pallette as possible for obvious reasons!

I have used the incredibly useful Scallop Circles and Circles Framelits Set as a background for this cute 3D Flower and Vine motif.


I absolutely live the little stich lines around the edges of the flower, it is such a cute detail!
The flower shape is a little confusing when you first cut it out but there are assembly instructions on the Sizzix website which make it so simple to create.

This simple Birthday card uses the very popular hexagon motif, there are 10 different sized shapes to chose from in this Framelit die set - Hexagons which makes it so useful for matting and layering.


The word 'Today' was created using my PC & printer and then I attached a die-cut number made using the Antiqua Numbers Decorative Strip die I adore the little flower which I decorated with a brad before attaching to the end of a pin using a glue gun. The flower was die-cut from yellow card using the Tattered Flower Garland Decorative Strip die, this is another useful die with several different flowers and sizes.


 I have embossed the bottom Hexagon using the Swirls, Butterflies & Dragonflies Set which is a pretty design and adds a little extra interest to the geometric shapes.


Well I really hope that you like the projects,  love to here what everyone else is creating this time of year, has anyone taken up a new craft for 2014? I really would love to start crocheting a throw for the sofa, my house is so cold and it would be lovely to snuggle up under what my kids would refer to as a granny blanket!

Have a great week!

Simple Card

$
0
0


Hi All!

Daria is here. And today I would like to show you a simple but beauty card. I used two dies which helped me to create my card more interesting.

Items:
Big Shot Machine (657900)
Sizzix On the Edge Die - Distressed Doily (657496)
Sizzix Sizzlits Decorative Strip Die - Flower Garden w/Scallops (657708)


Have a nice day!

Daria.

Всем привет!

Сегодня я с очень простой, но милой открыткой, которую можно подарить по любому поводу, если сделать соответствующую надпись. Для создания этой открытки мне понадобилось 2 ножа и немного бумаги.

Материалы Sizzix:
Big Shot Machine (657900)
Sizzix On the Edge Die - Distressed Doily (657496)
Sizzix Sizzlits Decorative Strip Die - Flower Garden w/Scallops (657708)

Всем хорошего дня!

Дарья.

New Blooms! (Part 1)

$
0
0

New Year, new dies new inspiration, and where better to start than with some brand new dies from Mr Tim Holtz. Today I am using the Sizzix Bigz XL Jumbo Tattered Florals and the Sizzix Bigz Die Garden Greens which are perfect bed fellows. These dies were supposed to be launched in March but they created such a buzz we felt it wouldn't be fair to keep you waiting.

I'm going to spread this project over two blogs because I was hoping to have some special spray to complete it, hopefully it will arrive soon.

I started by Die cutting three of the flower shapes and two leaves and the garden greens from Kraft card. I then took my large ball end stylus from the Susan's Garden Tool Kit and softened and creased the flower shapes against the thick foam mat. Next, I cut the flower into 3 parts as shown (1,2 and 3 petals).


I took the single and double petals and twisted them into cones. Next I used tweezers to fold over the edges of the petals and placed one inside the other. I repeated the same process with the three petals and wrapped them around the first two cones before building outward with larger flowers (4,5 petals etc).


Keep building from the centre until you are happy with your bloom.
Next, soften the two leaves with the stylus and use the leaf tool to add a crease down the centre. Die cut the foliage, then soften and crease each leaf


Finally, Attach to and old picture frame using your glue gun, This frame was recovered from an old project which I had lying around. Next week we will sprinkle on some magic dust and if all goes well we should have something pretty cool!

I'm excited now because I have a vision of how this will look but I have no idea if it will work as well as I expect, Tune in next week, or as they say on Sherlock.......to be Continued!


Best wishes card

$
0
0


Hello!

It’s the Greetings time of the year so here is a new card with bright colours to wish a Happy New Year to your loved ones!

Supply list:

Papers: Crate Paper, Studio Calico
Alphabets: American Crafts
Stamp: Craft Origine
Ink: Chalk Prima
Star: Studio Calico
Strass: Toga
Ribbon: American Crafts
Masking Tape: Lovely Tape

Die

658752 Sizzix Textured Impressions Embossing Folder 2PK-Peace Set

I wanted to create a bright and colourful card for a very lively person!

I used a sea-green printed paper from Studio Calico as background. I embossed a second piece of this very same paper with the folder from the “Peace” set. The embossed paper piece will be glued with double-sided tape on top of the other paper for a tone-on-tone effect.

On the smooth area will be printed the stamp "Meilleurs Voeux Joyeuses Fêtes". Then I had fun adding lots of embellishments here and there: ribbon, masking tape or a lovely gold star.

As a finishing touch, I added “2014”, still with the tone-on-tone effect.


What about you? Are you finished with your greetings cards?

Have a lovely day !

Karine

Bonjour !

C'est la saison des voeux alors une nouvelle carte aux couleurs acidulées pour souhaiter une bonne année à ceux que l'on aime !

Matériel :

Papiers : Crate Paper, Studio Calico
Alphabets : American Crafts
Tampon : Craft Origine
Encre : Chalk Prima
Etoile : Studio Calico
Strass : Toga
Ruban : American Crafts
Masking Tape : Lovely Tape

Die utilisé

658752 Sizzix Textured Impressions Embossing Folder 2PK-Peace Set

J'ai eu envie de créer une carte colorée et acidulée pour une personne haute en couleur !

Mon fond est un papier imprimé vert d'eau de la marque Studio Calico. J'ai embossé le même imprimé avec une plaque à embosser du set "Peace". Le papier en relief sera collé au double face par dessus pour un effet ton sur ton.

Un tampon " Meilleurs Voeux Joyeuses Fêtes" sera imprimé sur la partie lisse. Je me suis ensuite amusée à multiplier les décorations : ruban, masking tape ou encore jolie étoile dorée.

2014 sera ajouté en touche finale toujours pour un effet ton sur ton !

Et vous ? Avez-vous terminé vos cartes de voeux ?

Bonne journée


Karine
Viewing all 2033 articles
Browse latest View live