Quantcast
Channel: Crafting ideas from Sizzix UK
Viewing all 2033 articles
Browse latest View live

Whites, watercolors, ferns - freestyle journal page with Sizzix

$
0
0


Hi again, I hope you had a great creative week! 
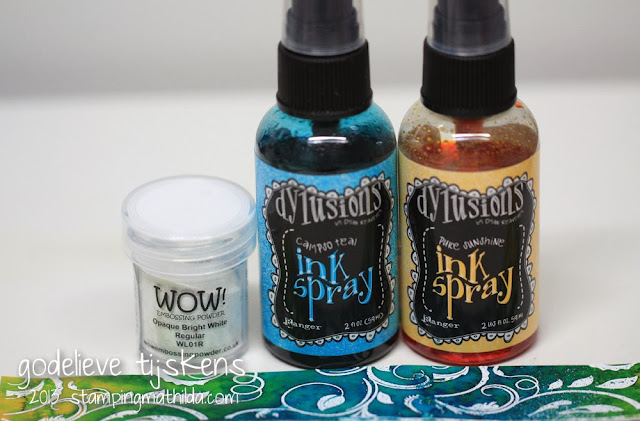
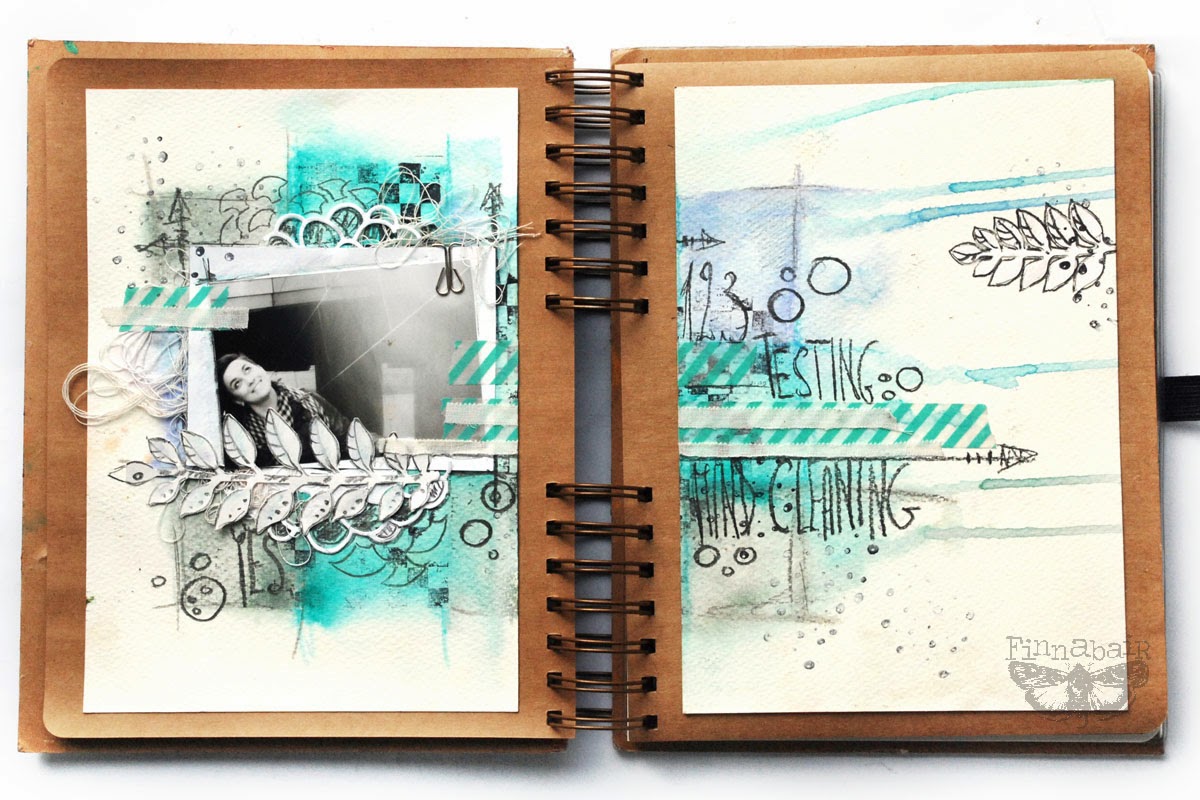
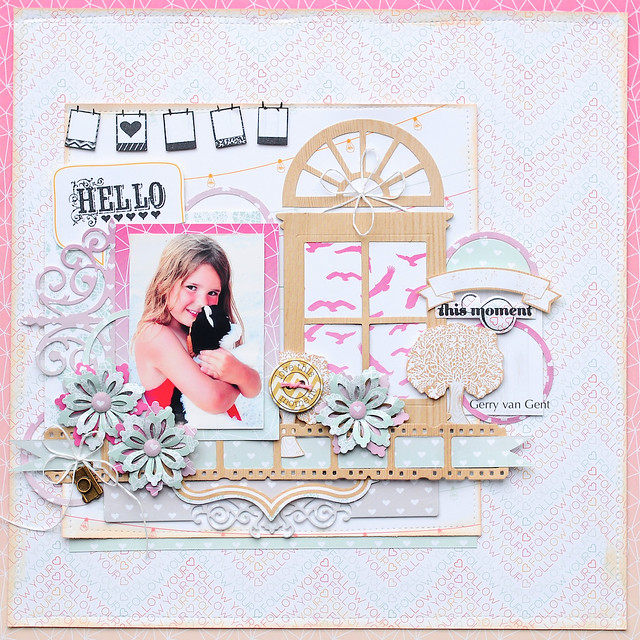
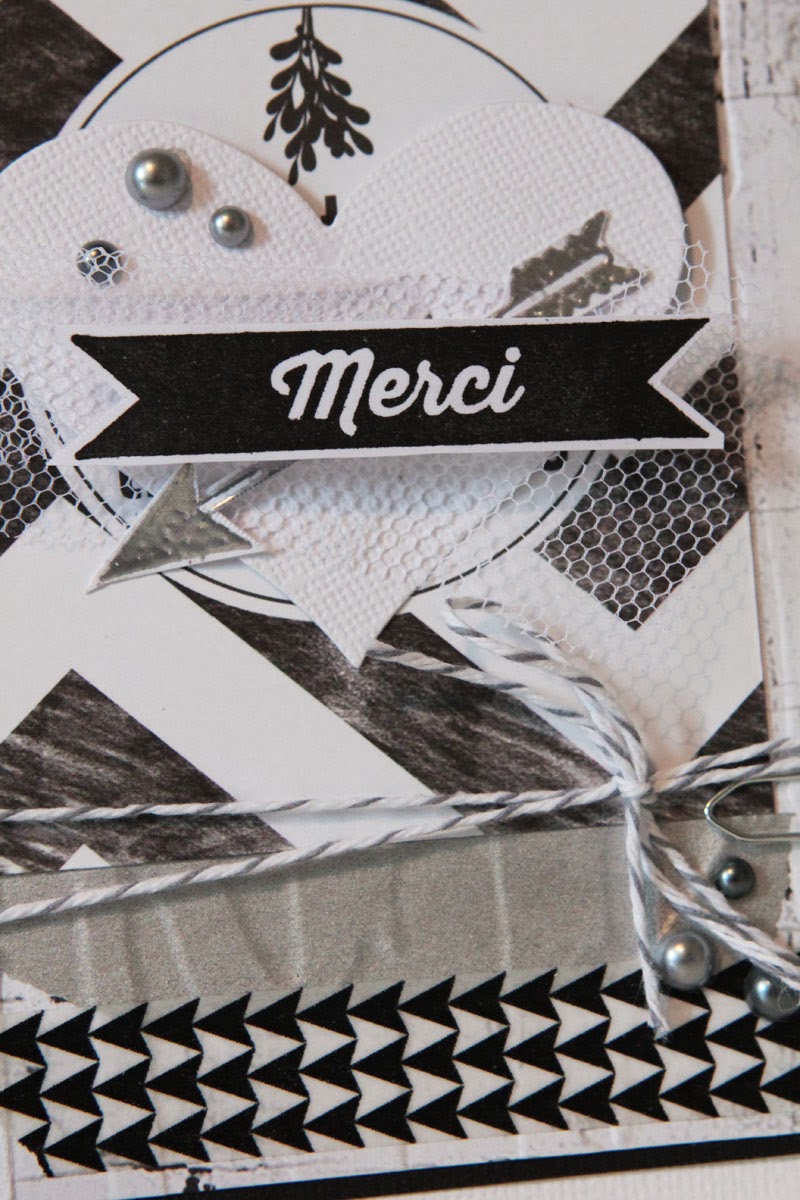
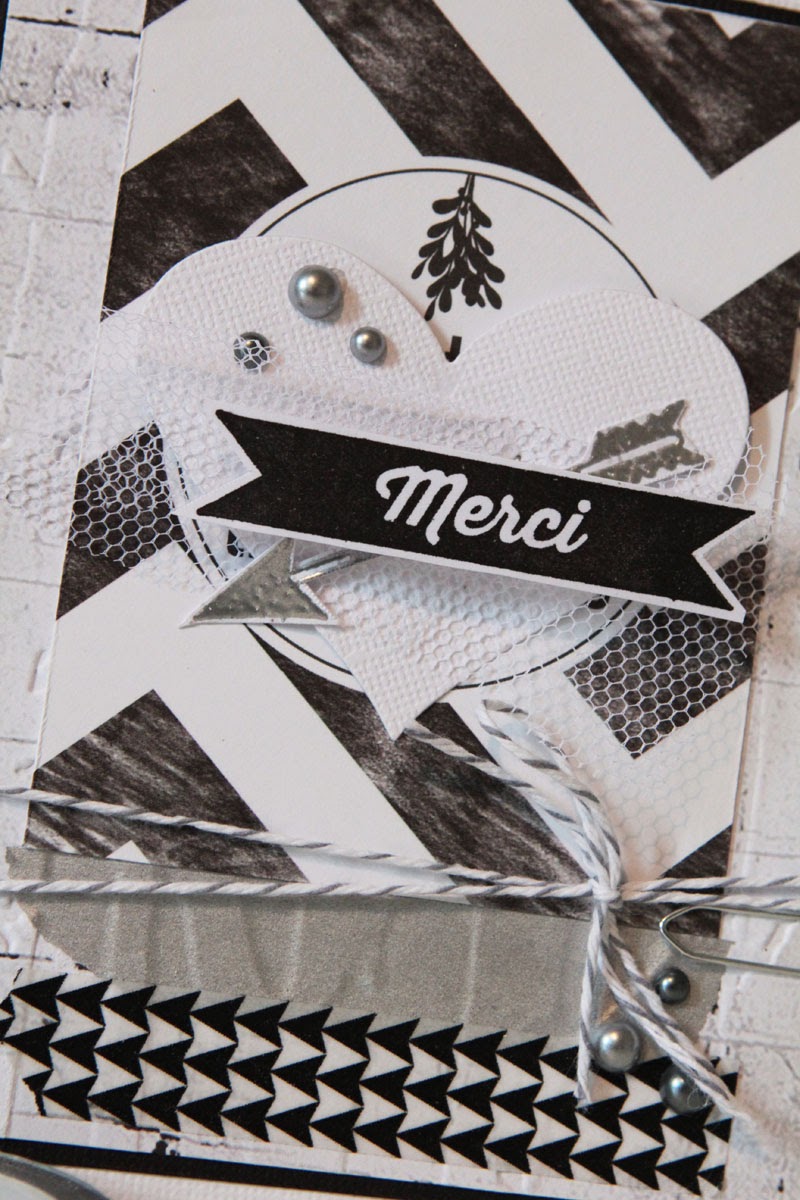
It is good to create something more "airy", lighter- from time to time. For me it is important to play with white spaces and more flat  structures - especially after a weekend full of grungy, dimensional projects I teach during my classes. This page below is a great example of such "mind-cleaning": white background was painted wuth Distress Inks, Watercolor Pencils and Pencil and the main elements of composition are ferns - cut outs from one of my favorite dies in last days - Garden Greens Bigz Die by Tim Holtz.


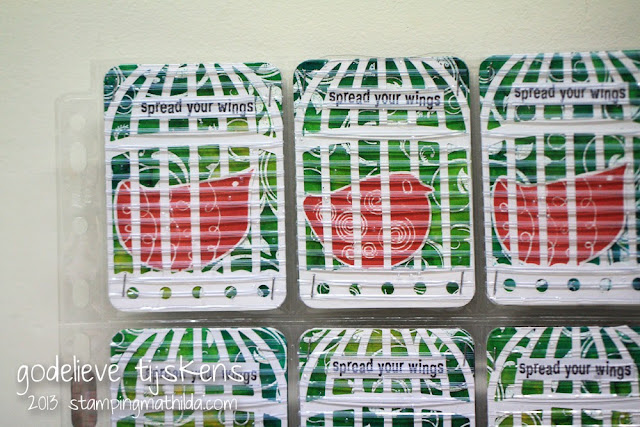
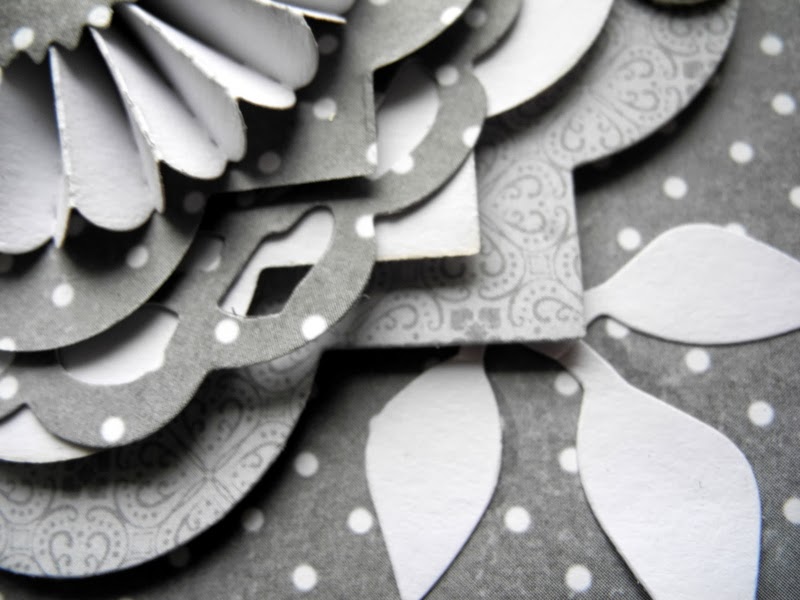
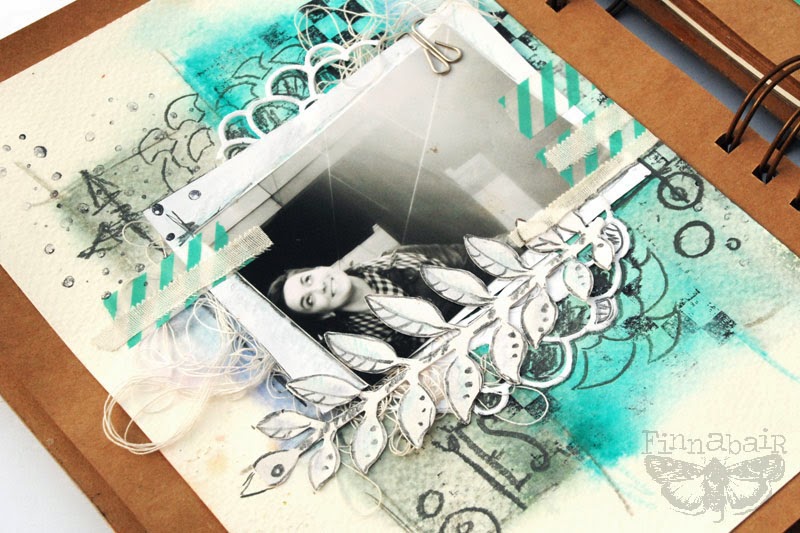
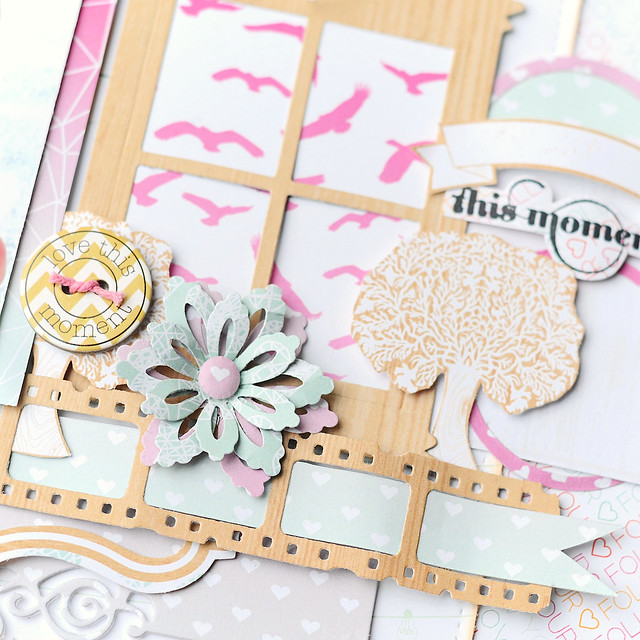
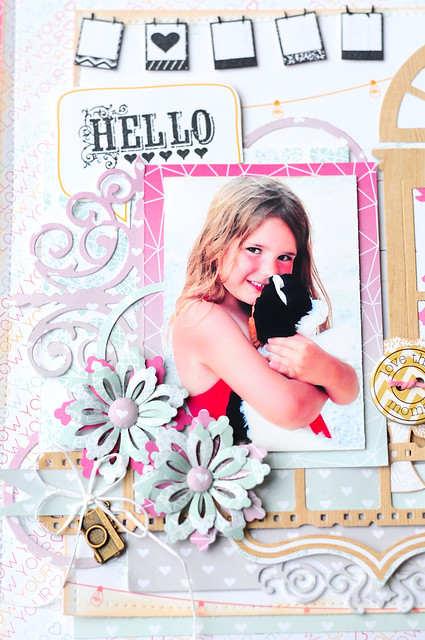
To show more beautiful details of the floral shape I lined it a bit with very soft pencil. It looks fresh and artsy - I'm really happy about this look! I also repeated the shapes of "petals" of the intricate flower die and added a bit of dots and free-hand journaling.


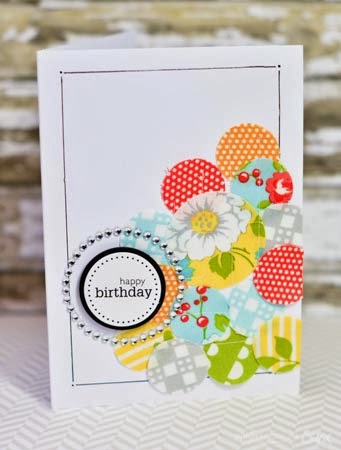
Here are the Sizzix dies I used for this layout:
- 659117 - Sizzix Thinlits Die Set 4PK - Springtime
- 659436 - Sizzix Bigz Die-Garden Greens

I hope you will all have a great weekend - I surely will! This year I'm attending CraftHobby and Stitches Show in Birmingham for the very first time - and I'm super excited about it :)
I hope to meet you there:)
hugs
Finn

Simple Layout by Gerry van Gent

$
0
0

Hello Sizzix friends!
I hope you all enjoyed a very special 
Valentine's Day with your loved ones!
Today I would love to share with you my
vision of a simple layout using gorgeous Sizzix dies.

Hello
657900 Sizzix Big Shot machine
658607 Sizzix Thinlits Die Set Flowers, Intricate
658551 Sizzix Sizzlits Decorative Strip Die Mini Filmstrip & Mini Tickets
659127 Sizzix Thinlits Die Set Frame Layers & Flower #2
658221 Sizzix Originals Die Curly Gate
659131 Sizzix Thinlits Die Set Labels, Long
658850 Sizzix Thinlits Die Set Conservatory Window
658780 Sizzix Bigz Die Window & Window Box

*   *   *
Because I wanted to add flowers and the collection
didn`t have any I decided to make my own.
I simply chose different pattern papers and die cut some flowers.
For the centers I die cut exactly around the tiny white hearts.
Hello 1

This window is a combination of two dies - 
Hello 2
The top of the Conservatory Window was used
on top of the other window.
658850_conservatory window
658780_2

The die-cut circles spread all over the page were
die cut from the Frame Layers & Flower #2.
Hello 3
OTHER PRODUCTS I USED:
Webster's Pages - "Sprinkled with Love" collection

Thank you for your visit today!
Have a creative day!

greetings from stitches!

$
0
0


Yesterday I took a flying visit down to the craft hobby and stitches show at the NEC in Birmingham.

 'Stitches' is the largest trade show for the crafts and hobby industry in the UK so it's a great place to see new products and ideas before they hit stores.

Usually I'm working shows - doing demos for Sizzix, but this time I got to visit and have a good look around. Angela was busy working the Sizzix stand which I have to say was my favourite of all - it was huge and looked absolutely amazing. I'm sure she'll have lots of photos and be able to tell you all about it when she's back.

I got a sneaky peek of some new applique dies designed by Nel Whatmore. These will be in shops soon (I'll keep you updated!) but for now, here's a little glimpse


There is so much new and exciting stuff coming from Sizzix and it was absolutely brilliant to see everyone working so hard and doing demos constantly to interested buyers. I overheard some ladies talking about how excited they were about getting new dies in their shop when I was sat having a cup of tea. It made me feel really proud to be a part of the company and how the quilting and applique lines have grown over the past year.

Stitches is still on today and tomorrow so I'm sure the whole team will be utterly exhausted by the end of it! If you're going be sure to pop by the stand (you can't miss it!) and say hello to everyone.

Acetate Flip-its!

$
0
0
Hi everybody!

These days I have been playing a lot with my new Flip-its dies. The new range are Framelits dies, so I wanted to try if I they were able to die cut some acetate to create a transparent Flip-its card and... Guess what? They did it! So here is an acetate flip-its card. I love it!


Supply list:


I love the way the three squares look on an acetate base because they seem to be floating in the air.


I have used the Phrases Framelits and stamp set. it is great for card makers, because you get a lot of sentiments and labels to mix and match.


Happy Monday!

.........................

¡Hola a todos!

Estos días he estado jugando con mis nuevos Flip-its. Son unos troqueles estupendos, porque te permiten hacer unas tarjetas con paneles que voltean que quedan realmente espectaculares.

Los nuevos Flip-its son Framelits, que son los troqueles finitos de Sizzix, así que me pregunté si podían troquelar acetato para hacer una tarjeta transparente... y ¡Sí! cortaron acetato sin problemas, así que aquí tenéis una tarjeta que voltea transparente. Chula, ¿verdad? Los paneles parece que floten en el aire :)

¡Feliz lunes!


Life is good....

$
0
0

Hi everyone...hope you all had a great week...today I have a card to show you....


Supply list:
657900 Sizzix Big Shot machine
659573 Sizzix Sizzlits Decorative Strip Die - Spring Greenery
657848 Sizzix Texture Fades Embossing Folders 2PK - Diamond Plate & Riveted Metal Set
658716 Sizzix Bigz Die - Crescent Moon & Stars
658761 Sizzix On the Edge Die - Star Cluster

Papers: Kraft-Core Shattered no. 24-s, Foil Cardstock, Manila Tag # 5, old book paper
Stamps: Stampers Anonymous Tim Holtz Collection
Inks: Distress ink Pad - Walnut Stain, Black Soot, Archival Ink - Jet  Black, Distress Paint - Black Soot, Distress Stain - Frayed Burlap, Alcohol Ink - Pitch Black
Other:Cheesecloth, sand paper, Glue N'seal

How to do:
Glue old paper to Foil Cardstock with Glue N'seal. Let it dry. Emboss with embossing folder Sizzix Texture Fades Embossing Folders 2PK - Diamond Plate & Riveted Metal Set
Color the panel with Distress Paint - Black Soot and distress it with sand paper.
Distress Manila Tag # 5 with  Distress Stain - Frayed Burlap and water.
Stamp image on the tag.
Die cut stars in Foil Cardstock with Sizzix Bigz Die - Crescent Moon & Stars
Color the stars with  Alcohol Ink - Pitch Black and distress the stars with sand paper here and there.
Die cut greenery with Sizzix Sizzlits Decorative Strip Die - Spring Greenery and paint it with  Distress Paint - Black Soot here and there. Glue the panel to the main card. Glue the tag with 3D foam in the front.
Journal card:
Die cut stars with Sizzix On the Edge Die - Star Cluster
 Glue some of the stars in Foil Cardstock on the top.


Thanks for stopping by...wish you a great day!
Anne Kristine

♥♥♥♥♥♥

Hei alle sammen ...håper du har hatt en fin uke ...i dag har jeg et kort å vise deg.

Materialer:
657900 Sizzix Big Shot machine
659573 Sizzix Sizzlits Decorative Strip Die - Spring Greenery
657848 Sizzix Texture Fades Embossing Folders 2PK - Diamond Plate & Riveted Metal Set
658716 Sizzix Bigz Die - Crescent Moon & Stars
658761 Sizzix On the Edge Die - Star Cluster

Papir: Kraft-Core Shattered no. 24-s, Foil Cardstock, Manila Tag # 5, gamle boksider
Stempler: Stampers Anonymous Tim Holtz Collection
Inks: Distress ink Pad - Walnut Stain, Black Soot, Archival Ink - Jet  Black, Distress Paint - Black Soot, Distress Stain - Frayed Burlap, Alcohol Ink - Pitch Black
Annet: Osteklut, sandpapir, Glue N'seal

Beskrivelse:
Lim gammel bokside til Foil kartong med Glue N'seal. La det tørke. Emboss med embossing folder Sizzix Texture Fades Embossing Folders 2PK - Diamond Plate & Riveted Metal Set
Mal panel med Distress Paint - Black Soot og puss over med sandpapir.
Distress Manila Tag # 5 med Distress Stain - Frayed Burlap og vann.
Stemple motiv på tag'en.
Stans ut stjerner i Foil kartong med Sizzix Bigz Die - Crescent Moon & Stars
Mal stjerner med Alcohol Ink - Pitch Black og puss over stjernene med sandpapir her og der.
Stans ut grener med Sizzix Sizzlits Decorative Strip Die - Spring Greenery og mal de med Distress Paint - Black Soot her og der. Lim panel til hovedkortet. Lim fast tag'en med 3D puter i front.
Journal kort:
Stans ut stjerner med Sizzix On the Edge Die - Star Cluster
Lim noen stjerner i Foil kartong over.

Takk for at du stikker innom her og ha en herlig dag!
Anne Kristine

Life isn't tied with.................

$
0
0
Hi everyone
I hope you  all had a beautiful and creativ week. Today i will show you a card using two Sizzix bigz dies.
 
Items i have used:
Suplly list:
Paper:Bed of Roses II 6x6 and 12x12 Galleriapapiera
Ink: Archival ink watering can from Franger
Stamp: Kaisercraft clearstamp Today
Brads, recycled cardstok and ribbon
Thanks for stopping by
wish you a great week
Pia

 
Hej alle
Jeg håber i har haft en dejlig kreativ uge. I dag vil jeg vise et kort hvor jeg har brugt to forskellige sizzix dies
Dies jeg har brugt:
Andre materialer:
Papir:Bed of Roses II 6x6 and 12x12 Galleriapapiera
Ink: Archival ink watering can from Franger
Stempler: Kaisercraft clearstamp Today
Brads, genbrugs karton og bånd
Tak fordi du kiggede forbi
Ønsker dig en dejlig uge
Pia

Everything that Glitters

$
0
0

Hello,
This week I am writing my blog from my Make'nTake area at the Craft,Hobby & Stitch Exhibition in the N.E.C. Birmingham. I can't believe how quick the exhibition has gone, it has totally flown by! 

Well as promised I have taken some photographs of the display that I have created for the centre of  the stand. Last week I posted pictures of the individual elements so here it is all together...


It is a little difficult to see but this large hanging flower is made from White glittery felt and voile and is cut using the new Jumbo Tattered Flower die from Tim Holtz which goes to show that you don't have to like grunge to use a Tim Holtz die! The Tattered Floral dies have been so popular and I absolutely love that we now have a jumbo version.


Most of the other decorations have been created using dies from our core range of Bigz dies such as the Butterfly and the cute Layered Flowers.

I hope that you like the display. The show was such a success this year, I have met so many lovely people who share my passion for craft and I am really excited to keep in touch with each and every one of them to share ideas and inspiration. Have a lovely week!

Happy Belated Valentine’s Day!

$
0
0


Happy Belated Valentine’s Day! Here’s a quick and easy project made from fleece and felt.

My daughter had a baby a week ago and I drove down to Florida to help out. On my way down, I found this cute little felt pouch in a fabric store (it’s a 1070 mile drive! I had to stop and take a break here and there...)


I had die cut some pink  Sizzix Flower with Heart Petals before on the trip I left thinking I would use them on a card. But this worked event better!

The flowers were die cut from two colors of pink fleece and the leaves were cut from an old wool jacket. I used brads to hold the flowers together, then placed them on the purchased pouch. They were glued on using Fabri-tac glue.

Fabric flowers can be used in so many ways- as hair accessories, on shoes, stationery, lampshades and other home decor projects. I love steel rule dies because they can cut so many materials...


Heading back to Virginia and a foot of snow :-( See you next time!

Black & White card by Karine

$
0
0
Black and White card

Hello,

How are you doing? Today let me show you a new “Thank You” card with an elegant and timeless combo of colours: black & white.

Supply list:

Cardstock: American Crafts
Papers: Infocréa, Studio Tekturek
Stamps: Glitz Design, Craft Origine
Ink: Black Versafine
Embossing powder: American Crafts
Others: Pearls, tulle, twine, masking tape

Dies:

658778 Sizzix texture fades embossing folders 2PK-Birch trees and candy stripes set
659107 Sizzix Thinlits Die Set 4PK-Everyday Eclectic

This is a card with trendy colours size 12 x 15 cms which you can create in record time. Are you with me?

Start by cutting a cardboard piece size 12 x 15 cms.

Emboss a grey pattern paper with the “wood” folder. Glue it on a black cardstock so that it stands out more.
Then glue a chevrons sticker and add two strips of masking tape.
These strips are smoothed down to put the emphasis on the embossed patterns.

Add a heart cut out of white cardstock. Add volume with tulle, little grey beads and knot some matching twine.

The title “merci” is printed with black Versafine and glued with 3D adhesive foams.

This card is now ready to be sent and I hope the recipient will be pleased!


Have a lovely day

Karine

Black and White card

Bonjour,

J'espère que vous allez bien ! Aujourd'hui j'ai le plaisir de vous proposer une nouvelle carte "merci" au como élégant et indémodable : le noir & blanc !

Matériel :

Cardstock : American Crafts
Papiers : Infocréa, Studio Tekturek
Tampons : Glitz Design, Craft Origine
Encre : Versafine noire
Poudre à embosser : American Crafts
Divers : Perles, tulle, cordelette, masking tape

Dies utilisés :

658778 Sizzix texture fades embossing folders 2PK-Birch trees and candy stripes set
659107 Sizzix Thinlits Die Set 4PK-Everyday Eclectic

Une petite carte aux couleurs tendance et au format 12x15cm réalisable en un minimum de temps, cela vous tente ?

Commencez par découper votre cardstock au format 12x15cm.

Embossez avec la plaque à embosser bois un imprimé gris, prenez soin de matter celui-ci en noir afin qu'il ressorte au maximum.
J'ai ensuite collé une étiquette à motif chevrons et j'ai complété avec deux bandes de masking tape. Ces derniers sont lissés afin de faire ressortir l'embossage.

Ajoutez un coeur découpé dans du cardstock blanc. Complétez avec du volume tel du tulle, des petites perles grises et nouez une cordelette assortie.

Le titre merci est un tampon imprimé à l'encre Versafine noir, il sera monté en 3D à l'aide de mousses.

Une carte prête à être envoyée et qui fera je l'espère plaisir à son destinataire !

Bonne journée à vous

Karine

Animal Magic!

$
0
0


If you are both British and of a certain age you will no doubt remember the show from the title, featuring jovial zoo keeper Jonny Morris. Cute animals are everywhere at the moment in surface design, cards, gift wrapping, fabrics and yes, you guessed it, in Sizzix dies too (this is where the magic comes in!)

When I saw these designs I was so excited because of their simplistic beauty. they lend themselves perfectly to children's projects and rather than create one card I thought I'd make 4. They are designed by Eileen Hull, a very smart lady who always comes up with the goods! Thanks Eileen for making my job a whole lot easier.

There is nothing clever to see here today, no fancy techniques or patterned papers just great dies doing what great dies should! The dies featured are in two sets, Thinlits Die Set 7PK Elephant & Giraffe 658976 and Thinlits Die Set 8PK Lion & Monkey 658973.

To create the base card (each measuring 8 x 12cm) I started by printing the greetings using my computer using my Publisher software. If you have ever used Word then this is really easy to use. All the fonts are free to download (Try the website dafont.com, its really easy to find what you need).

 printing your own greeting is a great way of making a handmade card even more personal and you can adjust the sizes to accommodate your design elements too. For those font obsessives amongst you, here are the fonts that I used:

  • Blackjack
  • Stereo 
  • Hoedown
  • Showguide
  • Saddlebag
  • Bebas Neue
  • BigNoodle Titling
Here are the cards that I printed off onto heavy weight white card trimmed to size and ready to go.


I deliberately used simple bold colour combinations for each of the animals in question and cut them out before sticking the pieces together using PVA glue.

Next I added some tiny 2mm pearls for eyes and attached to the card using 3D foam pads.


Same again for the giraffe.......


The Lion..........


And of course, the elephant who also features a length of string tied around his trunk.


I think I can afford to say without sounding too boastful that these are pretty cool cards because all the magic comes from the great dies. Sometimes all you have to do is just cut and stick!


Beyond Stitches

$
0
0


As you may already know the Sizzix team have been at the Stitches trade show, and before that in Frankfurt for Paperworld trade show - which has meant literally months of preparation and planning of projects - and now we can start afresh with lots of exciting new projects.
The stand at Stitches looked absolutely amazing - and Debi Potter created a stunning central display - using a variety of dies and lots of different materials - all in shades of white. If you haven't seen it yet take a look at Debi's blog.
At the show we met lots of lovely customers, new and old, and although it was hard work -(talking all day!) it was really enjoyable.
As you can imagine I haven't had much time to create a new project this week - but someone very special has a birthday next week so I thought I would put a kit together so that she can make a cushion using her new sewing machine ( after the birthday I will reveal more details and hopefully the finished item)
I've used the Big Shot and die 656335 - primitive hearts (http://www.sizzix.co.uk/product/656335/sizzix-bigz-die-hearts-primitive)
to pre-cut some hearts.
The patterned fabrics are from the Woodland Walk range by Fabric Freedom, and the pink fabrics are from my stash.
I think I may buy some coloured ribbons too and she can create to her hearts content - I can't wait to give this gift.
Now I'm going to make a cup of tea and plan a project for my next workshops at Sewing for Pleasure in March.
Until next time - keep sewing.
Angela


Five Minute Masculine Card

$
0
0

Good Morning All! Happy friday! This is Anna.

Yesterday I sat down and made a super simple birthday card for a man and it only took me five minutes with my Big Shot!
This handmade card can be made in the same amount of time that it takes to make a cup of tea. I'm not kidding.
You guys know I love the stars die for masculine cards. Today, I’ve used it to create a 5 miniute card!
Here’s what I did.
This card was not only incredibly easy to make, it also didn't require any special materials and was ready in less than five minutes (plus some drying time for the glue).
I just love the simplicity of it…
So, you can to make this super-easy card in just five minutes whit Sizzix dies!
 
cafe creativo - Anna Draicchio - sizzix big shot - five minute card - stars (1)
 
cafe creativo - Anna Draicchio - sizzix big shot - five minute card - stars (2)
 
Items used:

Sizzix Big Shot Machine Only (Powder Blue & Teal) (657900)
Sizzix Bigz Die - Stacked Stars (658771)
cardstock: white, turquoise
thick chipboard
color mist (Mister Huey's – Studio Calico)
washi tape (I picked 3 different designs)
gauze
strass
sequins
 
**************************************
Flag_of_Italy Per le amiche italiane! :)

Buongiorno a tutti! Buon venerdì! Ecco un nuovo appuntamento con Anna.

Ieri avevo poco tempo e tante cose da fare. Così mi sono seduta nel mio angolino creativo per creare un biglietto d'auguri maschile e mi ci sono voluti solo cinque minuti con la mia Big Shot! Ebbene sì, questa card può essere realizzata nella stessa quantità di tempo che ci vuole per fare una buona tazza di tè. Non sto scherzando!
Per i temi maschili mi piace usare le Stelle, così ho preso la fustella con le quattro stelle di Tim Holtz per creare una card in soli 5 minuti! La fustella è una Bigz quindi può tagliare anche il cartone ed altri materiali spessi. Ve la consiglio perchè è molto versatile.
Questa card non solo è stata incredibilmente facile da realizzare, ma non ha richiesto particolari materiali. Tutto quello che ho fatto è stato spargere qualche goccia di colore sulla card base, fustellare tre stelle di dimensioni diverse (sia in cartoncino, che in cartone) e decorare con washi tape, garza e strass, aggiungendo alla fine la striscia con il "sentiment". Facile no?
Adoro la semplicità di questo biglietto ...
Quindi, anche voi potrete fare card super-veloci, ma carine in soli cinque minuti con le fustelle Sizzix! Provateci e fatemi sapere ;)

Alla prossima!
 
Materiali:

Sizzix Big Shot Machine Only (Powder Blue & Teal) (657900)
Sizzix Bigz Die - Stacked Stars (658771)
cartoncino: bianco, turchese
cartone
color mist (Mister Huey's – Studio Calico)
washi tape (io ho usato 3 differenti disegni)
garza
strass
paillettes

Caged Bird Artist Trading Card

$
0
0


 Hi, it's Rachel here today to share a fabulous way Sizzix Dies and Embossing Folders can be used with Darkroom Door stamps. Every month on the Darkroom Door blog we host an Artist Trading Card swap. Each month has a different theme and recently the theme was 'Sizzix & Darkroom Door'! This means that all artists needed to use a Darkroom Door stamp with a Sizzix die or embossing folder. It was such a fun swap and the ATC's that were created were amazing!

Today I want to share one of the ATC's that was created by Godelieve Tijskens who lives in Belgium.


Godelieve started by making the heat emboss resist background, using Darkroom Door's Flourish Background stamp, WOW embossing powder and Dylusions Ink Spray.


Two different birds from the Darkroom Door Carved Birds Vol 2 set were stamped with Archival Ink #Vermillion, 5 times each, then cut out.  Words from the Darkroom Door Wildflowers Vol 1 stamp set were stamped with Archival Ink #Jet Black.


Godelieve used the Sizzix Bigz Caged Bird Die. She cut the cages and assembled the ATCs.  After everything was glued in place, Godelieve embossed an acetate cover for each ATC, using the Sizzix Notebook embossing folder. The Tim Holtz Tiny Attacher was used to secure the embossed acetate to the ATC's.


The corners were then rounded with a corner rounder punch. 


Darkroom Door has 2 sets with stamps to use on the back of your ATCs.  Godelieve used the Artist stamp set to fill out all her details.


Once they were all completed, Godelieve put the ATCs in a 9 pocket sleeve, ready to send in to the Darkroom Door headquarters to be swapped out with other artists! 


Supplies used:
Sizzix Bigz Die: Caged Bird 656634
Sizzix Texture Fades Embossing Folder: Notebook 656647
Darkroom Door stamps: Flourish Background, Carved Birds Vol 2  stamp set, Wildflowers Vol 1 stamp set, Artist stamp set
Dylusions Ink Spray: Calypso Teal, Pure Sunshine
Archival Inkpads:  Vermillion & Jet Black
Versamark inkpad
WOW embossing powder
Tim Holtz Tiny Attacher
Acetate
WeRMemoryKeepers Corner Chomper
ATC - 9 Pocket Sleeve

Stay tuned for my next blog post on 8th March where I'll share all of the ATC's that were sent in for this swap :)  If you'd like more information on how you can take part in these swaps, you can read all Darkroom Door Swap details HERE. It's a great way to 'meet' other artists and share your creativity!

Thanks so much for stopping by today!

Rachel

A fabric card using the Big Shot Starter Kit

$
0
0

Last weekend was a busy one as Stitches, the UK Craft Trade show, took place in Birmingham. I had a blast as usual and I must say that the Sizzix stand was the most impressive one. Pete, Debi and Angela did an outstanding job with all the areas and samples, as well as the rest of the marketing team who made it all come together.

On thursday I attended a "Love your Sewing Machine" workshop because I really needed to get to grips with my sewing machine. It inspired to use it more, including with some paper projects. I got also some small fabric bundles, perfect for die cutting using the Bigz die that comes in the Starter Kit.


I die cut the circles using the large and small circle dies on the Bigz die. I then layered them on white card and sew them on the machine making inverted L shapes.


To create a frame on the card I created a template using the framelits from Rectangles 2 and some heavyweight card. Then I placed it on the card centred and with a 0.3 pen I traced round. 


I did a dot in each corner. Then I die cut a black circle using the larger Framelit from the Starter Kit. Then I layered on top one of the Craftwork Cards Messages In circles. Finally I added a circle of self adhesive rhinestones.


I just love the texture of the fabric mixed with the card and the rhinestones. I hope you like it too!

Everyday card by Gerry van Gent

$
0
0

Hello Sizzix friends!
It`s Sunday and I am ready to share with you my latest 
 card created with two of the recently released Thinlits dies.
If you need to make a quick surprise card for
your best friend all you need is .... two awesome dies :-)
Best Friend
657900 Sizzix Big Shot machine
659127 Sizzix Thinlits Dies Frame Layers & Flower #2
659131 Sizzix Thinlits Dies Labels, Long

*    *    *

As a base of my card I used a double round card from white cardstock
which has almost the same diameter as the inner (yellow-white) die-cut circle.
I left the round double card 1/2 cm bigger so I can adhere 
round the edges the scallop die-cut circle.
I die cut the Frame Layers & Flower #2 twice using 
two different pattern papers. 
Best Friend 1
The Long label was die cut from the same pattern paper as 
the scallop circle. On top I added the phrase - I used foam squares 
for more dimension. Then I fussy cut a few patterns.
Pearls and twine were added for decoration.
Best Friend 2
OTHER PRODUCTS I USED:
Webster's Pages - "Party Time!" paper collection

I hope you enjoyed my card today!
Have a beautiful Sunday!

charm pack cherry quilt

Mixing dies in my new notebook

$
0
0
Hi everybody!

The past three weeks I have put into practice one of my year goals and I have retaken my French classes, which I have been procrastinating for years, Yay for me!

I needed a new notebook for my classes and, of course, I have decorated it with my Big Shot and Sizzix dies :)


Supply list:

This time I have used a variety of dies from different ranges. I love how versatile they are and how you can mix and match different collections in the same project. Here I have used dies from Paula pascual, Tim Holtz, and karen Burniston and they all coordinate perfectly!

And you? Do you like to combine dies from different ranges? 

Happy Monday!

........................

¡Hola a todos!

Durante las últimas tres semanas he estado poniendo en práctica uno de mis propósitos del año y he retomado mis clases de francés, cosa que he estado posponiendo durante años. ¡Bien por mí!

Para ello necesitaba una libreta nueva y, por supuesto, la he decorado utilizando mi Big Shot y los troqueles de Sizzix.

En esta ocasión he utilizado una variedad de troqueles de diferentes colecciones. me encanta lo versátiles que son y cómo es muy fácil mezclarlos y utilizar troqueles de diferentes estilos en un solo proyecto. En esta ocasión he utilizado troqueles de Paula Pascual, Tim Holtz y Karen Burniston y ¡todos combinan a la perfección!

¿Y vosotros? ¿Os gusta también combinar troqueles de diferentes colecciones?

¡Feliz lunes!

Pocket Watch Mini Wall Hanger

$
0
0

Hi everyone...hope you had a great week.... today I have a mini wall hanger to show you.

 Supply list:
657900 Sizzix Big Shot machine
659573 Sizzix Sizzlits Decorative Strip Die - Spring Greenery
659441 Sizzix Bigz XL Die - Jumbo Tattered Florals
658175 Sizzix Movers & Shapers Die - Pocket Watch Frame
658566 Sizzix Movers & Shapers Magnetic Die Set 3PK - Sized Circles

Papers: Pion Design - A Day in May, Tissue Paper, chipboard
Inks: Distress ink Pad - Walnut Stain, Distress Crackle Paint - Picket Fence
Other: Feather, Seam Binding Ribbon, button, pearls

How to do:
Die cut the Pocket Watch in chipboard with Sizzix Movers & Shapers Die - Pocket Watch Frame
and  Sizzix Movers & Shapers Magnetic Die Set 3PK - Sized Circles
Paint it with  Distress Crackle Paint - Picket Fence, let it dry. Distress the edges with Distress ink Pas - Walnut Stain.
Die cut layers of flower in patterned paper and Tissue Paper with Sizzix Bigz XL Die - Jumbo Tattered Florals
Die cut greenery in patterned paper with  Sizzix Sizzlits Decorative Strip Die - Spring Greenery
Print out image and glue it under the Pocket Watch. Glue greenery, feather and flower in front.


Thanks for stopping by....wish you a great day.
Anne Kristine

♥♥♥♥♥♥

Heisann...håper du har hatt en fin uke...idag har jeg et mini veggbilde å vise deg.

Materialer som er brukt:
657900 Sizzix Big Shot machine
659573 Sizzix Sizzlits Decorative Strip Die - Spring Greenery
659441 Sizzix Bigz XL Die - Jumbo Tattered Florals
658175 Sizzix Movers & Shapers Die - Pocket Watch Frame
658566 Sizzix Movers & Shapers Magnetic Die Set 3PK - Sized Circles

Papir: Pion Design - A Day in May, Tissue Paper, chipboard
Inks: Distress ink Pad - Walnut Stain, Distress Crackle Paint - Picket Fence
Annet: Fjær, Seam Binding bånd, knapp, perler

Beskrivelse:
Stans ut klokken i chipboard med Sizzix Movers & Shapers Die - Pocket Watch Frame
og  Sizzix Movers & Shapers Magnetic Die Set 3PK - Sized Circles
Mal over med Distress Crackle Paint - Picket Fence, la det tørke. Distress kantene med Distress ink Pas - Walnut Stain.
Stans ut lag med blomster i mønsterark og Tissue Paper med Sizzix Bigz XL Die - Jumbo Tattered Florals
Stans ut grener i mønsterark med  Sizzix Sizzlits Decorative Strip Die - Spring Greenery
Print ut motiv eller et bilde og lim dette under klokken. Lim grener, fjær og blomst i front.

Takk for at du stikker innom her og ha en herlig dag.
Anne Kristine

White and grey card

$
0
0
Hi everyone
I hope you all had a beautiful week, HereinDenmarkthe weather belike spring. Today i will show you a white/ grey card using different sorts of beautiful Sizzix dies
Items used.
Sizzix Bigz Die Garden Greens 659436
Sizzix Framelits Die Set 5 PK Labels, Funky 658362
Sizzix Sizzlits decorative  Strip Die Mini Paper Rosettes ( 2 sizes9 657177
Sizzix Sizzlits Die Vintage Doily 658506
Supply list:
Paper: Till the End of the Night/Galleriapaper
Half Pearls,3 d foam and brads
How to make:
Make a cardbase using white cardstock 12x13,5 cm. Cut out patterned paper 11,5x 13  cm
Die cut the different sorts og sizzix die glue to the cardbase using 3D foam
 

Thanks for stopping by,see you next Tuesday
Wish you a great week
Pia

Hej alle
Jeg håber I har haft en dejlig uge og nyder det skønne forårsvejr vi har her i Danmark. I dag vil jeg vise et grå/ hvidt kort hvor jeg har brugt forskellige af de skønne Sizzix dies.
Dies jeg har brugt:
Sizzix Bigz Die Garden Greens 659436
Sizzix Framelits Die Set 5 PK Labels, Funky 658362
Sizzix Sizzlits decorative  Strip Die Mini Paper Rosettes ( 2 sizes9 657177
Sizzix Sizzlits Die Vintage Doily 658506
Andre materialer:
Papir: Till the End of the Night/Galleriapaper
Halv Perler,3 d foam og brads
Sådan gør du:
Lav en kortbase i hvidt karton på 12x13,5 cm. Skær et stykke mønstret papir på 11,5x 13 cm og lim til kortbasen. Udstans de forskellige die og lim dem på med 3 D foam
Tak fordi du kiggede forbi, vi ses næste tirsdag
Ønsker dig en dejlig uge
Pia
 

My Heart will go on....

$
0
0


A couple of weeks ago I said that I would feature some more ideas using basic shapes in a funky, creative way. I stumbled across a sight called mykidcraft.com (great site for kids craft ideas, big kids too!) which featured a great way of using heart shapes to create a wonderful lion so I played around with the idea until I came up with this weeks blog.

It seems like a good time to use all those heart dies left over from the Valentines frenzy so I dug out my favourite, and ever popular Framelits die set set namely Hearts 657561 and got to work.

For the Lion I started by die cutting all the separate hearts, before cutting little nicks in the edges at strategic points. Next I assembled the face before attaching to the mane using 3D foam pads, the eyes are black adhesive pearl gems, how easy is that?


I attached the assembled lion to a square card measuring 13 x 13cm  withe the legend 'You're Grrrrrrreat' printed on the base using my PC ( the font is called 'no color' and you can download it for free at dafont.com)


I couldn't stop at one (I'm up to 6 so far!) so here's another animal using the same Hearts die set. This time a bunny rabbit.

I die cut all the parts to make the head and cut two of teh hearts down the centre to form the ears.


Next, I attached the nose and teeth with 3D foam pads before attaching the ears. the eyes are black pearl gems.


I die cut all the parts of the body and cut all but the small white heart in half using a craft knife. Next I started to assemble the body using 3D foam pads to add depth.


Finally, to make the carrot, I used half an orange heart with some trimmed green card attached to the top before attaching to the body together with the paws.


I assembled the bunny on the front of a 15 x 15cm base card onto which is printed the legend '24 Carat Birthday Wishes'.


I hope you like these ideas as I have more to share next week?


Viewing all 2033 articles
Browse latest View live