Quantcast
Channel: Crafting ideas from Sizzix UK
Viewing all 2033 articles
Browse latest View live

Valentine gift

$
0
0


Happy Valentine's Day
I know last week I said that I was going to start a sampler quilt - but as it's Valentines Day I decided to show you a lovely cushion that my daughter and I made as a last minute birthday present for a special friend.

We just rummaged through some fabrics that we had and put this together in an evening.

From this selection we chose fabrics for the hearts and applied fusible web to the back of the fabrics before cutting out the hearts using the Big Shot and die 656334. I love this die because it has 3 sizes of heart on it which makes it very versatile. The hearts were placed  randomly on the spotted fabric and when we were happy with the placements we ironed the hearts in place.


We chose a straight stitch to stitch the hearts in place to give a hand drawn effect.


After this we chose a selection of strips of fabric to complete the front of the cushion - and stitched them together adding lace and ribbon to the seams.

And a sweet little heart at the bottom.
 So this is how the cushion looks,


All that was left to do was to add a backing and then slip stitch the opening together by hand.


Needless to say our friend loved this present - and we may have to make another as we loved it too.
This would also make a great present for Mothers Day - which is 10th March in the UK - so there is time to make one!
Hope you've had a lovely day and that our cushion has put a smile on your face.
Angela 


Quick & Easy Sketchbook

$
0
0

Happy Friday everyone,
One of my goals for 2013 is to be more organized. I decided to make a little notebook to take always with me to take notes for ideas about craft. I started with a simple memo book.

Cafe Creativo - Sketchbook - Craft  - Taccuino (1)

Items used:
Sizzix Big shot machine (655268)
Sizzix Bigz Die - Tiny Tabs & Tags (657188)
Sizzix Bigz Die - Dog, Puppy (657687)
Sizzix Framelits Die Set 6PK w/Stamps – Banners (658289)
memo book
patterned paper
kraft paper
washi tapes
scraps of paper
yellow and white twine
paper doily
pressboard
two-sided tape, glue...

Cafe Creativo - Sketchbook - Craft  - Taccuino (3)

How to make:
1- Cut and apply a rectangle from patterned paper to fit the front. Repeat this same process with the backside of your notebook. Grab the washi tape and cover the binding of the notebook.
2- Apply half paper doily on the left edge.
3- Cut a tag (die 657188) from the kraft paper. Cover the top of the tag with three strips of washi tape. Insert the twine in the tag hole, tying into a bow.
4- Use die 657687 for cut out the little heart. Glue the heart on the tag. Apply the tag on the doily.
 
Cafe Creativo - Sketchbook - Craft  - Taccuino (2)
 
5- Print and add a title on the tag.
6- Cut out the banner with Framelits (658289) and apply it in the top, right side
7- Apply other embellishments, if you want.
8- Cut the labels with die 657188 to divide each section, sticking out from the memo book.
9- Use again die 657188 to cut out the little round tag to create a chipboard with pressboard and patterned paper. Apply the chipboard to the ribbon and use it to mark your place.
 
Cafe Creativo - Sketchbook - Craft  - Taccuino (4)

Keep one in your purse, in your desk or wherever you might be when you have time to write and design.

Cafe Creativo - Sketchbook - Craft  - Taccuino (5)
Cafe Creativo - Sketchbook - Craft  - Taccuino (6)
 
Hope you enjoy making your own little notebook!
 
**************************************

Flag_of_Italy  Per le amiche italiane! :)

Ciao e buon venerdì!
Siamo giunti alla fine di questa settimana ed io sono qui a condividere, come sempre, un nuovo progettino da realizzare con la vostra macchina Sizzix.
Uno dei miei buoni propositi per il 2013 è quello di essere più organizzata. Così ho deciso di fare un piccolo taccuino su misura per me, diviso in settori ed argomenti ed utile per prendere appunti o disegnare schizzi. Sono partita da un semplice taccuino, tipo Moleskine. Vi spiego come ho fatto...
Materiali:
Sizzix Big shot machine (655268)
Sizzix Bigz Die - Tiny Tabs & Tags (657188)
Sizzix Bigz Die - Dog, Puppy (657687)
Sizzix Framelits Die Set 6PK w/Stamps – Banners (658289)
taccuino con pagine bianche
carta scrapbooking fantasia
carta kraft (io ho usato un pezzo di un packaging)
washi tape di tre colori
avanzi di carte varie
cordoncino bicolore
centrino di carta
un pezzo di cartone pressato
colla, nastro biadesivo...

Procedimento:
1 - Tagliare un rettangolo di carta fantasia della misura del vostro taccuino. Incollare con colla o nastro biadesivo. Ripetete la stessa procedura per la parte posteriore. Prendere il washi tape e coprire il dorso del taccuino.
2 - Incollare mezzo centrino di carta sulla costa del taccuino.
3 - Tagliare una tag (con la fustella 657188) dalla carta kraft. Tagliare l'anello della tag su carta in contrasto e incollare. Coprire la parte inferiore della tag con tre strisce di washi tape diverse. Inserire il cordoncino nel foro della tag e fare un fiocco.
4 - Usare la fustella 657687 per tagliare il cuoricino nella parte della tag con i tape. Incollare il cuore sulla tag, vicino al cuore in negativo. Incollare quindi la tag sopra al centrino di carta.
5 - Stampare, tagliare e incollare il titolo prescelto.
6 - Tagliare la bandierina con i Framelits 658289 e incollarla nel lato destro in alto.
7 - Aggiungere altri abbellimenti, se si vuole.
8 - Tagliare le utili etichette da schedario, con la fustella 657188. Queste serviranno a dividere ogni sezione. Incollarle nella giusta posizione e farle spuntare fuori dal taccuino.
9 - Usare di nuovo la fustella 657188 per tagliare la piccola tag rotonda. Servirà a creare una chipboard con cartone pressato e carta fantasia su entrambi i lati. Infilare la piccola tag tonda al nastro (spesso già esistente nei taccuini) da utilizzare per tenere il segno dove vi interessa.
 
Questo taccuino è davvero comodo! Se ne può tenere uno in borsa, sulla scrivania o portarselo dietro ovunque, per i momenti in cui si ha il tempo di scrivere e fare schizzi sui nostri progetti craft.
Spero che questo piccolo tutorial vi abbia dato un'idea per fare il vostro taccuino personalizzato!
 
Alla prossima

Simple Gift Bag for all occasions :)

$
0
0

Hi, I hope you had a great creative week!
I was verybusy last days having classes in France - and I'll be happy to share some peeks and photos soon, as there was a lot of Sizzix goodies used during the "Splash!" class! 
Today I've got something good for all occasions - altered gift bag... for Birthday? Or maybe as a nice gesture to somebody we love, without any occasion?
Creating project like that is fun and easy, just have a short look!


Prima ans Sizzix gift bag

We will need some paper scraps and Sizzlits and Framelits Sizzix dies:
- (658001) Sizzix Sizzlits Decorative Strip Die - Interlocking Circles 
- (657994) Sizzix Sizzlits Die - Card, Decorative Insert 
- (657996) Sizzix Sizzlits Die - Card, Scallop Circle Insert
- (658289) Sizzix Framelits Die Set 6PK w/Stamps - Banners 
For this project I used elements from 2 Prima collections: Papers and Flowers from Life Time Collection and Wooden Elements and Mechanicals from my collections for Prima.


- All the composition is build from many layers: the biggest element on the bag is a rectangle, I layered 1 smaller rectagle, 1 Scallop Circle (657996) and 1 smaller rectangle again -  on the top of it using my favorite adhesive. 

- Next step was cutting out and layering Decorative Card (657994) together with Cut out from Interlocking Circles Sizzlits Decorative strip (658001), which I've torn into smaller pieces. 

- The final layer is build with paper banners from Paula Pascual ( 658289), one more paper rectangle mounted on 3D foam and embellishments - some white thread, paper flowers, wood letters, epoxy stickers, bottle cap, pebbles and buttons. 


I hope my small project gave you some inspiration today!
See you soon and have a great week!
Finn

Fresh Flowers

$
0
0


More flowers? But, of course! Today a card and chart. I will begin by explaining how and why I made this card. 


I started by die cutting my mat and layering. I love that with the new Rectangles 2 I dont have to do any measuring for any A6 mat and layering. the smallest is die cut with white card. Then I positioned the larger intricate flower from the Intricate Flowers set on the white piece and secure it with low tack tape.  I also die cut the branches from the Bunch of Flowers and trim off two branches and the bottom.


The reason why I used this one to die an aperture is because is a Thinlit which means that is a solide die therefore does not leave a residual embossing on the negative. The framelit, or hollow die, does leave a residual around the negative area.

I then I just die cut some more floers from both Bunch of Flowers and Intricate Flowers and assemble it all together.

Of course, you will have noticed that flower shapes are the same through out the sets of flowers, Bunch of Flowers and Flower Vases or Intricate Flowers. Well, only shape is repeated not size, even if you had all three sets you would not have any one flower in a size repeated.


I like to combine different sizes of flowers to create different effects  - as in the card above -so I thought I would make three sets full of flowers so that depending on size preference one can choose one or the other.

Each set comes with different shapes but all in two sizes each: Flower Vases in 3/8" and 3/4"; Bunch of Flowers 1" and 1 1/4" and Intricate in 1 1/2" 1 3/4" (all sizes approx.).

To illustrate it I made this little chart so that you can see the sizes of each set, it is a scan of a real size printed chart and die cut flowers.


I hope this little tutorial has been helpful.

From The Heart Blog Hop

$
0
0

Hi everyone! Hope you all had a nice week and did something special for those you love. A handmade card or small present is a treasure and shows that you took the time to give part of yourself to another person. I love that!

Valentine's Day was the perfect day to launch my new From The Heart collection. So we celebrated over at the Sizzix US blog by having a Valentine Blog Hop! Each member of the Design Team created a project using one or more of my dies from this release and W.O.W. Every one of them is amazing...

Good news... IT'S NOT TOO LATE for you to enter to win two prize packages that Sizzix is giving away (I heard through the grapevine they are giving dies from this collection!) Make sure to leave your comment on the Sizzix_US blog by Wednesday, February 20, 2013 midnight pst for a chance to win. 

I will also be giving away one of the Square Box dies that I used to make this mini-album with (see below). Visit my blog and comment to be eligible to to win! You will also see a tutorial showing how I made this fun chunky book. The next one I make will be for my seven month old grandson- I'm thinking a fun little board book would be so cute. This die is so versatile- there are tons of ways to use it.

OK, are you ready? Prepare to be inspired! 


Amy Friend: http://duringquiettime.blogspot.com/2013/02/valentine-treats.html 


Aren't these projects gorgeous? I could look at them all day long... 

Which is your favorite? Thanks for coming by!

Sunday Inspiration from Gerry

$
0
0

Hello Sizzix friends!
It`s Sunday and I have another layout to share
with you today! I love creating layouts for my kids
preserving the good times with their friends. This a photo 
of my son and his friend - just an ordinary everyday photo.
And because they always have so much fun playing together I
wanted to express this joy in a bright, happy way! 
{655268} Sizzix Big Shot Machine
{657007} Sizzix Movers & Shapers Accessory - Base Tray, L
{657204} Sizzix Movers & Shapers Magnetic Die - Moments
{657496} Sizzix On the Edge Die - Distressed Doily
{657009} Sizzix Originals Die - Butterflies & Rings
{657601} Sizzix Original Die - Circles, 3/4"
{658583} Sizzix Thinlits Die - Dotty & Flowers Edges
{658946} Sizzix Thinlits Die - Decorative Border & Heart
{657176} Sizzix Sizzlits Decorative Strip Alphabet Die - Typeset

My very first step to begin this layout was to mask, mist and stamp on the background.
After that I cut on a piece of cardstock the word "MOMENTS" which I used as a mask
on top part of the layout. I did the masking with two shades of yellow as I began from top 
with the light yellow and added the darker one below.
Then I adhered on top of the letter  "O" one of the die-cut small circles (3/4").

The super cute and so beautiful Thinlits Decorative Border  was cut only once
using one of the pattern papers. After that it was cut into two horizontally 
and half was used on top of the photo (see photo above) while the other one
decorated the paper clock (see photo below)

I have used three different pattern papers to die-cut the circles. Then I "spread" them 
all over the layout. The initials "NL", title, year & month were cut out of black cardstock 
and glued on the pattern paper. My purpose was to make them look like they were stamped.
OTHER PRODUCTS I USED:
Webster's Pages Collections:
"Composition & Color" 
"All About Me" 
"Yacht Club"
Prima Marketing 
Masks & Stamp

Nederlandse vertaling
Hallo Sizzix vrienden!
Het is vandaag zondag en ik wil graag een nieuwe scrapbook pagina met jullie delen.
Ik ben er dol op layouts voor mijn kinderen te maken met foto's waar ze samen met hun vriendjes en vriendinnetjes op staan.  Op deze alledaagse foto staat mijn zoon samen met een goede vriend van hem. Ze hebben altijd veel pret samen en dit plezier heb ik proberen vast te leggen op een fijne en vrolijke wijze.
{655268} Sizzix Big Shot Machine
{657007} Sizzix Movers & Shapers Accessory - Base Tray, L
{657204} Sizzix Movers & Shapers Magnetic Die - Moments
{657496} Sizzix On the Edge Die - Distressed Doily
{657009} Sizzix Originals Die - Butterflies & Rings
{657601} Sizzix Original Die - Circles, 3/4"
{658583} Sizzix Thinlits Die - Dotty & Flowers Edges
{658946} Sizzix Thinlits Die - Decorative Border & Heart
{657176} Sizzix Sizzlits Decorative Strip Alphabet Die - Typeset

* * *
 Allereerst heb ik de achtergrond van de layout met verf, maskers en stempels bewerkt. 
Daarna heb ik op een stuk karton het woord "MOMENTS" uit gestanst. Dit heb ik vervolgens als een masker aangebracht aan de bovenkant van de layout. Op het masker heb ik 2 tinten geel gebruikt, van lichtgeel naar donker geel. In plaats van de letter "O" heb ik een kleine, uit gestanste cirkel aangebracht.
* * *
Het prachtige en schattige Thinlits Decorative Border heb ik in een keer uit gestanst van het patroonpapier. 
Daarna heb ik de rand horizontaal door midden geknipt. Het bovenste stuk heb ik boven de foto aangebracht, terwijl het onderste stuk heb ik gebruikt om de papieren klok te versieren.
* * *
Ik heb 3 verschillende patroon papieren gebruikt om de cirkels uit te stansen. Daarna heb ik ze willekeurig over de layout verspreid. De initialen "NL", titel, jaar en maand zijn uit zwart karton uit gestanst en op het patroon papier gelijmd. Mijn bedoeling was om het te laten lijken als of alle cijfers en letters gestempeld zijn.

* * * 
Thank you for visiting us today!
Have a Creative Sunday!

Introduction from Camilla

$
0
0


Hi everybody! I am Camilla Ekman from Sweden and I am a new blogger for Sizzix. I hope I will bring some inspiration for you. I looooove my Sizzix dies and use them a lot on my layouts. My style is romantique and I love to use flowers, swirls and different borders, which you will notice.

I have made a layout to inspire you today. The papers are from Maja Design and I have used some different Sizzix dies.

655268 Sizzix Big Shot


Here is a few close-ups:


Other products used:
Walking in the Forrest collection from Maja Design

I hope you have had a great weekend! See you next Sunday!

'what about the waste?'

$
0
0


'What about the waste?' is something I get asked a lot when I talk about my Sizzix big shot. Surely when you are using a die rather than ruler and rotary cutter or templates and scissors you can't position your fabrics in the same way and you are bound to get wasted fabric?

I will admit, I used to think the exact same thing before I tried using the Big Shot.

Thankfully I was pleasantly surprised by the amount, or more to the point lack of, waste involved with using Sizzix dies.

I'm going to show you how I would use the dies when I want to get the maximum benefit of the fabric, and the least amount of waste.


Firstly, I position my fabrics so they are just covering the cutting blades, rather than using the edges of the die as a guide . When I lay the fabric on the die, I can feel for the indentation of the blades. I wouldn't press down on the die without the fabric there to protect my fingers, but because the fabric is there I am safe - there's no risk of getting a nasty cut!

waste 1

I add multiple layers, as normal and roll through the machine.


This is the waste from a fat quarter. Not bad, is it? I discard these very skinny strings, but you could use them if you were especially frugal and creatively minded. Maybe to weave potholders, or coasters? Or for children's crafts? Maybe even pop them in a bird feeder and let the birds use them for building nests?

waste 2

On dies with unusual shapes, such as the hexagons, there is a little more wastage, but not a huge amount. Not when you follow the same principle and feel for the indentation of the blades under the fabric. These smaller dies are ideal for using with charm squares. I always seem to have the odd 5" square leftover from a charm pack, and they fit onto these perfectly with minimal waste.

waste 3


The slightly larger scraps from cutting more unusual shapes are perfect for trimming down and making string quilts, like this spiderweb quilt.

spiderweb - close up

I hope this has put your mind at ease if you're thinking of buying a Sizzix Big Shot or Big Shot Pro!


Katy


Quick and easy last minute gift idea

$
0
0


Does not it happen that sometimes you have to make a last minute gift and you have no more than 10 minutes? It happens to me quite often, and it is in those moments when I do what I call a Fast Scrap.


In these cases having my Big Shot by hand is always a plus, because it makes the work much faster and easier, which is most important on this occasion, but still make something beautiful and amazing.


Supply list:

Want to see my Fast Scrap in action? Then play the video :)


Happy Monday!
...........................................

¿No os pasa que a veces tenéis que hacer un regalo de última hora y no tenéis más de 10 minutos? A mí me pasa bastante a menudo, y es en esos momentos cuando hago lo que yo llamo un Fast Scrap.

En estos casos tener mi Big Shot a mano siempre es un plus, porque hace el trabajo mucho más rápido y fácil, que es lo más importante en esta ocasión, pero sin dejar de hacer algo bonito y sorprendente.

¿Queréis ver mi Fast Scrap en acción? Entonces dadle al play :)


Materiales:
¡Feliz lunes!

A card for a man

$
0
0

Hello everyone
Today I will show you a card, a card for a man who likes to travel
 I have used a piece of paper 10x29 cm, as a long tag, fold it in three.I have used Tim Holtz paper
Dies I have used:
Supply list:
Paper: Tim Holtz idea ology-destination- papperstash
Ink: Ranger Archival ink-jet black-, vintage photo.
Stamps: Stampers anonymous, Vilda stamp and JustRite
Ribbon: Seam binding ribbon and Cheesecloth ( gauze like fabric made from cotton) colored it with distress ink
Glossy accent from Ranger


 Hope my card gave  you some inspiration today.See you next Tuesday.
Have a great week
Pia
 Hej alle sizzix fan
I dag vil jeg vise et kort,et kort til en mand som kan lide at rejse. Jeg har brugt et stykke af Tim Holtz papir på 10x29 cm, foldet det i 3 og lavet det som en stor tag.

Dies jeg har brugt:
Andre materialer:
Sværte: Ranger Archival ink-jet black-, vintage photo.
Stempler: Stampers anonymous, Vilda stamp og JustRite
Bånd: Seam binding ribbon og ostelærred farvet med  distress ink
Glossy accent fra Ranger

Jeg  håber mit kort gav dig lidt inspiration. Vi ses næste tirsdag.
Ønsker dig en dejlig dag
Pia


Birthday card

$
0
0

Papers: Pion Design - Play Time
Stamps: Stampers Anonymous Tim Holtz Collection 
Inks: Distress Ink Pad - Brushed Cordoury, Vintage Photot, Walnut Stain.
         Alcohol Ink - Mixatives Copper, Perfect Pearls - Perfect Bronze.
Other: Seam Binding Ribbon.

How to make this card:
1. Cut the dog out twice with 657687 Sizzix Bigz Dies - Dog, Puppy glue the dog together in the top of the head.
2. Stamp a text and glue it inside the cute dog.
3. Distress the tag with Distress Ink Pad - Brushed Cordoury, Vintage Photot, Walnut Stain.
         and Perfect Pearls - Perfect Bronze.
4. Stamp some stamps on the tag.
5. Cut out a frame with  657756 Sizzix Embosslits XL - Frames, Ornate
6. Distress the frame with  Alcohol Ink - Mixatives Copper
7. Glue the tag to the card.


8. Cut out banners with 658289 Sizzix Framelits Dies Set 6 w/stamps - Banners


 Thanks for stopping by...see you next week.
Anne Kristine


Heisann :o))
I dag har jeg en søt hund med kort og vise.

Sizzix Dies som er brukt på dette prosjektet:

Papir: Pion Design - Play Time
Stempler: Stampers Anonymous Tim Holtz Collection 
Stempelputer: Distress Ink Pad - Brushed Cordoury, Vintage Photot, Walnut Stain.
         Alcohol Ink - Mixatives Copper, Perfect Pearls - Perfect Bronze.
Annet: Seam Binding bånd.

Hvordan kortet er laget
1. Hunden ble stanset ut to ganger med 657687 Sizzix Bigz Dies - Dog, Puppy limte sammen hunden på toppen av hodet.
2. Stemplet en tekst på innsiden av hunden.
3. Distresset tag'en med Distress Ink Pad - Brushed Cordoury, Vintage Photot, Walnut Stain.
         and Perfect Pearls - Perfect Bronze.
4. Stemplet noen stempler på tag'en.
5. Stanset ut rammen med  657756 Sizzix Embosslits XL - Frames, Ornate
6. Distresset rammen med  Alcohol Ink - Mixatives Copper
7. Limte tag'en til kortet.
8. Stanset ut banner med 658289 Sizzix Framelits Dies Set 6 w/stamps - Banners

Takk for at du tittet innom her og vi ses neste uke.
Anne Kristine

A LOVE YOU card

$
0
0


Hello everyone!

It was Valentine's Day last week, I hope you were spoiled with love and roses!
I made a pretty card for my Valentine too, even though he was much into Super Mario "Wanna be my player two?" kind of thing, I thought I would make him a cute and girly card! :)

Using your Big Shot and the LOVE 3D Pop Magnetic die, you'll be able to create this card within 10-15 minutes, no more, no less!

Here's what you'll need to create this cute little card : 

First of all, you need to cut a piece of kraft paper that measure 4". The length is up to you.
Then fold in two.
Decorate the cover with embellishments and such. Here, I simply glued a fabric label and stitched two pieces of paper, and glue them all together on my cover.
Add a flower for a more feminine look.


To create the inside of the card, use the LOVE 3D Pop Magnetic die with your Big Shot. HEre, I used a Dear Lizzy patterned paper to cut my LOVE pop-up sign.

Once it's cut, you'll have "lines" appearing on your die-cut : that's exactly where you need to fold your die-cut for him to fold properly.

Once it's fold, glue the upper and lower edges to the card, making sure the LOVE sign isn't glued.


Add stamps and YOU with silver Thickers by American Crafts.

Finish by sewing all around the card.


You created a very cute card in minutes!

And don't feel like you have to use this die only for Valentine's day : you can tell your loved ones you love them EVERYDAY :)

Have a great day!
Céline

Shabby Chic Card

$
0
0


Hi everyone!

I love shabby chic style. And today I would like to show you  very sweet shabby chic card.

Items used:
Big Shot Machine (655268)
Cardstock - white 
Paper - Scrapberry
Pigment ink - pink
Flower Ribbon
Crystals - Pink

As you can see I used many dies to create this card.  I used Tattered Flower Garland die to create beautiful flowers. I cut Vintage Lace and Butterflies to make my card more interesting. I used a swirls from Vintage Lace to make a flower bouquet more airy. And I used stamp from  SizzixFramelits Die Set 6PK w/Stamps – Floral to create a title of my card. 


See you next Wednesday, have a nice day

Daria.


Всем привет!

Сегодня я хочу показать очень нежную открытку в стиле шебби-шик. Для ее создания я использовала различные ножи. С помощью бабочеки кружевного бордюрая сделала открытку более интересной и разнообразной. С помощью цветочного ножая создала объемные цветы, внутрь которых поместила цветочки с тканевой ленты. Чтобы сделать букет более интересным, я добавила завитков, которые вытащила из кружевного бордюра Для надписи использовала штамп из набора Sizzix Framelits Die Set 6PK w/Stamps - Floral.

Материалы:
Big Shot Machine (655268)
Кардсток - белый
Бумага - Scrapberry
Пигментные чернила - розовые
Цветочная лента - розовая
Стразы - розовые

Всем хорошего дня!

Дарья.

Flipping Cards!

$
0
0


I know the title of this blog sounds like I'm fed up of my job but it couldn't be further from the truth. I am of course referring to the fab ,new Flip-its cards from the wonderfully talented Stephanie Barnard who is a licensed designer and spokesperson for Sizzix over in the USA. 

We were lucky enough to Have Stephanie join us at our trade show in Birmingham last year and she was a great success largely down to the fact that she is a first rate demonstrator who's passion shines through when sharing her ideas and techniques.


The Flip/its cards sit alongside sets of coordinating Framelits dies and sets of Framelits/stamps which all work together beautifully making my job easy, as I was gifted the task of creating all the samples for our recent trade shows.

You can see from the images above that the dies are of the Movers & Shapers variety allowing you to use magnetic drop in dies should you wish to create an aperture in your card. The smart thing about these dies is that they create a card which 'flips' on it's axis allowing you to place a message/design front and back making them great fun to create and receive.

Below are a few examples using the various dies and stamps in Stephanie's new collection, to see more of Stephanie's work follow this link

each pair shows the same card flipped so that you can see both sides......Enjoy!


Add texture on your layout !

$
0
0


Hello!

Here we go again on the Love theme with this layout full of colors and texture!
As a background, I used a Canvas Corp cloth canvas instead of paper. I just love working with different materials and play with volume!

Here are the supplies used in this "everyday” layout:

Cloth canvas: Canvas Corp
Papers: I Lowe Scrap
White Bristol paper
Chipboards: Making Memories
Stamps: Craft Origine
Inks: Adirondack
Glimmer Mist: Sunflower, Rum Punch, L.E.D Red
Others: Tag, thread
Masks: Jenni Bowlin, The Crafter's Workshop
Die Sizzix: 658290 Butterflies#4

Start by placing a mask on your cloth canvas and spray on it with three different colors of Glimmer Mist. I chose my favorite colors: pink, yellow and…some more pink! Let it dry.

On a big manila tag, place a nice chevron-patterned mask and spray on it with Rum Punch Glimmer Mist.
With the die, cut out ten or so butterflies out of the Bristol white paper.
Color the butterflies with Adirondack inks. Once colored, staple them to your lay-out in a fly-away pattern. Fold the wings for more volume.

For more texture, wrap the butterflies with yellow sewing thread. You’ll like the effect!


Now we’re done with this very colorful layout!

See you soon!

Karine

Bonjour !

Toujours sur le théme de l'amour une nouvelle page riche en couleurs et textures !
J'ai utilisé comme fond de page non pas du papier mais une page tissu Canvas Corp, un travail de matières tout en volume comme j'adore !

Voici la liste du matériel de ma page "Everyday"

Page en tissu : Canvas Corp
Papiers : I Lowe Scrap
Papier Bristol blanc
Chipboards : Making Memories
Tampon : Craft Origine
Encres : Adirondack
Glimmer Mist : Sunflower, Rum Punch, L.E.D Red
Divers : Tag, fil
Pochoirs : Jenni Bowlin, The Crafter's Workshop
Die Sizzix: 658290 Butterflies#4

Commencez par positionner un pochoir sur votre page en tissu et vaporisez avec 3 couleurs de Glimmer Mist, j'ai choisi mes teintes préférées : du rose, du jaune et...encore du rose ! Laissez sécher

Sur un grand tag beige, positionnez un joli pochoir à motifs chevrons et vaporisez avec le Glimmer Mist couleur Rum Punch.

Découpez une dizaine de papillons blancs dans du papier Bristol à l'aide de votre die sélectionné.

Teintez les papillons avec des encres Adirondack, une fois colorés vous pouvez les agrafer à votre page en simulant un envol. Pliez les ailes pour accentuer le volume.
Rajoutez un peu de texture en entortillant du fil à coudre jaune autour de vos papillons, effet garanti !

Et voilà votre page 100% colorée est terminée !

A très vite,

Karine

Love cards from Janna Werner

$
0
0


Hello everyone, my name is Janna Werner. I am a 34 year old full-time artist from Germany and this is my first post on the Sizzix blog. I am very excited to be here and hope to inspire you with my modern-experimental (scrapbooking) style.

Today I´d like to share three cards that I created with patterned paper and emebellishments from Crate Paper, as well as with some of my favorite Sizzix dies.


supply list:
655268 Sizzix Big Shot machine
656624 Sizzix On The Edge Die - Scrollwork
656638 Sizzix Bigz Die - Heart Wings
656641 Sizzix  Movers & Shapers Die - Ornamental
657188 Sizzix Bigz Die - Tiny Tabs & Tags
paper: Crate Paper
embellishments: Crate Paper
other: sewing machine, adhesive, white Cardstock (American Crafts)


Here you can see each of the cards:

On this card I used the Heart Wings and the Tiny Tabs & Tags dies, definitely two of my favorite dies. Instead of using the posisitve of the Heart Wings die, I took the negative shape and adhered a piece of patterned paper in the back.

For this card I used the Movers & Shapers Die - Ornamental, cut it in two part and put those on top of each other, using a sewing machine to adhere them.

The last card was made by using the On The Edge Die - Scrollwork and, again, adding stitching for highlightening that part.

Have a great and crafty day, everyone!
Janna

******

Hallo ihr Lieben! Mein Name ist Janna Werner, ich bin eine 34jährige Vollzeit-Künstlerin aus Deutschland. Dies ist mein erster Post auf dem Sizzix Blog. Ich freue mich sehr, hier zu sein und hoffe, euch auf die eine oder andere Weise mit meinem modern-experimentellen (Scrapbooking) Stil inspirieren zu können.

Heute möchte ich euch drei Karten zeigen, die ich mit Patterned Paper und Embellishments von Crate Paper und einige meiner Lieblingsdies von Sizzix hergestellt habe.

Materialliste:
655268 Sizzix Big Shot machine
656624 Sizzix On The Edge Die - Scrollwork
656638 Sizzix Bigz Die - Heart Wings
656641 Sizzix  Movers & Shapers Die - Ornamental
657188 Sizzix Bigz Die - Tiny Tabs & Tags
Papier: Crate Paper
Embellishments: Crate Paper
Anderes: Nähmaschine, Kleber, weißer Cardstock (American Crafts)

Oben seht ihr die drei Karten. Bei der ersten Karte habe ich die Heart Wings und Tiny Tabs & Tags Dies verwendet. Unbedingt zwei meiner liebsten Dies. Anstatt das Positiv der Heart Wings Die zu nutzen, habe ich die negative Form genommen und ein Stück Patterned Paper dahinter befestigt.

Für die zweite Karte habe ich die Movers & Shapers - Ornamental Die verwendet. Die Form habe ich in zwei Teile geschnitten, aufeinandergelegt und dann mithilfe der Nähmaschine befestigt.

Die letzte Karte ist mit der On The Edge - Scrollwork Die entstanden. Auch hier habe ich die Nähmaschine eingesetzt, um die Teile zu befestigen und zu highlighten.


Habt einen schönen Tag!
Janna


Sampler beginnings

$
0
0


Hello again, hope you've enjoyed the week. I was fortunate to be at the Stitches Trade Event at the NEC at the weekend, I am so excited about the new fabrics that will be coming into a shop near you later this year! There are delightful retro prints, vibrant geometric in bold colours and delicious muted prints. I think the fabrics available keep getting better year on year and I look forward to m in this using some of them in this blog as the year goes by.

Now to the beginning of our sampler quilt.
Over the weeks some blocks will need a background fabric to be sewn onto - so choose a variety of fabrics, usually lighter ones, for the backing - you will need 8 1/2" squares for this.

Today I am going to start with the Dresden Plate.
For this you will need 2 fabrics - one for the front of the plate and one quite fine for the backing.
Both pieces need to be about 18" x 6".
You will also need a small piece for the centre.
Using the Big Shot machine and die 657165, I cut 12 'petals' from each fabric.


Match one piece of backing, right sides together with a front petal.
Pin at the notches - as shown below -


and stitch a 1/4" seam around the curved edge -


snip the seam allowance, as shown below, to remove excess fabric.


Turn the petals right side out and press the curved edge.
                                                                    

With Right sides together pin 2 of the 'petals' together -

     
and stitch  a 1/4" seam, back stitching at the end.
Press the seam flat open. Join all 12 'petals' together in the same way to create a plate, and press.

 To cut a 1 1/4" circle I used die 658314, placing a small piece of yellow fabric over one of the circles on the die, and rolling it through the Big Shot.
By hand I stitched a 1/4" seam around the circle and then pined it to the centre of the plate and slip stitched it in place. Pin the plate onto a background square -


and slip stitch in place. 
So 1 block done - several more to go!
Enjoy your week.
Angela


.


Texture, lyers and whites - layout

$
0
0

Hi,it's great to see you again!
From time to time it is good to have some white space on your project - to give some air, some space to "breathe", balance to the composition... but what can ve do to make the white space less boring, less plain? How about some gesso and a home made, Sizzix die-based stencil technique? This is what I did to the project below:

Be Here - *Prima* and *Sizzix*
In the background you can see white alphabet pattern, done with gesso applied through the leftover from cutting one of Tim Holtz alphabets. It gives just a bit of thecture, delicant element to the composition. More visible are elements  gathered close to the photo - paper rosettes and   a picture wheel, which is layered directly under the photo.
Here are the dies numbers:
- 658558Sizzix Bigz Die - Picture Wheel
- 657177Sizzix Sizzlits Decorative Strip Die - Mini Paper Rosettes (2 Sizes) 

Having these elements on the project you don't that many embellishments anymore = no flowers, no lace is needed!


I finished the project just with paper, epoxy stickers, wood elements and metal breads and establishments - Mechanicals (all from Prima). Free hand pencil doodling going perfectly with the pattern on papers and some thread give the project modern, artistic look.

I hope you found some inspiration - Sizzix provides so many elements to choose from that embellishments on your projects can be really reduced to minimum... the imagination is the limit!
xoxox
Finn

Little Red Riding Hood Doll

$
0
0
Hi again!
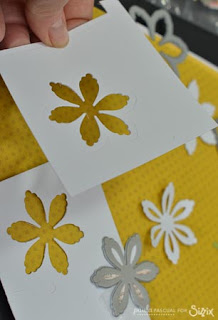
I don't know about you guys, but often I look at the Sizzix dies with different eyes.
I adore Little Red Riding Hood! Here is a tutorial I put together for this little doll. How cute! It was so much fun to make it, I hope you love it as much as I do!

cafe creativo - Little Red Riding Hood Doll (1)

Items used:
Sizzix Big shot machine (655268)
Sizzix Bigz Die - Heart, Stem & Leaves (657691)
Sizzix Bigz Die - Circles (656333)
Sizzix Bigz Die - Owl #2 (657694)
felt: cream, red, brown, white, pink
scrap of fabric
polyester stuffing
iron-on interfacing
ruler, scissors etc
yarn
sewing machine

How to make:
1- Use your Sizzix Machine and Sizzix Bigz Die - Circles (656333) to make the doll’s face with cream felt. Use Sizzix Bigz Die - Heart, Stem & Leaves (657691) to cut out red hearts (hood), white and brown leaves. Lastly, cut a little circle pink to make the cheeks with Sizzix Bigz Die - Owl #2 (657694).
Cut 2 of each piece.

cafe creativo - Little Red Riding Hood Doll (2)

2- To make the cape: take a piece of red felt 18x8 cm and fold in three parts, as shown in photo. Place the folded felt on the heart die 657691 and cut. Before making this, carry out a test with paper.

cafe creativo - Little Red Riding Hood Doll (3)

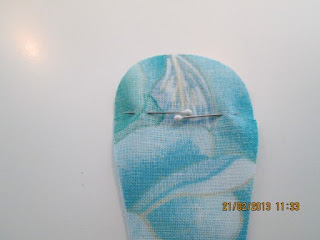
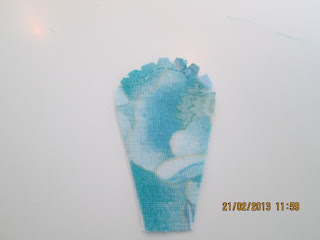
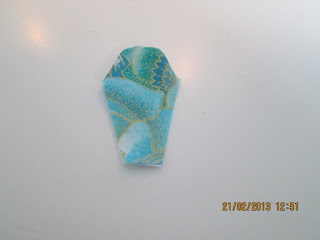
3- If you are using cotton fabric for the dress, make sure you use thick interfacing or batting. Cut two triangles. Sew the white leaves to make the collar.
4- Sew the cream circle into the red heart. Hand stitch the face. Make two braids with wool and sew to the back of doll’s head. Sew on the bangs.
5- Add the head to the dress, front and back. Sew the head front to the head back.
6- Stuff the head with fluff.
8- Cut and sew arms and legs together.

cafe creativo - Little Red Riding Hood Doll (4)

9- Sew the dress front to the dress back making sure you sew the arms inside as you go around.
10- Stuff the dress with fluff.
11- Sew the dress and the legs. Add the cape.
12- Use your Sizzix Machine and Sizzix Bigz Die - Circles (656333) to make the basket with brown felt. Cut a piece of the circle. Use the small part to make the handle. Sew the basket. Add the little scrap of fabric to make the napkin.
Ta-da you have your very own sweet Little Red Riding Hood Doll!
I shall be back Friday to share with you another Sizzix project.

Happy crafting!

cafe creativo - Little Red Riding Hood Doll (5)

**************************************
Flag_of_Italy  Per le amiche italiane! :)

Non so voi, ma spesso mi viene da guardare le fustelle Sizzix con occhi differenti. E' così che un cuore diventa un cappuccio, un cerchio un viso o un cestino, delle foglie si trasformano in capelli... Ecco comparire nella mia mente… un mondo di fiaba con Cappuccetto Rosso!
Quindi oggi sono qui a condividere con voi un tutorial per creare questa dolce bambolina. E' stato un progettino molto divertente da fare, spero che vi piaccia tanto quanto è piaciuto a me!
Prepariamoci quindi a lavorare con feltro e stoffa oggi!

Materiali:
Sizzix Big shot machine (655268)
Sizzix Bigz Die - Heart, Stem & Leaves (657691)
Sizzix Bigz Die - Circles (656333)
Sizzix Bigz Die - Owl #2 (657694)
feltro nei colori: panna, rosso, marrone, bianco, rosa
ritagli di stoffa
cotone lanato o lana marrone
ovatta sintetica per imbottire
tela termoadesiva
righello, forbici ecc
fili in tono
macchina da cucire

Procedimento:
Io ho usato in gran parte la macchina da cucire, ma voi potete cucire a mano o incollare, secondo le vostre preferenze.
1 - Usare la macchina Sizzix e la fustella Bigz Die - Circles (656333) per creare il viso della bambolina con il feltro panna. Utilizzare la fustella 657691 per tagliare i cuori rossi e le foglie bianche (saranno il colletto) e marroni (la frangia dei capelli). Infine, tagliare un cerchietto rosa per realizzare le guance con Sizzix Bigz Die - Owl # 2 (657694). Tagliare due per ogni pezzo.
2 - Per fare la mantella: prendere un pezzo di feltro rosso di circa 18x8 cm e piegarlo in tre parti, seguendo un po’ l'inclinazione della fustella cuore, come mostrato nella foto. Posizionare il feltro ripiegato sulla fustella cuore 657691 e tagliare. Prima è meglio effettuare una prova con la carta per vedere di realizzare la forma della mantella desiderata.
3 - Se per il vestito si utilizza tessuto di cotone, assicurarsi di stirare la tela termoadesiva, per renderlo più rigido. Dal tessuto prescelto tagliare due triangoli e smussare l'angolo in alto. Cucire le foglie bianche per creare il colletto.
4 - Per il davanti: cucire il cerchio panna sopra il cuore rosso posizionato a testa in giù. Ricamare il viso, creando occhi e bocca e cucendo le guance. Fare due trecce di lana e appuntarle nella parte posteriore della testa della bambolina. Cucire la frangia. Per il retro: cucire il cerchio panna sul cuore rosso, se si vuole aggiungere tra questi un cerchio rosso, per creare meglio il cappuccio.
5 - Cucire la testa al vestito, sia per il davanti che per il dietro. Cucire insieme le due parti della testa, davanti e dietro.
6 - Riempire la testa con l'imbottitura.
8 - Braccia e gambe sono delle strisce semplici di feltro, scegliete voi la lunghezza desiderata. Dal feltro panna tagliare le braccia, da quello marrone tagliare le lunghe gambe, due pezzi ciascuno. Se volete usate anche del tessuto a righe per le calze, da posizionare sopra. Cucire insieme le parti per renderle doppie e più rigide.
9 - Cucire il vestito (davanti con dietro) facendo attenzione a cucire assieme anche le braccia, posizionate per una piccola parte all'interno.
10 - Riempire il vestito con l'ovatta sintetica.
11 - Cucire la parte bassa del vestito con le gambe. Appuntare la mantella sotto al colletto.
12 - Usare la macchina Sizzix per tagliare due cerchi marroni che serviranno a creare il cestino della merenda. Ai cerchi di feltro marrone tagliare la parte superiore, come in foto. Utilizzare la parte piccola per fare il manico, ritagliando una strisciolina. Cucire il cestino, assemblando assieme le due parti di cerchio, arricciando un po' il bordo in alto. Fissare il manico. Aggiungere un quadratino di stoffa per fare il tovagliolo e se volete un po' d'imbottitura per tenere bello gonfio il cestino.
Ta-daaaa! Ecco che avete la vostra dolcissima Cappuccetto Rosso!
Per oggi finisce qui, tornerò venerdì per condividere con voi un altro progetto Sizzix, questa volta con la carta ;)

Happy Crafting!

Create the background

$
0
0


Hi everybody! I hope you are having a fabulous weekend! Today I am going to show you how to use Sizzix dies to create a lovely background. The papers are from Maja Design. Sizzix have several die sets which enables you to use matching dies on your pages.


These are the dies I used for my background and they are all a part of a die-set (657902).


I cut out one large frame and five of the smaller frames. I also used seven hearts. Then I glued them like this.


To add more dimension and detail to the background I used my sewing machine to add stitches.


The larger frame became the photoframe and lifts the photo from the back.


Then I decorated the page with some flowers and some Sizzix flourishes.
657902 Sizzix Framelits Die Set 4PK – Frame, Fancy Oval

Papers from Maja Design (Vintage Summer Basics collection)

See you next Sunday!


*******************************

Hej på er! Jag hoppas att ni har en underbar helg! Idag ska jag visa er hur ni kan använda Sizzix dies för att skapa en fin bakgrund. Pappren kommer från Maja Design.  Sizzix har flera olika die sets som gör det möjligt för dig att använda matchande dies på dina layouter.

Jag använde dies från die-set 657902 som du kan se ovan. Jag skar ut en stor ram och fem av den mindre ramen. Jag använde också sju hjärtan. Sen limmade jag på de små ramarna och hjärtana på sidan. För att lägga till lite mer dimension och detaljer till bakgrunden så använde jag min symaskin för att lägga till stygn. Den större ramen blev till fotomatta och lyfter fotot från bakgrunden. Sen dekorerade jag layouten med lite blommor och några Sizzix flourishes.

Vi ses nästa söndag!
Viewing all 2033 articles
Browse latest View live